Part 2: Compatibility Check for Wheelset and Brake Calipers
Part 3: Component Selection
Part 4: Installation Issues and Solutions
Finally, with all the unexpected installation issues solved, I can continue the assembly of the Wheelsport Fantasy mini velo! Those issues put the assembly of this bike on hold for two weeks as I had to wait for the parts of the custom FD mount to arrive from Taobao.
As planned earlier, I will be moving most of the components from the Dahon Boardwalk over to this new frame. This includes the Chris King custom wheelset and the Ultegra Di2 2x11 speed drivetrain.
In the previous post, I was about one-third of the way through this bike assembly, and today, I will complete the full bike assembly and also show the full component list for this mini velo. The drivetrain components (RD, FD, Cassette, Crankset, Chain) have already been installed, and the next step is to move on to the handlebar area.
Using the aluminium Fizik Cyrano R1 stem, the FSA K-Force Compact Carbon Road Handlebar was installed with no problem. These are considered lightweight components with a combined stem plus handlebar weight of only 330 grams.
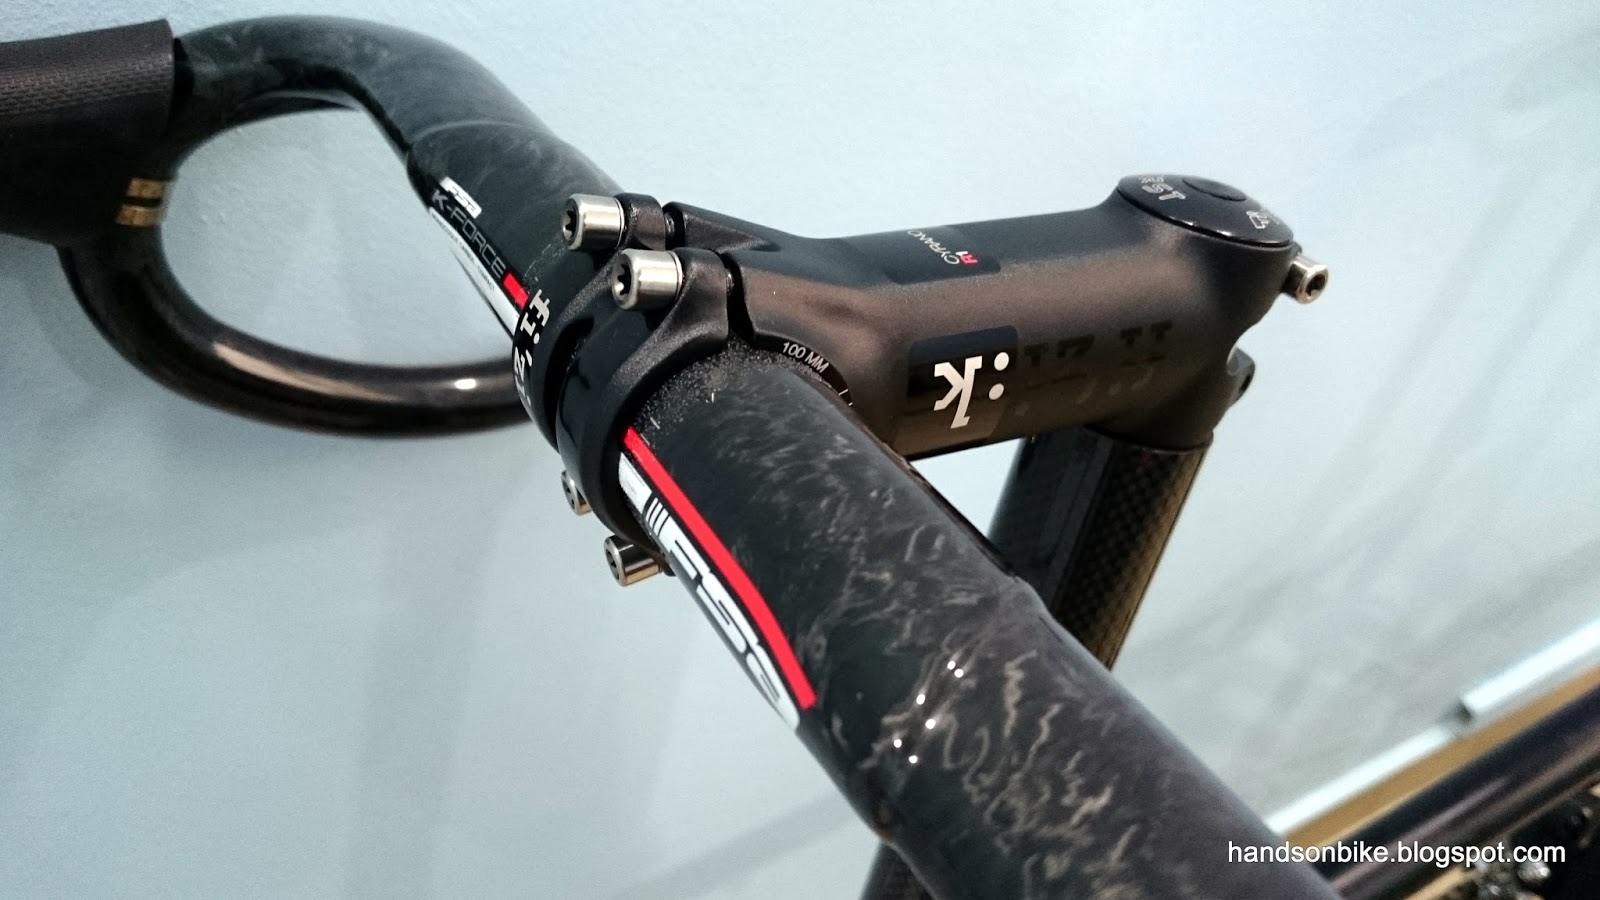
FSA handlebar on Fizik stem. Subtle black decals on the Fizik stem.

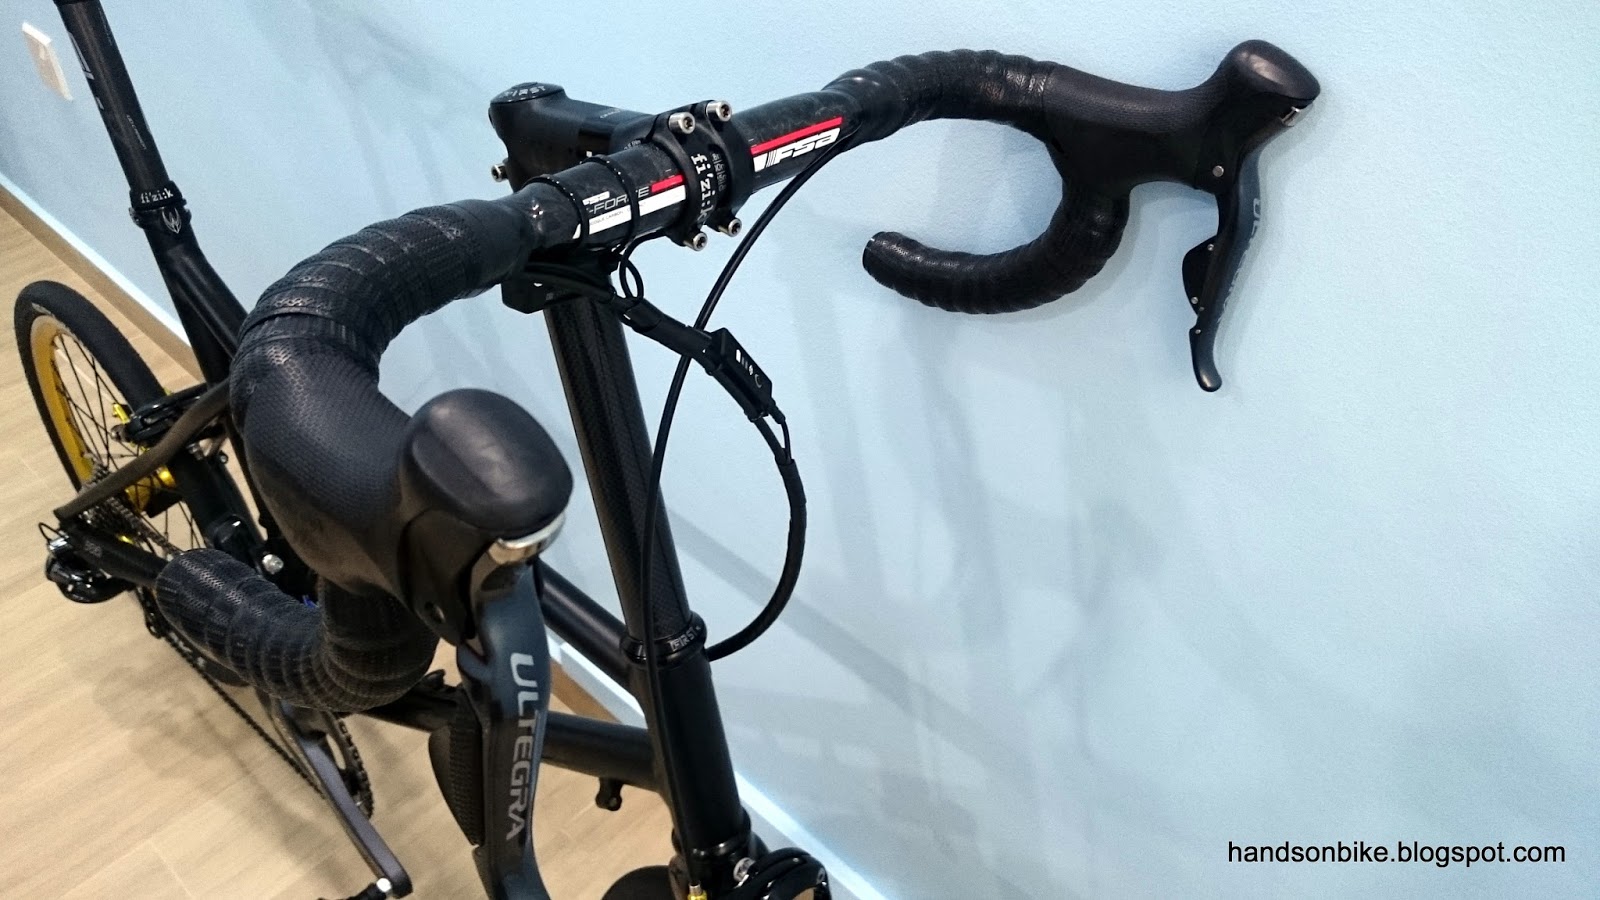
With the Ultegra Di2 shifters already installed, but before connecting the brake cables and the shifter Di2 wires

To minimise friction from the brake inner cable rubbing against the hole edges of the metal cable end caps, I used the type of end cap with a plastic tube at the end. Polymer coated brake inner cables were also used to minimise friction.

Not very visible, but the black plastic tube just manages to poke out of the end of the cable adjust bolt. This ensures that there is no metal to metal rubbing between the brake inner cable and other parts of the brake system.
With the brake cable routing determined by the stoppers on the frame, it is simple to just follow the stoppers when installing the brake cables. However, this frame is designed for mechanical shifting, which means using steel inner cables to connect the shifters to the RD and FD. There are cable stoppers for the shifter cables, but since I am using Di2 shifting, I will not need to use those cable stoppers.
The challenge now is to find the best route for running the Di2 wires along the frame, with the objective of making it look clean and neat. Also, areas which will be touched by the hand or bike stand should be avoided to prevent damage to the Di2 wires.
Once again, it is time to use my creativity and experience from setting up two previous Di2 bikes (Dahon Boardwalk and Dahon MuEX) to find the best wire routing along this Wheelsport Fantasy mini velo frame. Each frame may require a different setup, as the frame design, type of usage and components used may be different.
In this case, it may be easier than the previous two bikes, as this is a non-folding bike, which means that I do not need to worry about how the Di2 wires will be affected by the fold.
The shifter inner cables are designed to run under the downtube of this frame, but I did not want to run the Di2 wires the same way. The disadvantage of running the cables or wires under the downtube is being exposed to all the dirt and water kicked up by the front wheel. Also, it will then have to pass under and behind the BB, which requires extra cable or wire length.
With the freedom of setting my own wire routing for the Di2 wires, I determined that the best way is to run the Di2 wires along the top tube, just beside the rear brake cable. This would keep the rest of the frame looking as neat as possible.

From Junction A, the Di2 wire runs along the rear brake outer casing, before reaching the top tube. Here, the Di2 wire runs along the top tube, secured in place by the special Di2 wire sticker guide.

At the other end, the Di2 wire rejoins the rear brake outer casing...

...before running down the back of the seat tube to Junction B.

Junction B is pasted and cable tied to the rear of the seat tube, same as how it is done on the Dahon Boardwalk and Dahon MuEX. The D-Fly wireless unit is fixed to the left chainstay using the supplied rubber band.

The D-Fly wireless unit is located in between the rear derailleur and Junction B. A black chainstay cover is used to help secure the Di2 wire and also protect the chainstay.

Final Di2 wiring layout on this Wheelsport mini velo. Same components as on the Dahon Boardwalk, but with a different wiring layout and some different wire lengths.

View of the Ultegra Di2 6870 FD and 6800 52/36T Crankset

Overall view of the Ultegra 2x11 speed drivetrain

Putting the lightweight Selle Italia saddle and the FSA SL-K seatpost in the frame

This seatpost has a unique clamp that can be reversed, such that it gives either 0mm offset or 15mm offset. Shown here is the 0mm offset condition, which is perfect for my usage.

With my favourite Lizard Skins bar tape wrapped and all ready to go!
No accessories installed on the bike yet

View from the front. A very clean handlebar area, with neat cabling. Junction A of the Di2 system is fixed to the rear brake cable.

View of the completed bike! I like the gold accents throughout the bike

With the full Ultegra Di2 groupset on this Wheelsport Fantasy mini velo.

It is as lightweight as it looks, weighing only 8.2kg including pedals.

Full part list of this bike. Lightweight at only 7.8kg without pedals! Barely 500 grams heavier than the upgraded Merida Scultura 5000 which is also equipped with Ultegra components.

Outdoor shot of the Ultegra Di2 2x11 speed drivetrain

Full view of the completed bike! On a test ride to check the function and position of the saddle.
The assembly of this mini velo is complete! However, there is still some more work to be done, which is to install the accessories, such as the lights and the extra bottle cage. If you look at the two pictures above, you will see an extra bottle cage attached to the seat tube. On the original frame, there are no screw bosses on the seat tube. To find out how it is done, wait for the next post in Part 6!
Click here for Part 6
No comments:
Post a Comment
Every comment is moderated before publishing due to spam bots. If you don't see your comment yet, it is likely that it is currently being reviewed. Thank you for your patience!