Sunday, April 26, 2020

Minoura Thru Axle Adapter for Bike Trainer

As of now (April 2020), it is practically impossible to buy a new bike trainer, as it is sold out everywhere. There are restrictions on outdoors cycling, thus many cyclists are using indoor bike trainers to continue cycling without leaving the house.

I also want to do that, but my Cervelo Aspero is not compatible to the Minoura LR340 Bicycle Trainer. The problem is the rear axle type, which is incompatible between the bicycle and the bike trainer.

The trainer supports a quick release (QR) axle, where it will support the two ends of the QR axle. The QR axle has to be supported firmly to prevent movement during pedaling, and also to prevent damage to the frame or trainer. In fact the trainer comes with its own steel QR axle that must be used, in order to ensure compatibility and safety.

However, many new bikes that use disc brakes come with 12 mm thru axles, as already seen on the Canyon Endurace and also the Cervelo Aspero. It is not feasible to attach the thru axle directly to the Minoura bike trainer, as the interface shape is different and will not be able to hold the bike firmly and safely.

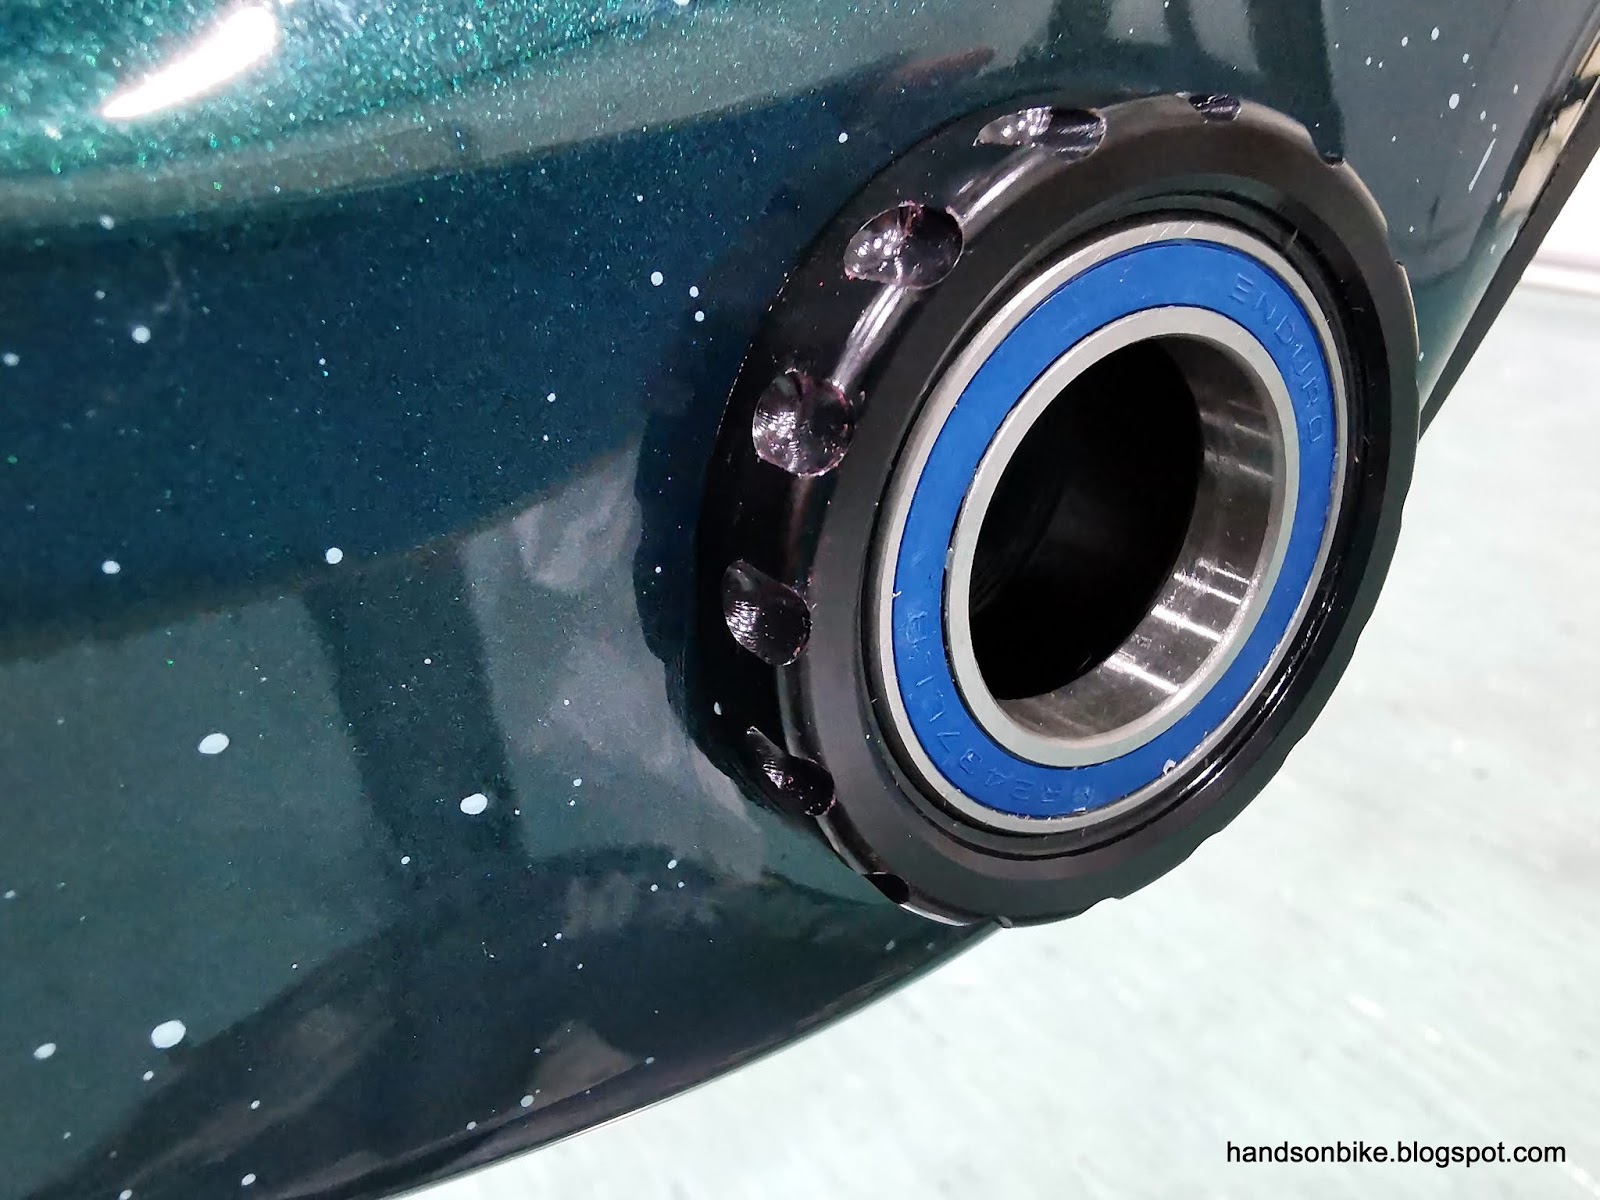
Aluminium nut with internal threads for the 12 mm thru axle, found on the drive side of the Cervelo Aspero. This shape does not match the interface of the Minoura bike trainer.

Thru axle lever on the non-drive side of the Cervelo Aspero. This lever shape does not fit into the bike trainer as well.

So I have a bike trainer and a bike, but no way to match the two of them together. I used to have a setup for small wheeled bikes as shown on the same post for the Minoura bike trainer, but I cannot find the small wheel adapter any more. Therefore I cannot use the folding bikes with this trainer as well.

Fortunately, there is a solution, which is what I want to share with everyone who is facing the same issue. The solution is to buy an adapter for the bike, so that it can be fitted onto the bike trainer. Of course you can also use an old bike with QR axles, or buy a new bike trainer.

I will be using the official Minoura thru axle adapter, with the Minoura bike trainer, so there should be no compatibility issues. If you are using it on other bike trainers, take note that the interface may be different.

Before getting the adapter, it is important to make sure that you get the correct adapter! The Minoura thru axle adapter is for 12 mm thru axles, but it comes in different thread pitches. This is due to the different thread pitch specifications used by different frame manufacturers. It is also another reason why thru axles are almost always included with the frame, as another thru axle may not fit. The normal thread pitches are M12 x 1.0/1.25/1.5/1.75 mm.

I almost bought the wrong adapter, as I thought my Cervelo Aspero uses the more common M12 x 1.5 mm thread pitch. Luckily I double-checked first, as I discovered that the front and rear thru axles have different thread pitches! Front thru axle uses the more common 1.5 mm thread pitch, while the rear has a less common 1.75 mm thread pitch. Since I will need the adapter to match the rear, I will need to get the M12 x 1.75 mm version.

Good that the thread pitches are labelled clearly on the Cervelo Aspero thru axles!

Official Minoura thru axle adapter. This is the spec for 1.75 mm thread pitch. There are basically only 2 parts.

Prior to getting this thru axle adapter, I had no idea how it would work as I could not find any instructions online. I thought I might have to figure it out myself after getting the parts. Luckily the adapter comes with its own instructions which are pretty clear. Here it is for those who are interested.

The two parts of the adapter goes into the two sides of the bike, and it is tightened using the steel QR axle that comes with the Minoura bike trainer.

Everything stays on the bike, except the original 12 mm rear thru axle which will be removed. The rear wheel stays on the bike. This thru axle adapter basically allows the steel QR axle to be installed, so that it can match the Minoura bike trainer.

This part goes onto the non-drive side of the bike, which is normally occupied by the thru axle lever. 

When fully inserted, it supports the rear hub axle by connecting it to the frame dropout. 

This is the other part of the thru axle adapter. The external threads (M12 x 1.75) goes into the female threads on the frame, while the internal threads (M5 x 0.8) will be used by the QR axle threads.

On the drive side, without the original thru axle. The thru axle normally threads into this nut from the other side, through the rear hub axle.

When this thru axle adapter is fully inserted, it will support the hub axle as well. 

Thread in the thru axle adapter until it is fully inserted. I think hand tightening is enough to ensure no play.

I could not find the original Minoura steel QR axle, but I did find a steel QR axle from another brand that looks very similar. Only this part is needed, the nut and springs are not required. 

Insert the steel QR axle from the non-drive side, and tighten to the adapter on the other side. Adjust the lever angle so that it can be tightened normally like a QR axle. The Minoura bike trainer will support this side of the QR axle.

 The other side of the adapter will be supported by the Minoura bike trainer as well.

The steel QR axle fits well into the bike trainer. 

The other side of the adapter also fits securely into the bike trainer. 

The rotating lever on the bike trainer is used to clamp the bike between the two support points. The user manual states that once there is no looseness between the bike and the clamps, tighten the lever 2 more rounds and stop. There is no need to over-tighten the clamps or it will damage the frame or the bike trainer.

Cervelo Aspero installed onto the Minoura LR340 bike trainer! It feels secure and works pretty well. 


Found a corner in my bedroom where there is a direct view of the TV, while being directly under the fan and aircon for good cooling and ventilation.

Signed up for Zwift, and managed to get everything working! So far what I have needed to get was only these Minoura thru axle adapters. I already have everything else needed for virtual cycling.

Zwift Device: Smartphone
Zwift Display: On TV via Chromecast screen mirroring
Bike Trainer: Minoura LR340
Bike: Cervelo Aspero with Minoura thru axle adapter
Power Meter: 4iiii Precision (left side only)
Cadence Sensor: 4iiii Precision
Heart Rate Sensor: Samsung Galaxy Watch

Power meter, cadence and heart rate sensors connected!

Since I am using my smartphone to receive the signals from the sensors, Bluetooth Smart sensors are necessary since the phone does not have ANT+. The 4iiii Precision power meter broadcasts in both ANT+ and Bluetooth which is fantastic. I was lucky that I had the Galaxy watch which can broadcast heart rate over Bluetooth. If I needed an ANT+ signal, I will use my Garmin Forerunner 235 as the heart rate sensor.

One of my first group rides in Zwift! 

Just a 20 minute ride is enough to get me sweating buckets. Very efficient and productive way of training as you can ride consistently at a specific wattage without stopping, unlike when riding outdoors on public roads.

 Lots of rubber bits from the rear tire after riding.

There will be a line on the tire where the roller contacts. Super grippy, like a slick F1 tire that has been warmed up.

Using this kind of bike trainer, where the rear tire touches the roller directly will make the rear tire wear out quite fast. In this case, it is OK for me as I plan to replace the Continental GP4000 tire soon, as I have not changed it ever since it came stock with the Canyon Endurace.

Saturday, April 18, 2020

Cervelo Aspero: BBright Bottom Bracket by Wheels MFG

On the Cervelo Aspero, the bottom bracket specification is a unique one, as it is not found on other brands of bikes. This special specification for Cervelo is called BBright, which is a press fit type. However, it is unique because the non drive side (left) and drive side (right) offset is different.

Traditional threaded bottom bracket shells have a width of 68 mm, with the bearings supported outboard by the BB cups. Normally, for press fit bottom brackets, the width is wider than threaded type, as the bearings are already included inside the BB shell width. For a comprehensive guide to the various BB specifications, check out this link.

For Cervelo BBright, it is odd because it is a hybrid specification. It is a press fit type, but the drive side is not shifted outwards. Only the non-drive side is shifted outwards by 11 mm, giving a total BB shell width of 79 mm (68 + 11). This supposedly allows sufficient crank and chain ring clearance on the drive side, while allowing the non-drive side frame to be made wider for better frame stiffness.

This idea in itself sounds OK, but it creates an asymmetrical frame and bottom bracket. This is not a problem, but I have heard and read about many bad experiences with BBright bottom brackets, as they creak and squeak quite frequently. This can happen to any press fit bottom bracket design, if the frame and bottom bracket tolerances are not controlled tightly.

One of the best solutions is to use a set of press fit bottom brackets that thread the left and right side together, to prevent looseness and play that will cause creaking. That is why I had to get a threaded BBright bottom bracket that is heavier and more expensive, instead of the normal press fit type.

Wheels Manufacturing makes many types of bottom brackets to fit almost every BB specification, you need to choose the correct one to match your frame and also your crankset.

BBright is based on Press Fit 30 specifications, in terms of diameter. However, the offset of the left and right side is non-standard.

This bottom bracket has a bearing with an inner diameter of 24 mm to fit Shimano crank spindles. BBRIGHT-OUT-1 is what you need for this Cervelo Aspero, for Shimano cranksets.

This is what comes in the box.

The left and right side threads together, to eliminate free play and creaking within the frame.

Sealed bearings with an inner diameter of 24 mm, to match Shimano crank spindles.

Set of seals and spacers. The two seals on the left are compulsory, to be placed on the outside of both sealed bearings. Spacers are optional depending on your frame requirements.

Bearing seal placed on the sealed bearings.

Bottom bracket with seals weigh 143 grams, which is quite a bit heavier than normal press fit bottom brackets. Most of the additional weight is due to the aluminium housing.

Non drive side flange is only 1.5 mm thick.

Drive side cup is about 9 mm wide, which compensates somewhat for the shorter BB shell on the right side.

Cup diameter that fits into the frame shell is just under 46 mm. The dimension on this threaded type press fit BB is slightly smaller than normal true press fit type, as there is no need to be very tight since it will be threaded together anyway.

Normal BB tools will not fit as the serration on the BB cups are bigger than usual.

A new tool is necessary, which has a bigger serration to fit this bottom bracket. I bought it together with the new bottom bracket from Wheels Manufacturing.

This side of the tool with a diameter of 44 mm is the same as Shimano standard.

This side with the larger 48 mm diameter serration is for this new BBright bottom bracket.

New tool is needed to install this new bottom bracket.

Non drive side cup is tight and need to be pressed into the frame using a press fit tool.

Drive side cup is slightly looser, and can be placed into the frame by hand.

Once the threads in the middle of the bottom bracket contact each other, just rotate the bottom bracket to tighten them together. For my case, the non drive side cup fits tightly with the frame, so there is no need to hold that side. I only needed to use the tool to rotate and tighten the drive side cup. Once the cups are nicely tightened to each other, installation is complete!

Hopefully this bottom bracket will prevent any bottom bracket creaking on the Cervelo Aspero.

Monday, April 13, 2020

Cervelo Aspero: PRO Vibe Aero Superlight Handlebar and Stem

Building a new gravel bike will require a new set of road handlebar and stem. This is because the previous handlebar and stem cannot be transferred over from the Canyon Endurace, since it is integrated with the frameset. With special headset spacers, 1 1/4 inch steerer tube, special clamping mechanism, it is not common, and it does not make sense to transfer them over to another bike.

Therefore, I have the chance to get a new road handlebar and stem for the Cervelo Aspero. This means that I am free to get anything I want. As I am using Dura-Ace Di2 with hydraulic disc brakes, it will be nice to get a road handlebar where the hydraulic hose and Di2 wire can be routed neatly inside the handlebar.

This narrows down the choice considerably, leaving options such as FSA and PRO. After checking in detail, I found that the routing holes on the FSA handlebar are not in the ideal location for hydraulic hose routing. Therefore, PRO is the choice, since they are actually affiliated with Shimano, and their products would presumably be compatible to Shimano products.

Even though I am building the Cervelo Aspero gravel bike, I will use it as a road bike too, when the Reynolds Assault road wheelset is installed. Therefore, I want to have a proper road handlebar, not a gravel handlebar. Besides, I am not a fan of flared gravel handlebars as they just don't feel comfortable for me.

I chose this PRO Vibe Aero Superlight Handlebar as it is one of the lightest handlebar by PRO. The flat aero sections look to be comfortable for holding as well. Let's take a closer look at the handlebar.

Pro Vibe Aero Superlight Handlebar

Features of this handlebar

Claimed weight is 205 grams, let's see how true it is.

I chose the 40 cm width to ensure it fits like a road bike.

Comes with anti slip paste to put on the contact surface between the handlebar and stem, to ensure no slippage without over tightening the clamp bolts.

Suggested Di2 wire routing through this handlebar. This assumes the usage of a Y split junction like how I did it on the Canyon Endurace.

The guide tubes are already inserted inside the handlebar, if you wish to follow the recommended wire and hose routing.

However, since I will be using my own routing, these guide tubes are useless to me. I appreciate the effort but they are not useful to me. The wire routing that I will use will be similar to that on the Dahon MuSP, where the wireless unit EW-WU111 will be installed inside the handlebar.

With the guide tubes pulled out of the handlebar

400 mm wide, with a compact drop and reach.

Aerodynamic shape on the tops

Integrated with Innegra fibre which is lightweight, vibration absorbing and also strong.

The curved parts of the drops are uniquely shaped, being flattened to make it a bit more aerodynamic.

Flattened drops. Not sure how it would feel when gripping it.

Cable hole near the hoods, to route the hose/cable/wire from the shifter into the handlebar.

Close up of the cable hole

Cable holes under the handlebar, which allows the hose/cable/wire to exit from the handlebar and be routed into the frame.

There is even a hole facing the stem, which allows a Di2 wire to run through the stem, if you want to install the Di2 battery inside the steerer tube.

Weighs 213 grams, just a bit more than the claimed 205 grams.

As for the stem, any stem will do, as long as it is compatible with the steerer tube and the handlebar. I decided to get a PRO stem as well to match the PRO handlebar.

Pro Vibe stem, with the unique V design on the face plate.

90 mm stem length, with a negative 10 degree tilt. It cannot be installed tilted up. Compatible with standard 1 1/8 inch steerer tubes (1 1/4 version also available). Made of aluminium.

For this stem, it is acceptable for the steerer tube to be lower than the surface of the stem clamp, as shown by the minimum fork height line.

Instructions showing how to install the special top cap.

Overall view of the PRO Vibe stem, with the backward facing face plate clamp bolts.

There is a hole near the top of the stem, which allows the Di2 wire to run into the steerer tube, through the stem.

View of the hole from the front of the stem.

Special shaped top cap, with recessed cutouts to allow internal Di2 wire routing.

Shape of the top cap matches the stem. This also means that standard round top caps cannot be used.

This stem weighs 132 grams, which is on the slightly heavy side.

Top cap and bolt weighs 15 grams.

Both the PRO Vibe handlebar and stem are rather special as they have unique features that are not found on other products, as far as I know.

PRO Vibe Aero Superlight Handlebar:
1) Flattened curve area of drops.
2) Many holes for internal routing.
3) Integrated with Innegra fibre.

PRO Vibe Stem:
1) Special face plate design.
2) Reversed face plate clamp bolts.
3) Special top cap.
4) Hole in stem to allow internal Di2 wiring.
5) Steerer tube is not supposed to protrude above the stem clamp.

I can't say that all these features are positive features. For some of them, it feels like it is purposely different for the sake of being different, without making it better.

For example, what is the point of having flattened drops on the handlebar? Once it is wrapped with bar tape, it will be oval shaped anyway and not really aerodynamic.. Not sure if the ergonomics of this flattened area will be good or not. As for the reversed face plate clamp bolts, it looks nice from the front but it is harder to install or adjust.

On hindsight, I might have gotten a standard FSA handlebar and stem, which would probably be cheaper and maybe a bit lighter. In any case, these PRO Vibe handlebar and stem will make this Cervelo Aspero quite unique as I am pretty sure no one else will use the same combination on this bike.