Saturday, May 30, 2015

K-Edge Aero Garmin & Camera Combo Mount

On the Merida Scultura 5000, I have mounted the Garmin Edge 510 cycle computer using the supplied plastic out front mount. Together with the K-Edge Go Big GoPro handlebar mount, I am able to fit both the Garmin and the Shimano Sport Camera on the handlebar.

Although it fits, it looks really crowded, with the devices taking up a lot of the space. As a road bike, I would prefer it to be less cluttered, but I find it hard to dispense with either the Garmin or the camera.

Both the Garmin and the Shimano Sport Camera fits, but it is very crowded.

Is there a way to reduce the number of clamps on the handlebar?

I found that there is actually a combo Garmin + camera mount available, made by K-Edge. As K-Edge products are expensive, this time I tried to find a similar one on Taobao, but there was no similar combo mount available. Also, a camera mount needs to be made of metal for better video quality, as plastic mounts tend to vibrate too much, resulting in a shaky video.

In the end, I decided to contribute to the revenue of the K-Edge company, and bought the K-Edge Aero Garmin and Camera Combo mount. Hopefully this will tidy up the handlebar area of the road bike!

K-Edge Aero Garmin and Camera Combo Mount. However, I am not too concerned about whether it is aero or not..

Simple and sleek looking aluminium mount

Plastic insert for the Garmin. The mount is made of plastic to avoid damaging the plastic back cover of the Garmin computer unit.

GoPro style of mounting at the bottom

You can use a bolt or a knob to tighten the mount. I prefer to use a bolt as it is smaller and more secure, although it cannot be adjusted as easily without an Allen key.

Designed for diameter 31.8mm oversized handlebars. A low maximum tightening torque of 2 Nm is recommended.

Adds 53 grams to the bike, but this replaces 2 mounts and so it is actually a good deal.

Garmin mount on top, Shimano camera mount at the bottom

Side view of the combo mount. Quick release mount for the Shimano camera.

With both the Garmin and the Shimano camera mounted on the K-Edge mount.

Front view of the setup. The Shimano camera hangs below the Garmin, just in front of the cables. Does not block the front lights that are mounted on the stem spacers.

Best seen from the top view. Very much neater than the previous set up! 

What I like most about this new mount and setup is that from the rider's point of view, the handlebar area is much neater. The Shimano camera is nicely hidden under the Garmin, out of sight and out of the way, but still very much functional.

Although the Shimano camera is mounted upside down, it will auto rotate to the right side up as it has an angle free feature. I am also unable to see the indicator LEDs on the camera, but it is still OK as I can hear the beeping sounds that indicate the start and end of the video recording.

This combo mount is highly recommended for those who have both a Garmin and a GoPro/Shimano camera on the bike, as it greatly improves the tidiness of the handlebar area. Although it is pricey, it should not be an issue if you can already afford both a Garmin and a camera on your bike.

Sunday, May 24, 2015

Using Cateye Strada Digital Wireless with Minoura Bike Trainer

Now that I have installed a new Garmin Edge 510 cycle computer on the Merida Scultura 5000, the previous cycle computer is now available for other uses. I had previously installed the Cateye Strada Digital Wireless cycle computer on the Merida, and now I will move it to the Dahon MuEX.

There are a few reasons for me to install the Cateye Strada Digital Wireless on the Dahon MuEX. The first is because there is currently no cycle computer on the bike, and I have found that I missed the info (speed, distance) from the cycle computer when riding the MuEX. The other reason is that this particular cycle computer has cadence and heart rate info too, which is really useful when training or exercising.

I had previously set up the MuEX on the Minoura Bike Trainer, mainly for indoor cycling and training. To improve the efficiency of the training, it is good to have a target cadence and heart rate to maximise the effectiveness of the training session. Speed and distance will not be accurate as the resistance on the bike trainer is different from riding on the road.

The difference between this Cateye cycle computer and cheaper cycle computers is that while most cycle computers have their sensors on the front fork, this Cateye cycle computer has the sensor mounted on the rear chainstay. This is because there are two parts to the sensor, the cadence sensor and the speed sensor. This combo sensor will detect the cadence from the crankarm in addition to the speed from the rear wheel. As the distance to the handlebar is greater, the sensor also needs to be more powerful in order to transmit the data to the computer unit on the handlebar.

One tricky thing is that not all cadence/speed sensors can be mounted on a small wheeled bike. Garmin also has a similar chainstay mounted cadence/speed sensor (GSC-10), but it will not work on the MuEX (and most small wheeled bikes) because of the sensor design. See below for the explanation.

Comparing the Cateye speed/cadence sensor (top) with the one from Garmin (bottom)

By comparing the distance between the crankarm sensor area and the wheel magnet sensor area, we can see that the distance between the two sensors is shorter on the Garmin sensor than on the Cateye sensor. The problem with a short distance between the sensors is that for most small wheeled bikes, due to the smaller wheel diameter, the rear wheel is further away from the crankarm. The result of this is that the cadence/speed sensor is unable to reach both the crankarm magnet and the rear wheel magnet at the same time.

When the cadence sensor areas are both aligned, the Garmin speed sensor has a reach that is about 20mm shorter than the Cateye sensor.

This 20mm is significant, as the extra 20mm reach of the Cateye sensor means that it can be used on small wheeled bikes! As you can see from the picture below, the Cateye sensor only just manages to reach both the crankarm magnet and the rear wheel magnet. I also had to place the wheel magnet all the way to the spoke nipple, and it only barely manages to reach the sensor.

The Cateye sensor is able to reach both the crankarm magnet and the rear wheel magnet at the same time. Wheel used is Wheelsport Sunny, a 20 inch 406 wheel with a low (~24mm) rim profile.

If a high profile wheelset (such as Wheelsport Smart 1.0, 30mm rim profile) is used, this will not work as the magnet still cannot reach the sensor. On the other hand, if a larger wheel is used, such as 20 inch 451 wheels, it will allow the rear wheel magnet to go closer to the sensor (closer by about 1 inch, or 25mm).

As previously used on the Merida Scultura 5000, I also stuck a strong neodymium magnet (Diameter 12mm) on the pedal axle, instead of cable tying the provided magnet.

Shown as mounted on the bike. The computer unit is able to detect the cadence/speed sensor even when it is mounted far away on the rear chainstay.

The heart rate and cadence shown on the computer screen will help to improve the effectiveness of the workout, by ensuring that I am training in the correct heart rate zone.

Not only is this Cateye cycle computer useful as a training aid, it will also be useful when I take the bike out for a ride as it will just work like a normal cycle computer.

So, if you are considering getting a cycle computer for your small wheeled bike that can also detect your cadence, this Cateye Strada Digital Wireless will work. On the other hand, the standard Garmin GSC-10 cadence/speed sensor will not work on most small wheeled bikes as the sensor cannot reach both the crankarm magnet and rear wheel magnet at the same time.

Thursday, May 21, 2015

New Garmin Speed Sensor

In a previous post about the Garmin Edge 510, you may have noticed that one of the bike profiles is that of my Dahon Boardwalk. Although the Garmin bundle comes with 3 sets of mounts, it only comes with one set of Speed/Cadence sensor. That sensor has already been installed on the Merida Scultura 5000 road bike, so how did I manage to link up the Dahon Boardwalk with the Garmin?

The easiest way is to not use a sensor at all. Using the Garmin head unit alone, it can use GPS to detect the position and therefore estimate the speed and the distance. Although using GPS works pretty well for overall distance, it is not accurate for instantaneous speed readings. Also, it does not work properly when cycling in between tall buildings, under bridges or anywhere where there is no good GPS signal.

A more accurate way to get speed readings is to get a second sensor for the bike. I don't really need cadence readings, and so a speed sensor will be sufficient. With speed, the distance and other parameters can be calculated.

What I need is actually just an ANT+ speed sensor, which can be found quite easily. However, all these speed sensors rely on a magnet on the spoke and a sensor tied to the fork. Although this works well, it also means that some setup is required and it is difficult to move the sensor from bike to bike.

Garmin recently launched a new type of speed sensor that comes with the Garmin Edge 1000 cycle computer. This speed sensor does not require a separate magnet, and is just a sensor on its own. Best of all, it attaches to the bike with just a rubber strap, which makes it easy to transfer the speed sensor across different bikes.

The new Garmin speed sensor

Easy-to-install, as stated on the packaging

The speed sensor embedded in a rubber cover, with a rubber strap for attachment around the wheel hub.

The battery compartment (CR2032 battery) is hidden at the bottom of the sensor. The hook for the rubber strap is located on the other side of the sensor.

Installation instructions for the new Garmin speed sensor. It basically tells you to wrap the sensor around the wheel hub, and that is all that is required!

I think this speed sensor works by using a gyroscope to detect its orientation. Every time the sensor flips from right side up, to upside down and then back up again, it will detect this as one revolution. Together with the wheel circumference entered in the Garmin head unit, this will give the speed of the wheel. It is a very simple concept that should work quite well. Mounting the sensor on either the front wheel or rear wheel will do, as long as it is on the wheel hub that is spinning.

Although installation is supposed to be very straightforward, it is not as simple to install on a small wheeled bike such as my Dahon Boardwalk.

I tried to install the sensor on the Novatec front hub, but the narrow 74mm OLD front hub means that the hub flanges are very close to each other, and the sensor cannot fit in between the hub flanges.

Next, I tried the rear hub. However, due to the larger diameter of the Chris King R45 rear hub, the rubber strap is not long enough to stretch around the hub and onto the hook.

In the end, I used a rubber band from the Garmin mount to extend the rubber strap of the speed sensor. Now it fits nicely around the rear hub of the Dahon Boardwalk.

With this new Garmin speed sensor on the Dahon Boardwalk, I am now able to move the Garmin head unit between the Merida and the Boardwalk easily, since both bikes have their own sensors. Also, this new speed sensor can be moved to another bike very easily. An example would be the Dahon MuEX. In just 1 minute, I can attach a Garmin mount to the bike, and also attach the speed sensor on the MuEX. The Garmin Edge 510 can then be used on the MuEX to track the cycling activity.

Saturday, May 16, 2015

Garmin Edge 510: First Impressions + Installation

It is time for a new cycling computer! This time, I decided to get a Garmin cycle computer as it has many new functions that I want to try out.

All my other bikes are using Cateye cycle computers, so a Garmin is new to me. My Dahon Boardwalk and Dahon Vitesse are using the older Cateye Strada Wireless computer; the Avanti Inc 3 commuting bike is using the Cateye Strada Slim cycle computer, while the Merida road bike is using the 
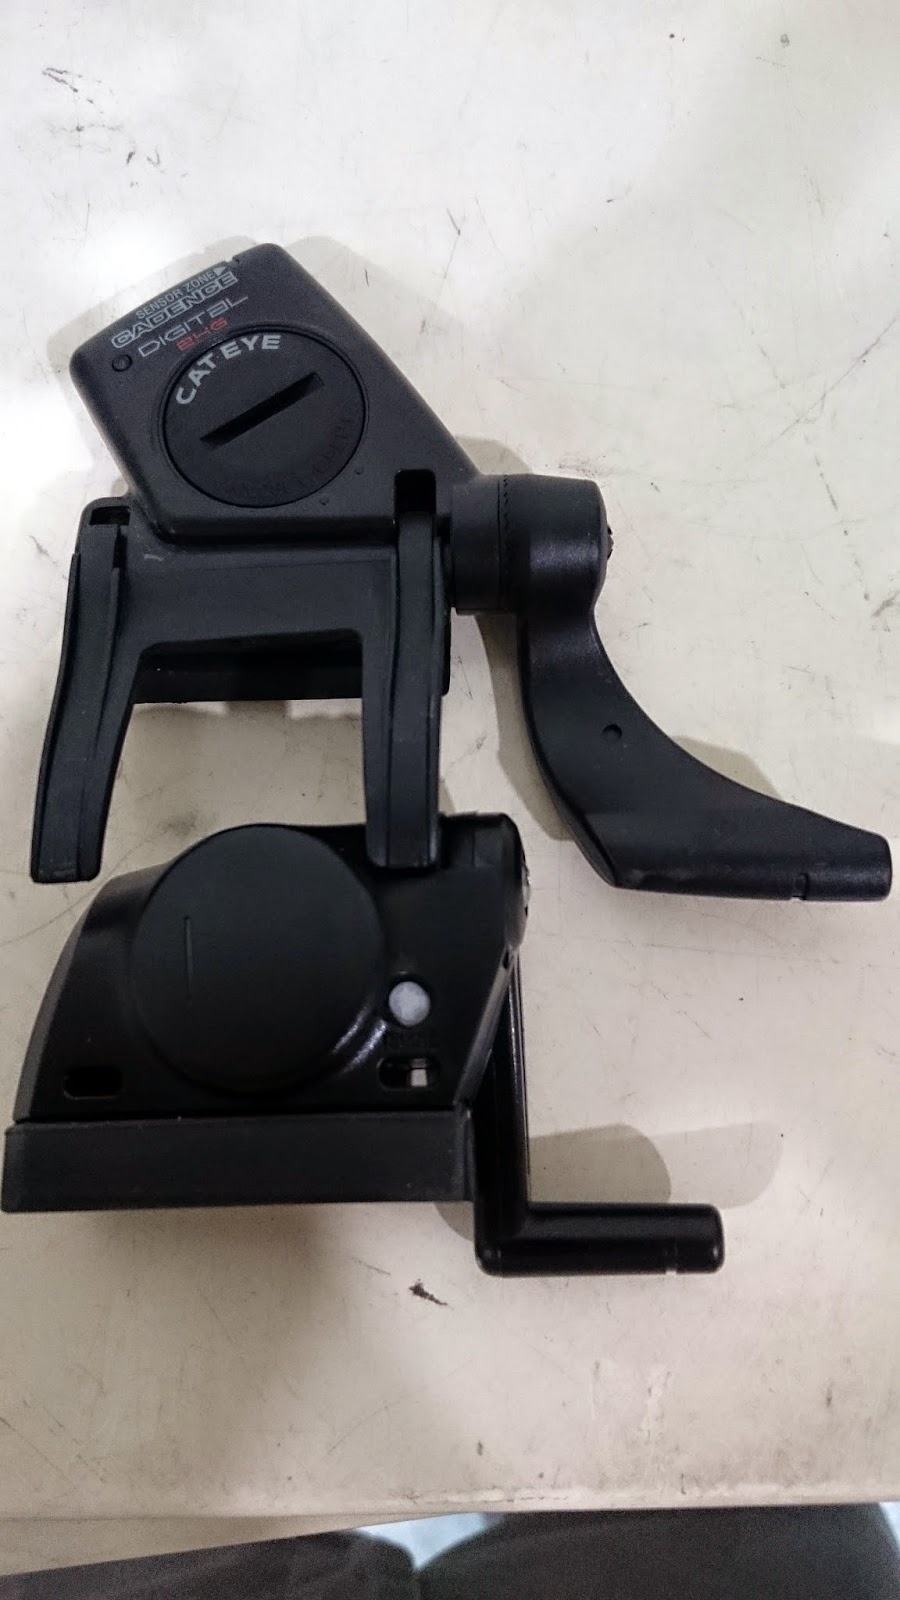
Strada Digital Wireless with HR and cadence sensor.

I have plans to move the Strada Digital Wireless cycle computer from the road bike to the Dahon MuEX that is on the Minoura bike trainer. This cycle computer will help to keep track of the cadence and heart rate for a more efficient workout. At the same time, it can also track the distance pedaled on the bike trainer (although speed and distance are not accurate on the bike trainer). Therefore, I will need a new cycle computer for use on the road bike.

Why a Garmin? First, I wanted to try something different instead of getting another Cateye. Cateye cycle computers are good and reliable, but their functionality is limited even for the newer models. Also, I wanted to use ANT+ sensors, which allow the cycle computer to be moved around different bikes easily. It would also be useful to have GPS to log the route taken, and combine it with video footage taken with the Shimano Sport Camera.

From reviews, it seems that the Garmin is easy to use and has some really good functions that I can try out. There are a few models to choose from, the Edge 510, Edge 810 and Edge 1000. The Edge 1000 is too advanced for my intended usage, and it is also very expensive. Between the Edge 810 and Edge 510, it seems that the main difference is that the Edge 810 has map navigation functions, while the Edge 510 does not. Finally, I decided to get the Edge 510 as I think I will not be needing the navigation function.

Garmin Edge 510 Bundle

Also can be connected to a smartphone for even more functions and connectivity

The bundle comes with bike mounts, HR sensor, Speed/Cadence sensor

The head unit of the Garmin Edge 510

Comes with the full array of mounts, sensors and other miscellaneous stuff

HR sensor and strap, Speed/Cadence sensor, and the magnets

Speed/Cadence sensor with an extra rubber pad to fit different seatstay shapes

2 sets of basic handlebar mounts with lots of rubber bands, and an out-front mount

2 complete set of mounts for multiple bikes, with different rubber band lengths

The out-front mount with a 31.8mm clamp, and a rubber shim for smaller diameter handlebars  

What is great about the bundle is that it comes with all the ANT+ sensors and 3 full sets of mounts for multiple bikes. This saves time and money from having to buy additional mounts for your other bikes. Garmin expects users to use the cycle computer across different bikes and thus supplies the mounts for you to do so easily. It is also cheaper to get the bundle than to buy the mounts and sensors separately.


The rear of the head unit. The simple yet secure quarter twist mounting design that is unique to Garmin.

Rubber flap hides the mini USB port that is used for charging and data transfer, and also protects it from rain.

After starting up the computer, I followed the instructions as provided in the user manual, and fiddled around with the settings. With such a high tech cycle computer, it feels very much like the unboxing of a new smartphone, with lots of settings and customization available.

This new Garmin has a new way of setting up the computer, so that it is easy to use different settings for different bikes and rides. By setting a different bike profile for each bike, it lets the computer know which sensors to detect and what wheel size to use, if the bikes are of different wheel sizes.

Next, select the ride profile that you want to use. This determines what parameters to display on the screen. For example, when commuting, I would like to see the time of the day. I do not need to see cadence or heart rate when I am riding to work.

On the other hand, when I am riding fast on longer rides, I would like to see cadence, heart rate and perhaps average speed. By choosing a different ride profile, I will be able to choose what to display and what not to display on the screen.

The top row allows you to select the bike to track, and the bottom row allows you to select the ride profile and thus the parameters to display. You can also choose the colour to use for different ride profiles.

The ride profile that I use for commuting. Not many parameters are actually needed.

There are many more functions that I would like to share, but it will be in a future post where I give a more in depth review after using this Garmin for some time.

One thing to note is that the screen is pressure sensitive, which means that it requires some finger pressure to work properly, different from smartphones. This makes the operation slightly sluggish, but it also means that it will work even if you are wearing full finger gloves, and will not be affected by rain water on the screen.

The bike that I first installed the Garmin on is the Merida Scultura 5000 road bike. As you can see below, there is not much space left on the handlebar for the Garmin.

Squeezing in the Garmin beside the Shimano Sport Camera. With such an arrangement, the camera needs to be removed first, before I can twist off the Garmin from the out-front mount.

The camera has to be located on the right side of the Garmin. This is because the power button of the Garmin is on the left side, which means that if the camera is on the left side, it will block access to the power button.

Installing the speed/cadence sensor on the Merida. No problem here, quite similar to how I set up the sensor with the Cateye Strada Digital Wireless cycle computer.

Instead of using the supplied crank arm magnet, I just stuck a strong magnet on the pedal axle. This works just as well and looks way better than cable tying a magnet onto the crank arm.

Installation is very straight forward and quick. Pairing the ANT+ sensors to the Garmin head unit is also quite easy with no problem. Once the sensors are paired, they will automatically start transmitting data once there is movement. The head unit will also detect the data automatically, which makes everything work really seamlessly.

Currently I am still testing out the Garmin Edge 510, and figuring out how to use the more advanced functions. I will write a more detailed review when the time is right!

Garmin Edge 510: In Depth Review here!

Saturday, May 9, 2015

Serfas Helmet Tail Light

When riding a bike, it is always important to make yourself visible to other road users, especially at night when visibility is not as good. By using lights during cycling, it improves safety by making yourself visible or by lighting up the road at poorly lit places.

Other than the lights on the bicycle, it can be a good idea to attach a rear light onto the helmet. As this light is higher up, it will be more visible to other road users. I used to have a couple of X Light 4 LED helmet lights, but I have retired them as they are not working properly. Those helmet lights are quite bright, but the downside is that the battery life does not last very long, and it gets costly to replace the batteries as they are using CR2032 batteries. After a few rides in the rain, some of the lights and buttons are not working properly, probably due to some water getting through the rubber seals.

Recently, during a trip to the US, I found this helmet light at one of the bike shops, and it seems quite bright. I decided to get it and mount it on my helmet to try it out.

Serfas Helmet Tail Light

Uses 2 x CR2032 batteries. Although this light also uses expensive CR2032 batteries, the battery life for the flash mode seems really long at 175 hours, so it should be manageable.

Based on my quick and simplified estimate, this battery life should last me for quite a bit of cycling. Using an average cycling speed of 20km/h, having 175 hours of battery life will last for over 3000km of usage. Also, since this helmet light will only be used for night riding (it is not bright enough for daytime usage), this means that it should last for 3000km of night cycling, which is really a lot. Realistically, I would be happy to get half that amount of battery life.

The light comes with a velcro strap and a rubber block

Triangular light design with red LEDs at the three corners of the casing, and the on/off button in the middle.

The orange rubber block attaches to the rear of the light, acting as a wedge to adjust the pointing angle of the light.

For my helmet design, there is no central beam to fix on this helmet light, and so I have to fix it off-centre at the side.

Based on the angle of the helmet while riding, it should point somewhat horizontal towards the rear for good visibility.

This helmet light is really bright which is great for visibility.

With this new Serfas Helmet Tail Light, I now have a good rear light mounted on my helmet. A rear light on the bike plus a rear light on the helmet will increase my visibility on the road, which is always a good idea.