Showing posts with label Selle Italia. Show all posts

Wednesday, February 19, 2020

Cervelo Aspero: Headset, E-Thru Axles, Brake Adapter, Seat Post, Saddle

When you get a new frameset, other than the frame and fork, there will also be other parts that are included with it. With this Cervelo Aspero frameset, the headset parts, E-thru axles and also the seat post are included. Let's take a closer look at these parts, and also weigh them to help estimate the total bike weight.

Compression plug that goes into the carbon fork steerer tube. This compression plug is quite long, which is good for grip but also means that it is a bit heavier.

Top cap to pre-load the headset, by pressing down on the stem and pulling up on the steerer tube.

Headset sealed bearings, with the top 1 1/8 inch in size and the bottom 1 1/4 inch in size. The compression ring and headset cover are also included. Quite heavy as the bearings are quite big.

During initial installation, I found that there is quite a big gap between the headset cover and the frame. The upper headset bearing is visible through the gap.

The installation is correct, as the compression ring rests on the top bearing.

After checking with the dealer, we realized that the height of the compression ring seems to be wrong. It seems to be too tall, causing a bigger gap between the headset cover and the frame. Functionally there is no problem, just that it does not look as nice, while water will get into the headset more easily.

The dealer sent over the correct compression ring that very same day, allowing me to continue with the installation.

With the correct compression ring that is flatter.

Now the headset cover matches nicely with the frame, with no big gap.

For frames with thru axles, the axles will usually come with the frame, as there are different axle lengths and thread pitches, so aftermarket axles may not be 100% compatible.

12 x 100/142 mm E-thru axles that are included with the Cervelo Aspero. As there are levers on both the front and rear axles, they are quite heavy at 129 grams in total.

The length and thread pitch of the thru axles are laser marked on the sides for easy reference.

The Cervelo Aspero fork has a Trail Mixer feature, which allows the trail of the bike to be adjusted forward or rearward by 5 mm. Adjusting the Trail Mixer itself it not that difficult, as only 2 bolts needs to be loosened to flip the Trail Mixer around.

However, the more troublesome part is moving the front brake caliper, as the front axle and thus disc rotor is in a different position between the forward and rearward axle setting. When the Trail Mixer is in the forward setting, just use the original brake adapter that is supplied with the Flat Mount brake caliper. In the forward setting, you can use 140 or 160 mm diameter rotors.

In my case, I chose to use the Trail Mixer in the rearward position, for more stability, especially with the smaller 650b wheels. Therefore, the brake caliper needs to be moved rearwards by 5 mm to match the rotor. A special Flat Mount brake adapter is included with the Cervelo Aspero, to move the brake caliper rearwards by 5 mm.

Special Flat Mount adapter, to be used when the Trail Mixer is used in the rearward position. Heavier than the thinner stock Flat Mount adapter.

This adapter only allows the use of 160 mm diameter disc rotors.

A new seat post is included with this Cervelo Aspero frameset, but I would prefer to use the Canyon VCLS suspension seat post, as it is more comfortable. However, not all bikes can use the VCLS seat post, as it needs a minimum exposed length for flexing. If the seat tube is too long or high, and if the rider is not tall enough, the VCLS seat post cannot be used.

On the Canyon, the seat tube is purposely made short, so that there is more exposed length for the VCLS seat post. My objective here is to find out whether the VCLS seat post can be used on the Cervelo Aspero or not.

This comparison is made more difficult by the fact that the Cervelo Aspero has a lower bottom bracket (78.5 mm drop) than the Canyon Endurace (75 mm drop), which means that putting the bikes side by side is not accurate as the bottom bracket height also affects the seat post height used by the rider.

The most accurate way is to measure the distance from the centre of the bottom bracket to the top edge of the seat tube, or maximum insertion line on the VCLS seat post.

Distance from centre of bottom bracket to top edge of seat tube is 462 mm. This is considered quite short.

At my normal seat post height setting, there is an additional 26 mm of insertion possible. The VCLS seat post cannot be inserted further as the flexing area cannot fit into the seat tube.

This means that the distance between the bottom bracket centre and the top edge of the seat tube can be a maximum of 462 + 26 = 488 mm. If the distance is longer, the seat post cannot be lowered enough to fit me.

Based on my measurement of the Size 51 Cervelo Aspero frame, the distance from bottom bracket centre to top edge of the seat tube is 500 mm.

Since the Cervelo Aspero frame has a seat tube that is too tall, I will not be able to use the Canyon VCLS seat post. That is a shame as it is a really nice suspension seat post.

In this case, I shall use the Cervelo SP19 seat post that is included with the Aspero frameset.
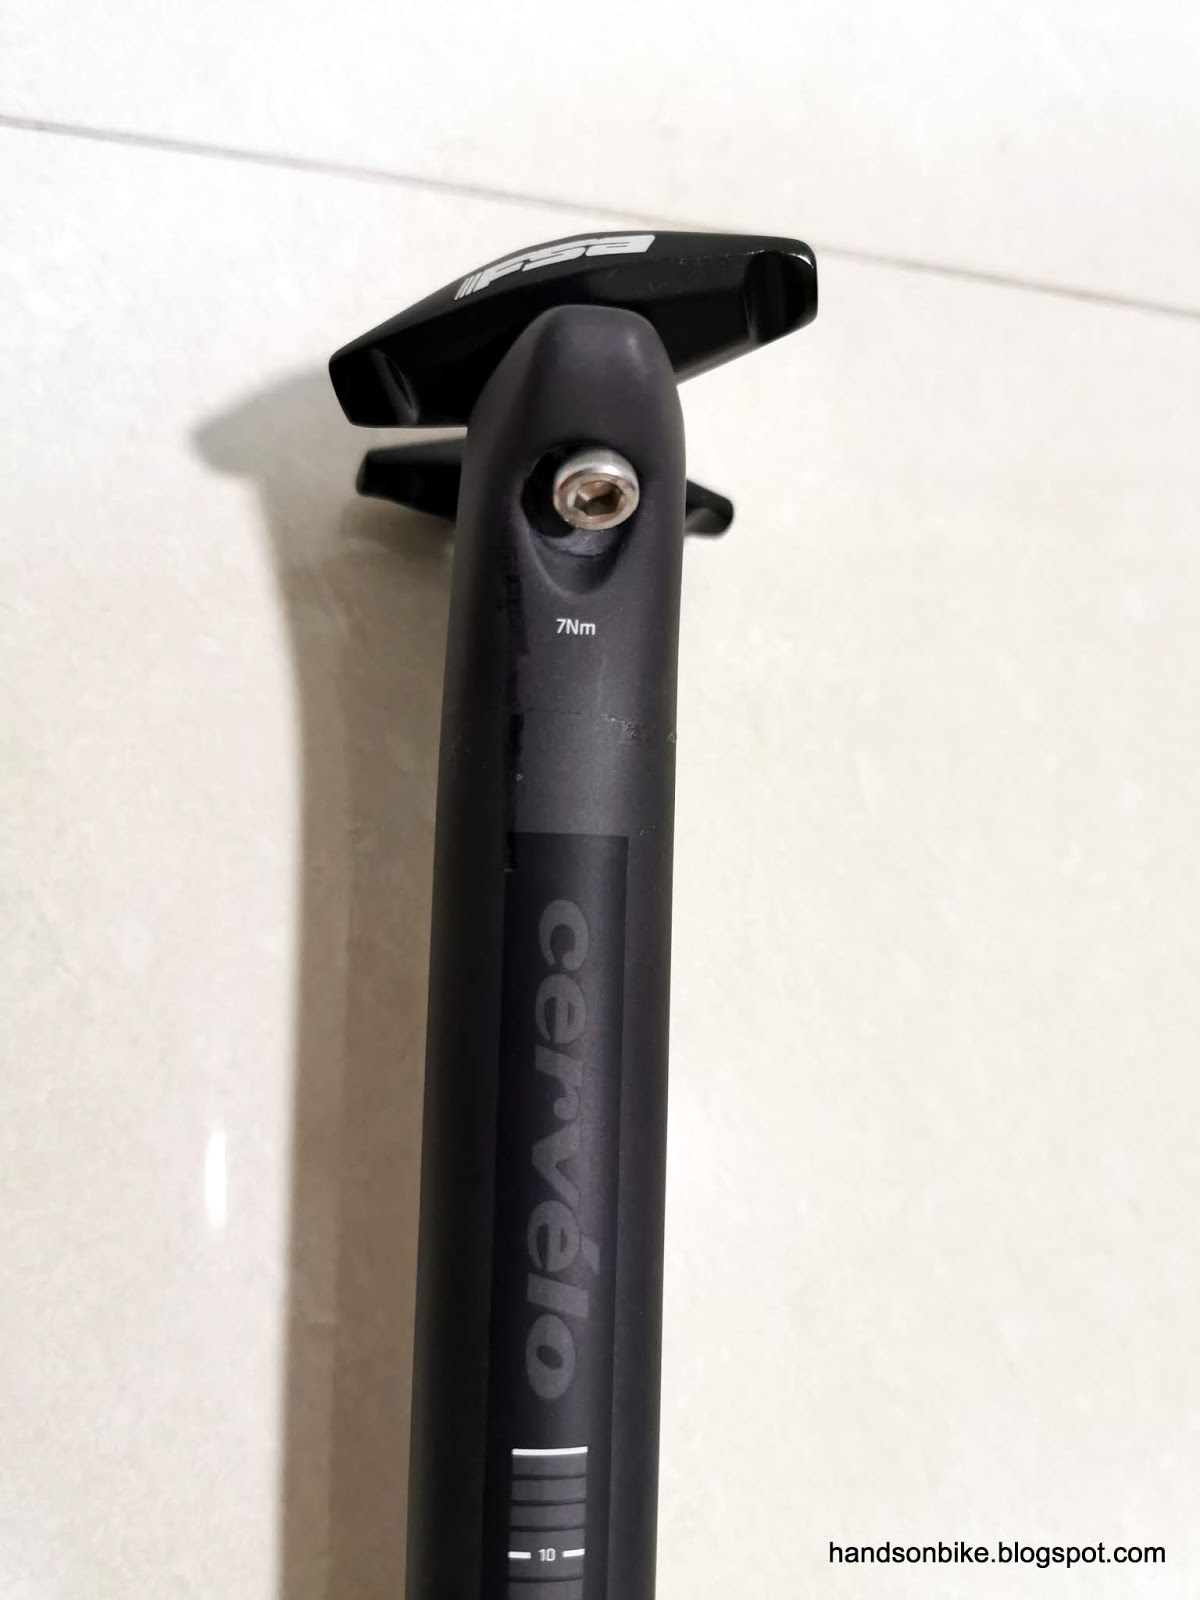
Cervelo SP19 carbon seat post, with a round diameter of 27.2 mm.

Minimum insertion length is only 70 mm, which is shorter than the usual 100 mm.

Seat post weight is just 188 grams, which is considered quite lightweight. Saves about 50 grams over the Canyon VCLS seat post.

One good thing about using the Cervelo SP19 seat post is that it is more lightweight. Another benefit is that I can install the internal Di2 battery inside the Cervelo seat post, instead of somewhere else on the frame.

On the Canyon Endurace, due to the VCLS seat post, the internal Di2 battery cannot be placed inside the seat post. Therefore there is a special Di2 battery holder inside the downtube of the bike frame. Now, since the Cervelo SP19 seat post is just a standard round seat post, I can install the internal Di2 battery inside the seat post. This is similar to how it is done on the Fabike C3.

Finally, I need a good saddle for this bike, and it needs to be lightweight. As you have seen above, the seat post is actually made by FSA, as seen from the FSA branding on the saddle rail clamps. Due to the design of the saddle rail clamps, carbon saddle rails are not compatible. Titanium rails will work though, and with just a small weight penalty (~20 grams) over the carbon rail version.

I already have a Selle Italia SLR Titanium saddle which was on the Canyon Endurace, but that saddle has a matching red colour, which does NOT match the Teal colour of the Cervelo Aspero frame. In order to avoid colour clashes, I decided to buy a new saddle of the same model, in a generic black and silver colour.

Selle Italia SLR Titanium saddle, lightweight and comfortable! Got it at a good discount, plus it is already tried and tested to fit me well.

Titanium rails to minimize the weight.

Just 142 grams!

With most of the miscellaneous parts of the Cervelo Aspero accounted for, we will move on to the other key parts, such as the wheelset and the components.

Wednesday, July 4, 2018

Crius AEV20 1x11: Seatpost, Saddle, Pedals

When riding a bike, most of the rider's weight will be on the saddle and pedals, with a fraction on the grips. As such, it is important to choose the right saddle and pedals for proper comfort and performance.

First, let's choose the seatpost for the Crius bike. A seatpost's main purpose is to support the saddle, therefore it needs to be strong enough. It is also one of the easiest places to save weight, if you use a Litepro seatpost that is both lightweight and strong.

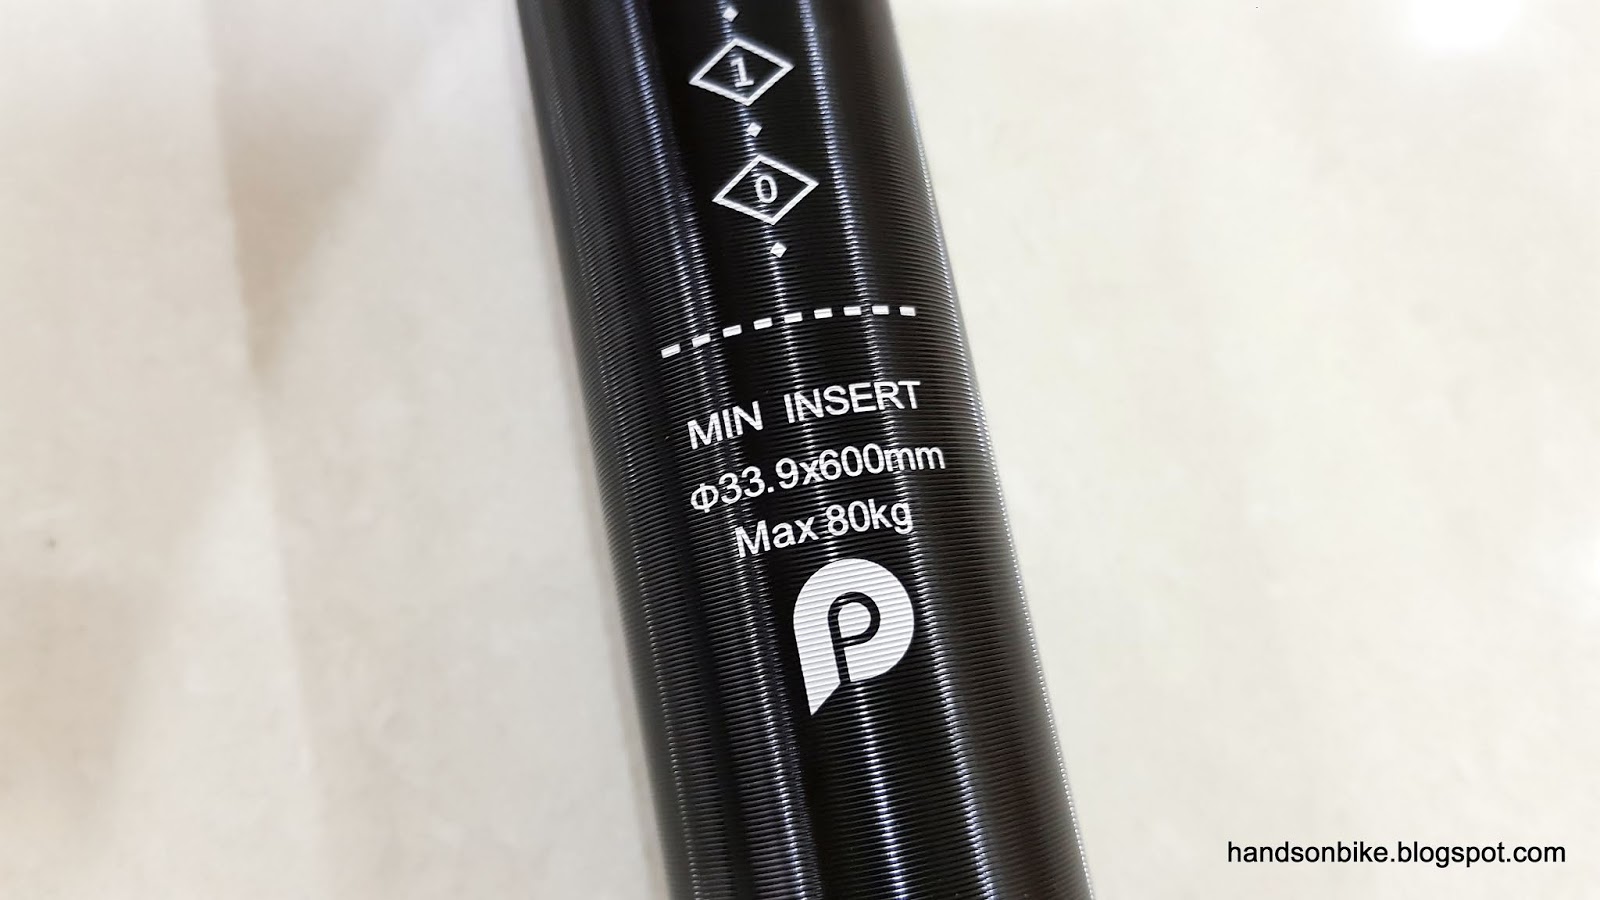
Stock seatposts are rated for a maximum rider weight of around 105 kg, as that is the maximum that is safely allowable by the bike manufacturer. However, if the rider is not that heavy, we can change to a lighter seat post with a lower maximum weight limit.

Litepro A61 aluminium seatpost is lightweight and strong

Maximum allowable weight is 80 kg, which is due to the more lightweight construction.

Minimalist saddle clamp design to reduce weight

The support plate for the saddle rail has been improved from the previous version, with a longer support area to minimize the bending of the saddle rails.

376 grams for the Litepro seatpost. Slight weight increase from previous versions.

As for the choice of saddle, I will not know what works best, as everyone has a different butt shape that will prefer different saddle shapes. What I can do is to choose a cheap saddle of decent quality, so that it is a good start. If the rider finds a more comfortable saddle, he or she can change it out without hesitation as the original saddle is not that expensive anyway.

From my experience on the Avanti Inc 3, the Selle Italia Q Bik saddle is cheap (around $30) and is quite comfortable, although it is not that lightweight. Basically it is a good saddle to get you started so that you can ride the bike.

Good and affordable Selle Italia Q Bik saddle

This is the model of the saddle

Decent design and appearance

Good workmanship, without unsightly folds or staples visible.

Standard steel saddle rail (FeC = Iron + Carbon Alloy = Steel?)

273 grams, which is a decent weight for a cheap and comfortable saddle.

Finally, the choice of pedals. What is required is just a pair of smooth rolling metal pedals that have a comfortable platform for pedaling. Plastic pedals are not recommended as they are prone to breaking under higher loads.

As a folding bike, it will be better to have folding or detachable pedals as it can reduce the folded size. Folding pedals such as the MKS FD-6 (now FD-7 I think) are compact, but the grip is not sufficient, while it is also heavy.

I decided to get detachable pedals, as the grip is better, while also being of lighter weight and is also slightly cheaper.

Wellgo M111 detachable pedals

Model number M111 printed here

Quick release mechanism links the crankarm to the pedal axle. Different from the MKS mechanism that I am using on the Brompton.

Another view of the quick release mechanism

Instructions here. Pull up the red cap to release or insert the pedals to the mechanism.

As seen here, pulling the red cap will release the pin that allows the pedal axle to be inserted or removed.

Hexagonal profile aligns to the mechanism, while the undercut area is locked when you release the red cap.

Decent looking profile that should give a decent grip on any rubber soled shoe.

Contact rubber seal on the pedal axle, to minimize the intrusion of dust and dirt, while keeping in the grease. Not the best seal design as it is quite exposed.

A pair weighs 337 grams including the mounts, which is quite good. Lighter than the MKS Promenade EZY pedals on the Brompton.

Comes with a few thin washers, to be used between the crankarm and the mount.

Purpose of these thin washers is to allow adjustment of the mount angle, as the red cap can be pointed anywhere depending on where the pedal thread starts.

Using two thin washers, I was able to position the red cap exactly within the crankarm when tightened, which is the neatest position. 

However, on the left side, no matter I use zero, one or two thin washers, I was not able to place the red cap within the crank arm. This was the best orientation that I could get.

As you can see here, the problem with having a preferred orientation on a rotational part is a problem, as you will not always be able to align it properly. It does not affect the quick release function or the pedaling, just that it does not look so neat.

Sunday, November 12, 2017

Canyon Endurace: Selle Italia SLR Titanium Saddle

On the Canyon Endurace bike, the stock Fizik Aliante R3 saddle is a pretty nice saddle. Once the saddle angle has been adjusted properly, it gives great support when riding in the hoods or drops. However, due to the high upsweep of the saddle at the tail end, it gets in the way when I try to sit up straight to hold the top of the handlebar. It is great for riding in the hoods, but not so when sitting up.

The Canyon Endurace comes with a nice integrated handlebar + stem, which is very comfortable to hold at the top, as it is flat and wide which is a good place to rest the palms on. As such, I find myself using the top of the handlebar more often then on other drop bar bikes. Therefore, I need to change the saddle to enable me to sit up comfortably.

On the Merida Scultura 5000 and Java Freccia, I have used the Selle Italia SLR Kit Carbonio Flow saddle, which is both lightweight and comfortable. However, on this Canyon bike, the VCLS seatpost saddle clamp has a side clamping design, which makes it unsuitable for use with carbon saddle rails.

The next lightest and still comfortable saddle would be the SLR Titanium version that has titanium rails instead of carbon rails. This will make it suitable for the side clamping design of the VCLS seatpost. Also, the VCLS seatpost has saddle clamp for round rails, which is also the type that is on the SLR Titanium.

Selle Italia SLR Titanium saddle

Claimed weight is 145 grams, which is just 20 grams more than the SLR Kit Carbonio Flow with carbon rails.

Best of all, it has a red coloured version that seems to match the frame colour quite closely!

Titanium rails on this saddle for lightweight

Simple and clean design at the bottom, with a thin shell to support the thin fabric

Weighs just 141 grams, which is also very lightweight

The red colour on the saddle matches the Kerosene Red of the frame quite closely, with a roughly 90% match!

Due to the setback of this seatpost, I have to set the saddle all the way to the front to get the correct fore-aft saddle position. I don't see an issue since the weight is mostly at the back of the saddle.

New saddle installed on the bike! Lightweight and also matches the frame colour.

With this new saddle, it feels the same as the Merida and Java bikes which also have a very similarly-shaped Selle Italia saddle. Although there is no cutout in the middle of this saddle, it feels fine. Compared to the Fizik Aliante R3, this saddle is very flat, and allows me to sit up straight without being blocked by the tail end of the saddle.