Showing posts with label Crius. Show all posts

Friday, July 20, 2018

Crius AEV20 1x11: Final Assembly

With all the components gathered, now I can assemble everything onto the Crius folding bike frame! Instead of writing too many words, let us just look at the pictures.

Shimano 105 CS-5800 11-32T 11 speed cassette mounted onto the Wheelsport rear wheel

With the Litepro headset installed, and Fnhon handlepost assembled onto the Crius bike frame

Another view of the handlepost. Inward folding type for a compact folded size. Also note the 3M sticker applied to prevent scratches.

Ultegra-grade SM-BBR60 Hollowtech II road bottom bracket


11 speed drivetrain assembled! A front single drivetrain looks neat.

New 11 speed chain on the Wolftooth 48T narrow wide chainring

Smooth cable routing to the Ultegra R8000 rear derailleur

Chain on the smallest 11T sprocket on the 11 speed cassette

Chain on the largest 32T sprocket, with the rear derailleur cage stretched out.

Setting the gear to gear distance between the 32T sprocket and the guide pulley. A distance of 5 to 10mm is usually ideal.

Shimano LX V brake calipers mounted. The ideal setting is for the brake arms to be parallel when the brake pad touches the rim.

Front V brake caliper mounted. Plenty of clearance to fit mudguards if required!

View of the Wheelsport front wheel with Schwalbe Kojak tires

Litepro Monster handlebar installed, with the shifter and brake levers mounted.

Using cable wrap to make the routing neat and tidy

Another view of the shifter, brake lever and Ergon grips

Litepro seatpost and Selle Italia Q Bik saddle

Wellgo M111 flat pedals with quick release adapter

There were no major issues detected during component assembly, which is good. Some other information which I discovered were:

1) Head tube inner diameter roundness is not good, making it difficult to press in the head set cups.
2) Rear frame opening is a few millimeters wider than 130mm, which means that you can probably fit in a 135mm OLD rear hub if you need to.
3) Diameter tolerance between seat tube, seat post shim and seat post is not ideal, as the metal shim can move inside the seat tube quite easily.

Clearance between the left crankarm and the kickstand is quite small, at less than 2mm. This is mainly due to the shape of the kickstand leg.

Picture of the fully assembled bike! All black as requested by the rider.

With a 1x11 speed drivetrain, shifting operation is straightforward and yet has a wide and well spaced drivetrain for efficient pedaling.

Folded size, with the handlebar tucked in between the frame for the most compact fold.

Full component specifications for this 1x11 speed Crius folding bike, and the final weight.

Actual weight of the bike is 9.6 kg inclusive of the pedals, which is the same as the calculated total. It is possible to cut down the weight further, as many of the components that I used are a good balance between weight and price. With a larger budget, the overall weight can be reduced by quite a bit.

Additional weight savings possible, without going to extreme levels (boutique/custom parts):
Wheelset: -200g
Tires and inner tubes: -100g
Grips: -100g
Brake levers: -50g
Handlebar: -50g
Cassette: -50g
Brake calipers: -50g
Saddle: -100g
Pedals: -50g
Remove kickstand and magnetix: -250g

Further weight savings possible, with a boost in budget: About 1 kg!

With this hypothetical "what-if", this folding bike project is completed! Although the bike is not mine, I still enjoyed sourcing for the parts and assembling the bike, and finally tuning it to run as smoothly as possible!

Sunday, July 8, 2018

Crius AEV20 1x11: Handlebar, Grips, and Misc

As for the choice of handlebar and grips for the Crius folding bike, I used tried and tested parts, with a good balance of cost, weight and function.

You can find aluminium flat handlebars easily, as their construction is very simple. Even the stock ones from folding bikes are good enough. In this case, I chose the Litepro Monster flat handlebar which I used on the Dahon MuEX. There are lighter aluminium ones, but they flex too much for my liking, while lighter carbon ones are expensive.

Litepro Monster flat handlebar, 580mm wide. Cheap and good, with a clamp diameter of 25.4mm.

As for handlebar grips, lightweight lock on grips are available, but they are not that comfortable compared to Ergon grips. For weight weenies, foam grips are also available and they weigh very little.

For best comfort, Ergon grips are perfect. GP1 grips do not have bar ends, which is good as it means a lower weight and also does not affect the folding. I find that S sized grips are suitable for most people.

S sized GP1 grips

Large area to support the palm

Locks to the handlebar with a single clamp bolt to prevent rotation.

A pair of Ergon GP1 grips weigh 165 grams. Not for weight weenies, but its very comfortable. I use them on the Dahon MuEX and also the Brompton.

Finally, for practicality sake, a kickstand was added to the bike. Not essential but very useful!

Kickstand weighs 183 grams

Magnetix system to hold the folded frame together weighs 59 grams. Also not absolutely necessary but useful to have.

With that, I think I have listed down almost every single component of this new folding bike. Next, it is time to assemble everything into a bike!

Wednesday, July 4, 2018

Crius AEV20 1x11: Seatpost, Saddle, Pedals

When riding a bike, most of the rider's weight will be on the saddle and pedals, with a fraction on the grips. As such, it is important to choose the right saddle and pedals for proper comfort and performance.

First, let's choose the seatpost for the Crius bike. A seatpost's main purpose is to support the saddle, therefore it needs to be strong enough. It is also one of the easiest places to save weight, if you use a Litepro seatpost that is both lightweight and strong.

Stock seatposts are rated for a maximum rider weight of around 105 kg, as that is the maximum that is safely allowable by the bike manufacturer. However, if the rider is not that heavy, we can change to a lighter seat post with a lower maximum weight limit.

Litepro A61 aluminium seatpost is lightweight and strong

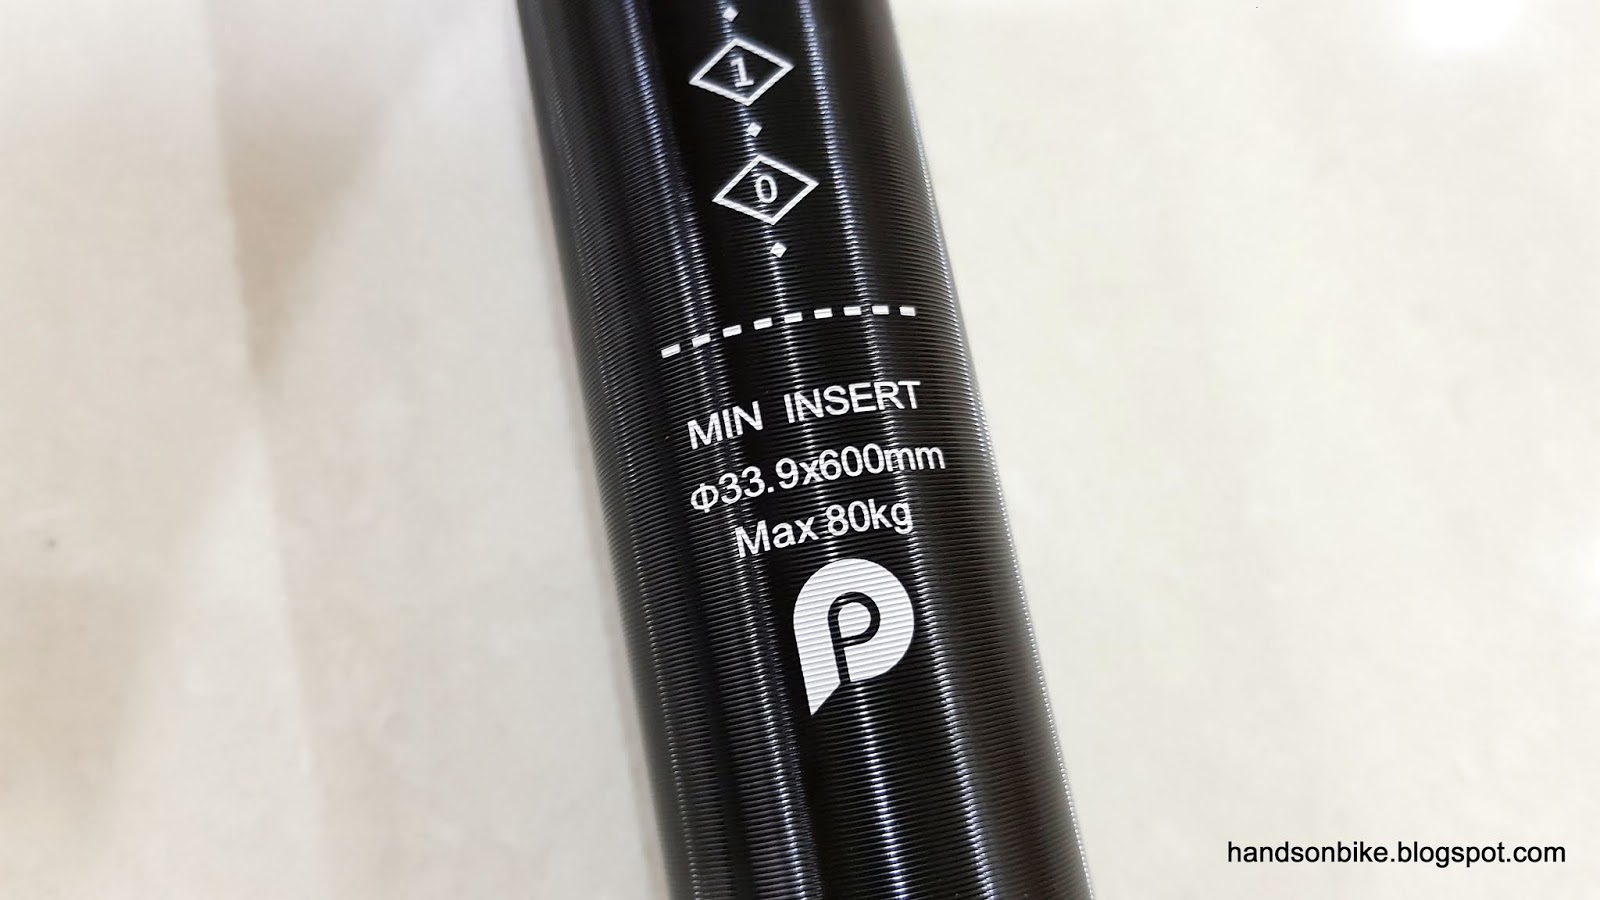
Maximum allowable weight is 80 kg, which is due to the more lightweight construction.

Minimalist saddle clamp design to reduce weight

The support plate for the saddle rail has been improved from the previous version, with a longer support area to minimize the bending of the saddle rails.

376 grams for the Litepro seatpost. Slight weight increase from previous versions.

As for the choice of saddle, I will not know what works best, as everyone has a different butt shape that will prefer different saddle shapes. What I can do is to choose a cheap saddle of decent quality, so that it is a good start. If the rider finds a more comfortable saddle, he or she can change it out without hesitation as the original saddle is not that expensive anyway.

From my experience on the Avanti Inc 3, the Selle Italia Q Bik saddle is cheap (around $30) and is quite comfortable, although it is not that lightweight. Basically it is a good saddle to get you started so that you can ride the bike.

Good and affordable Selle Italia Q Bik saddle

This is the model of the saddle

Decent design and appearance

Good workmanship, without unsightly folds or staples visible.

Standard steel saddle rail (FeC = Iron + Carbon Alloy = Steel?)

273 grams, which is a decent weight for a cheap and comfortable saddle.

Finally, the choice of pedals. What is required is just a pair of smooth rolling metal pedals that have a comfortable platform for pedaling. Plastic pedals are not recommended as they are prone to breaking under higher loads.

As a folding bike, it will be better to have folding or detachable pedals as it can reduce the folded size. Folding pedals such as the MKS FD-6 (now FD-7 I think) are compact, but the grip is not sufficient, while it is also heavy.

I decided to get detachable pedals, as the grip is better, while also being of lighter weight and is also slightly cheaper.

Wellgo M111 detachable pedals

Model number M111 printed here

Quick release mechanism links the crankarm to the pedal axle. Different from the MKS mechanism that I am using on the Brompton.

Another view of the quick release mechanism

Instructions here. Pull up the red cap to release or insert the pedals to the mechanism.

As seen here, pulling the red cap will release the pin that allows the pedal axle to be inserted or removed.

Hexagonal profile aligns to the mechanism, while the undercut area is locked when you release the red cap.

Decent looking profile that should give a decent grip on any rubber soled shoe.

Contact rubber seal on the pedal axle, to minimize the intrusion of dust and dirt, while keeping in the grease. Not the best seal design as it is quite exposed.

A pair weighs 337 grams including the mounts, which is quite good. Lighter than the MKS Promenade EZY pedals on the Brompton.

Comes with a few thin washers, to be used between the crankarm and the mount.

Purpose of these thin washers is to allow adjustment of the mount angle, as the red cap can be pointed anywhere depending on where the pedal thread starts.

Using two thin washers, I was able to position the red cap exactly within the crankarm when tightened, which is the neatest position. 

However, on the left side, no matter I use zero, one or two thin washers, I was not able to place the red cap within the crank arm. This was the best orientation that I could get.

As you can see here, the problem with having a preferred orientation on a rotational part is a problem, as you will not always be able to align it properly. It does not affect the quick release function or the pedaling, just that it does not look so neat.