Showing posts with label PZ Racing. Show all posts

Thursday, October 10, 2013

TAT Titanium QR Skewers for the Dahon Vitesse X20-TT

A couple of months ago, I wrote about the quality of different QR skewers available in the market. From the post, you will be able to see and differentiate between good and poor QR skewer designs.

For Dahon or Tern wheelsets, a shorter front QR skewer is required, as the front hub (74mm) is narrower than standard front hub widths (100mm). This greatly limits the choice of QR skewers available. A front 74mm and rear 130mm QR skewer is required for most Dahon or Tern bikes. For models with rear internal hub, a rear QR skewer length of 135mm will fit better.

Out of the many brands of QR skewers available for  Dahon / Tern bikes, I find that TAT makes one of the better QR skewers out there. The quality of the QR skewer is quite good, with nicely machined parts. Also, the hardware is mainly made from Aluminium or Titanium, which makes the QR skewer really lightweight.

In view of that, I got a set of TAT Titanium QR skewers for the Dahon Vitesse X20-TT. This is because the stock PZ Racing QR skewers are already rusty at the pivots.

Silver coloured TAT Titanium QR Skewers, 74/130mm for Dahon or Tern bikes

Good quality lever and brass washer for smooth and firm clamping action

PZ Racing front QR skewer is already rusty at the pivots

Same for the rear QR skewer

New shiny front QR skewer! See how the brass washer works to smoothen the clamping action.

Smooth and firm clamping action. Try it to believe!

New QR skewer for the rear wheel too.

Silver QR skewer goes well with the silver Tektro R559 caliper brakes, LitePro headset and Fnhon handlepost!

View of the rear with the new TAT QR skewers

This is a very simple upgrade that can be done by anybody, just remove the old skewers and insert in the new QR skewers. Just make sure that the length is correct for the wheelset. With this TAT Titanium QR skewers, I don't have to worry about the QR skewer rusting. One less rusty part to spoil the look!

Tuesday, August 27, 2013

Difference between Good and Bad QR Skewers

The quick release skewer is an often overlooked component on a bike. Despite looking small and flimsy, it plays an important role on the bike: Holding the wheels in place! Without a quick release skewer, the wheel would pop out whenever you go over a bump. Contrary to popular belief, the QR skewer does not bear weight on its axle. Rather, the load is borne by the ends of the hub, and the QR skewer merely clamps everything in place.

Of course, QR skewers did not always exist. Before it was invented by Mr. Campagnolo in the 1930's, cyclists have to loosen axle nuts before they could remove the wheel from the frame, which is comparatively more troublesome. Nowadays, QR skewers are found on most mid to high end bikes, with only the most basic entry level bikes still using traditional nutted axles for the wheels.

However, not all QR skewers are made the same! There are 2 main types of QR skewers: The internal cam type and the external cam type. From the pictures below, you can see the difference.

Dura-Ace QR skewer with an internal cam mechanism

QR skewer with an external cam mechanism

The most common type of QR skewers that we see nowadays are the external type. It is usually lighter in weight, and easier to manufacture. This makes it cheaper too. However, compared to the internal type with all metal parts, it does not have such a strong clamping force, and the performance is also poorer due to inferior parts being used (further elaborated below).

For normal usage, either type of QR skewer will work fine. However, if you want to know more about the difference between good and bad QR skewers, read on!

Let us take a look at the external cam type of QR skewers, as it is more common and the mechanism can be seen easily. Look at the two pictures below. They are both external cam type QR skewers, and they also look similar, but there is actually a crucial difference.

QR skewers that come with the Wheelsport wheelset

 New QR skewers from TAT

Did you spot the difference? If yes, good for you. You can tell the difference between a well designed QR skewer and a normal QR skewer. If not, read on to find out!

Look at the concave shaped washer under the lever cam. On most (90%) QR skewers, this piece is made of hard rubber or plastic (1st picture). When the lever is closed, the rubber compresses and some of the clamping force is lost. This is why you get a mushy feeling when you use this type of QR skewer. What you are feeling is the concave rubber washer compressing under load. Although it will still work, you will need to apply a higher force at the lever to close the QR skewer properly, as some of the force is used to compress the soft rubber washer instead of clamping the hub tightly.

On the other hand, look at the concave washer on the QR skewer in the 2nd picture. It is a solid metal washer made of brass. When closing the lever, the brass washer reduces the amount of friction in the cam mechanism (compared to the rubber washer), and it gives a nice, solid locking action. The brass washer does not compress and the clamping force is fully utilized to secure the wheel. Not only does the locking action feel smoother, the clamping force is easily achieved with less effort.

Another difference is the material used to make the QR skewer. This also indirectly affects the weight of the QR skewer.

QR skewers from the Wheelsport wheelset. All the pivots and axle are made of normal steel, with aluminium levers.

 TAT Alloy/Titanium QR skewers. Titanium pivots and axle, aluminium levers and nut.


The titanium QR skewer is a good 40 grams lighter than the normal steel QR. This is despite it using a heavier brass washer. Another important feature is that because there is no steel used (besides the spring), it does not rust! Compare this to another QR skewer that has some rust on the exposed steel pivot.

Rusted pivot on the PZ Racing QR skewer

More pictures of the TAT Titanium QR Skewer below:

Comes in 74/130mm lengths for Dahon/Tern bikes

Nice shiny hardware


Bought both the black and the gold coloured QR skewers

Now you know the difference between good and normal QR skewers. Besides looking at the material used (titanium or steel) and the weight, also look at the type of concave washer that is used! A QR skewer with a brass washer will have a smoother operation and also more solid clamping action. Although this may not make a difference to most people, the quality shows up in the details.

This "brass washer" concept also applies for seatpost QR levers, but that is a story for another day...
 
Seatpost QR lever with brass shim (instead of rubber/plastic washer)

For more info about QR skewers, you can refer to the links below.
Good vs Bad QR Skewers
Sheldon Brown - QR Skewers

Monday, August 27, 2012

Dahon Vitesse X20-TT

It has been quite some time since I last upgraded a folding bike! On my Dahon Boardwalk X20-R, there is practically nothing left for me to upgrade. It is already a 20 speed folding bike with a mix of Shimano Ultegra and 105 components, with fast rolling wheels and tires. Even if I change out the components to even higher end stuff, it may only be marginally lighter and faster, probably not worth the cost involved. In any case, it is already a great bike, and I can find no fault with it.

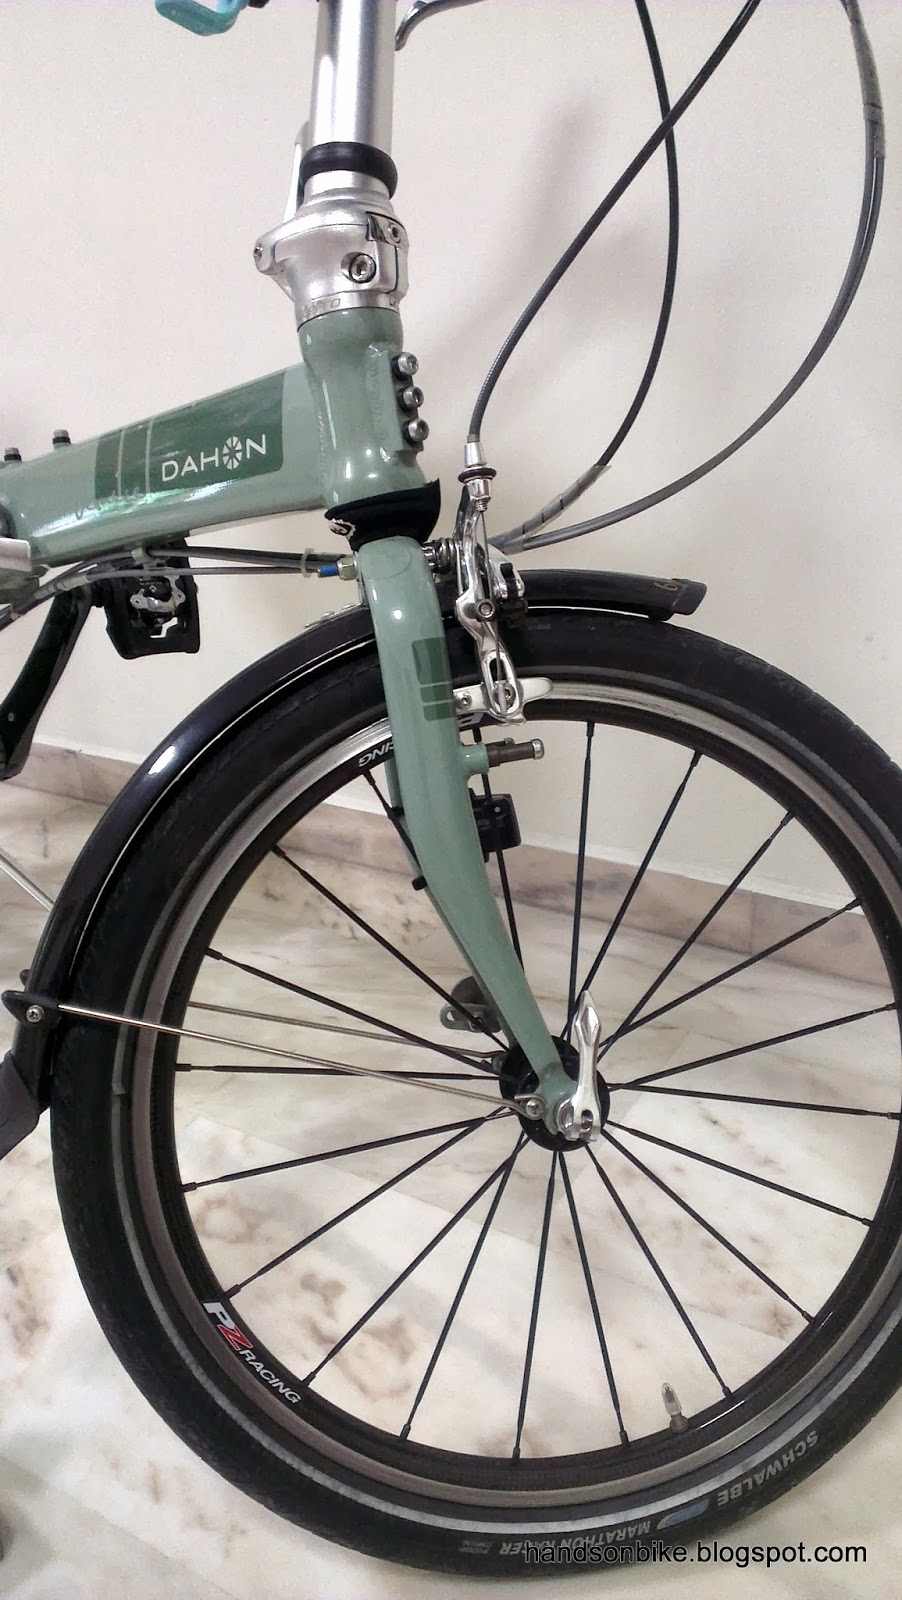
But my hands are itchy after not upgrading a bike for some time, and the solution is to find another bike to upgrade! I technically have 4 bikes under my stable, with my own Dahon Boardwalk X20-R and Flamingo London S7R, and Bernice's Dahon Vitesse P18-TT and Pacific Cycles Carry Me.

Coincidentally, the Vitesse has been found to be lacking in proper gear ratios at the low end of the gear range. This is due to the custom 9 speed cassette that I previously assembled. You can check out this link for more info on the custom cassette.

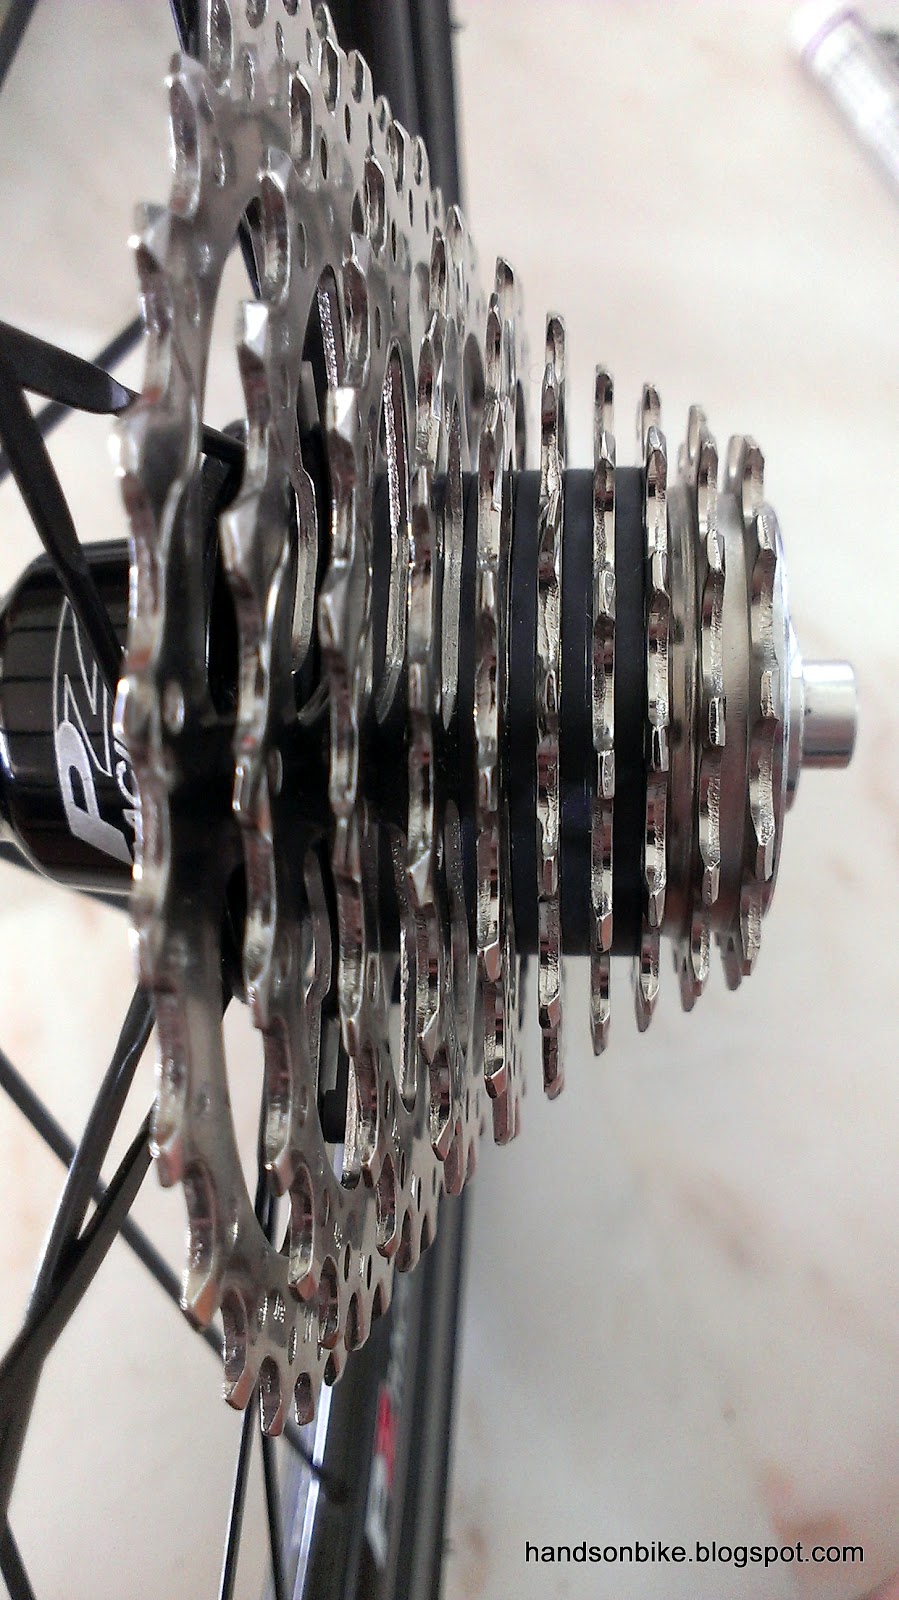
12-28T 9 speed cassette, as previously seen on the Boardwalk

This 9 speed cassette has sprockets sizes of 12-13-14-15-16-17-19-23-28. The advantage of this combination is that it has a close spread of high gear ratios (12-17T) for comfortable cruising on flat roads, but also has a low 28T sprocket for those "friendly" slopes.

However, the disadvantage is that the jumps between the lower gears are quite large, as the sprocket size changes quite a lot from 19-23T and 23-28T. This can be a problem when climbing slopes, as the 23T sprocket is too hard, but when changing down to 28T, the difference is too great, and the pedaling momentum is lost.

To solve this issue, the best way is to have one more speed between the 23T and 28T sprocket. But I cannot do that on a 9 speed cassette without sacrificing a sprocket from the higher gear range (12-17T). The solution is to upgrade to 10 speeds!

A lot of people ask why do we want so many speeds? My answer is, it gives you more gear ratios which makes your pedaling more efficient and comfortable. It may not necessarily make you go faster, but you will have more gears to choose from and you will be more likely to find a gear that you can pedal on at a comfortable cadence.

Working from the previous iteration of the Dahon Vitesse P18-TT, the "ingredients" that I need to convert the bike into a 2X10 speed bike are listed as below:

Components needed to upgrade the Vitesse from 18 speeds to 20 speeds:
1) 10 speed road cassette
2) 2x10 speed road shifter
3) 10 speed road front derailleur (FD), double
4) 10 speed road chain

Optional:
1) KMC MissingLink for 10 speed chains

Shimano Tiagra 4600 12-30T 10 speed cassette.

Why choose this? Wide ratio 12-13-14-15-17-19-21-24-27-30 cassette gives you many climbing gears. The 16T sprocket is sacrificed, but hopefully it is not a problem.

Shimano Tiagra 4600 2x10 speed road shifters

Why choose this? Instead of the higher end road shifters with internal shifter cable routing, I chose these shifters because of the external shifter cable routing. This is better for bullhorn bars to avoid excessive friction in the shifter cables.

Shimano 105 5700 double front derailleur

Why choose this? Because it matches the rear derailleur and crankset!

Shimano 10 speed chain

 KMC Reusable MissingLink for Shimano 10 speed chains

Note that these are not the only components that are needed to upgrade a bike from 9 to 10 speeds! You will also need a 10 speed rear derailleur and a 10 speed crankset. I did not need these for the Vitesse as it already has a Shimano 105 5600 Double Crankset and 105 5600 Rear Derailleur on it, which are both 10 speed components.

Sidetrack: During the upgrading of the cassette, I decided to take the chance to dismantle the rear hub and grease the internal pawl and ratchet mechanism

Rear hub with dirty grease. Still not too bad as it was last serviced at the beginning of this year.

Pawls on the freehub body

A clean ratchet! I just took some toilet paper and wiped away the old grease.

Similarly, the pawls and other parts are also cleaned.

As it says on the cover, you need special freehub grease. It is much lighter than normal grease, but more viscous than oil.

 
Generously coating the ratchet and pawls with freehub grease

After greasing the internals of the freehub mechanism, the freehub runs smoother and much more quietly. The freehub clicking sound will slowly return to its normal levels as the grease is displaced during normal usage.

Back to the Vitesse upgrade!

Sparkling new 10 speed cassette!

Go on, count it. You know you want to.

Tiagra 10 speed road shifters. Great shifters at an affordable price.

New Shimano 105 5700 FD with the older series Shimano 105 5600 53/39T crankset

Shimano 105 5600 series RD

I love the gleaming look of a clean drivetrain!

 
New bar tape in Bianchi Green! Definitely eye-catching.


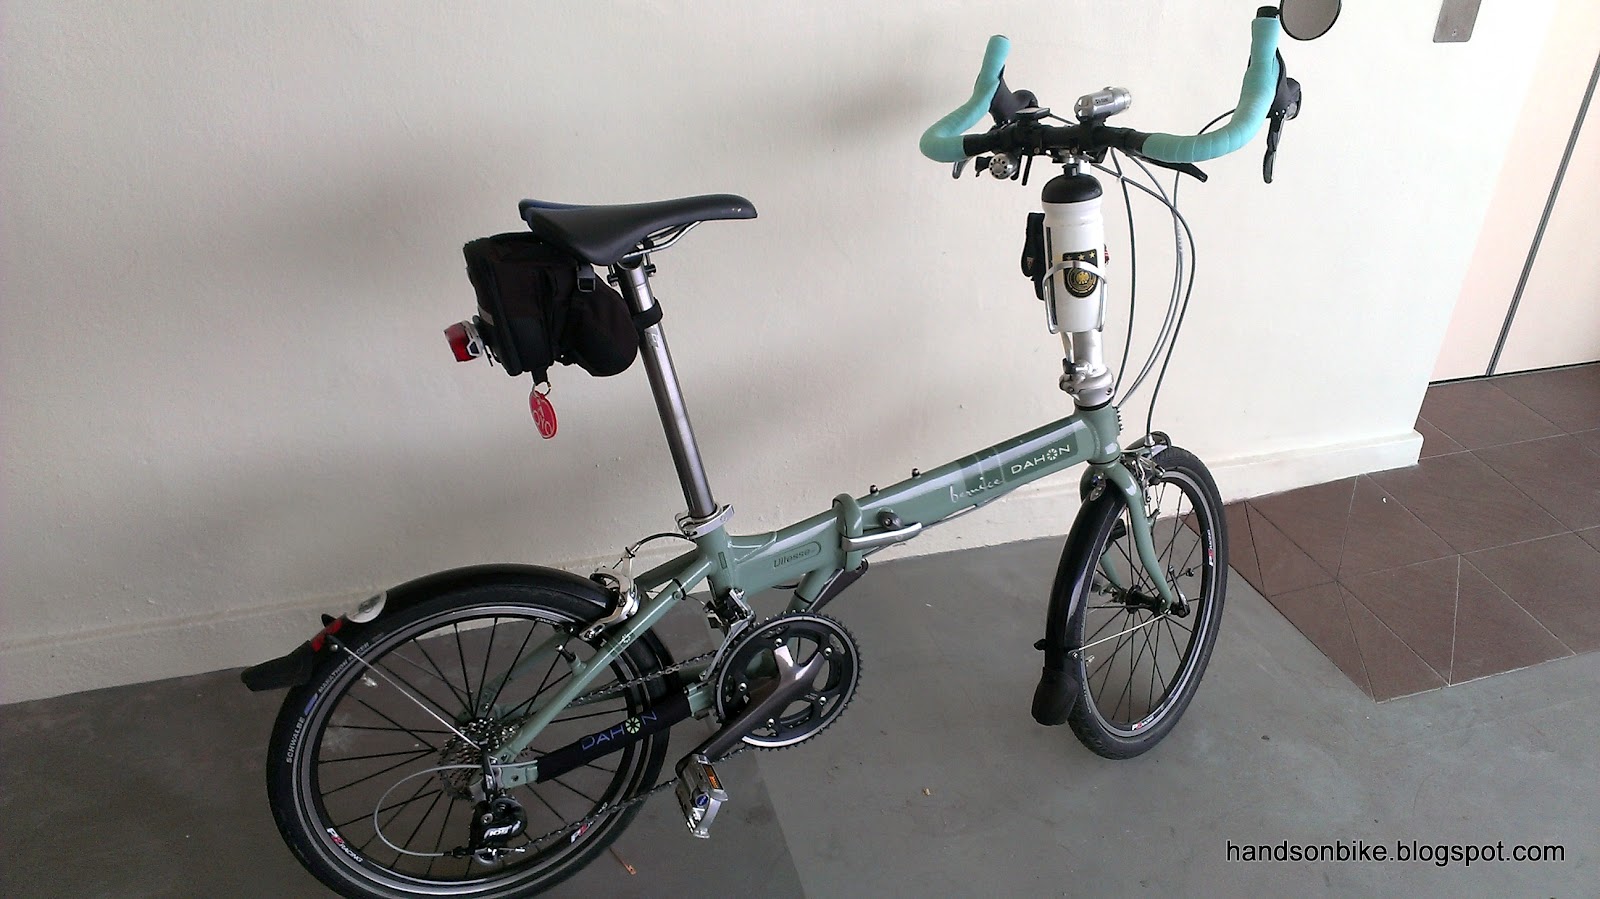
Overall view of the Dahon Vitesse X20-TT

I have brought the bike out for a few test rides, and it rides awesomely well! In fact, sometimes I feel that it rides better than my own Boardwalk. With the new 12-30T cassette, the gear range is now 26"-88". Great for climbing, ready to tackle any slopes! The shifting is also buttery smooth, you got to try it to believe it. Personally, I feel that the shifting is at the Dura-Ace level, smooth, light and precise, especially for the front shifting.

It was a fun and great upgrade. Definitely worth the time, money and effort spent!

Thursday, January 26, 2012

PZ Racing Freehub Maintenance!

Was taking apart the Vitesse, so decided to service the freehub of the rear wheel at the same time!

The freehub is one of the components on the bike whereby almost no maintenance is done at all. This is because it hardly gives any problems, and usually lasts very long, unless you are a hardcore cyclists who rides hard for long distances, clocking up lots of mileage!

After a series of freehub failures experienced by Matt and KC, it has highlighted the fact that freehubs do fail, although it is quite rare! In both the cases, I believed the springs holding the pawls in the freehub broke, causing the hub to freewheel in both directions.

Note that freehub maintenance is not a routine maintenance at all, and one should not attempt it unless you know how to put it back! Usually hubs with sealed bearings are easier to take apart and re-assemble, as compared to cup-and-cone bearing hubs.

The inside of the freehub! Note the ratchets that will engage with the pawls on the freehub body. This is the degreased condition.

The other parts of the rear hub. The freehub body and the covers/axle support on both sides of the axle. I'm lucky that this hub (PZ Racing) is maintenance-friendly.

The 3 pawls on the freehub body, degreased. Not with degreaser, but just wipe off the old dirty grease.

Special grease for the freehub! More viscous than oil, but not as thick as normal grease. This is something like a light grease.

Grease generously! Make sure to get grease under the pawls on the freehub body.

After greasing, the freehub runs much smoother, but it is also less noisy as the grease somewhat cushions the snapping of the pawls onto the ratchet. As the hub runs, the grease will move around and the hub should get louder over time.

By greasing the internals of the freehub with fresh grease, it helps to ensure that the wear and tear is kept to a minimum, and this will help to extend the life of the freehub.