Showing posts with label MKS. Show all posts

Tuesday, August 22, 2017

Brompton M6R: MKS Promenade Ezy Pedals

With the stock Brompton crankset upgraded to the more robust Tiagra crankset, the next component to change would be the pedals. I was told that if the left pedal is not unfolded before unfolding the Brompton, there is a chance of scratching the frame during unfolding.

In order to eliminate this risk, I decided to change the pedals to the removable type, which will allow the pedal to be stowed away when folded. This also makes the folded package even more compact as there is no folded pedal on the left side crankarm.

The most popular and reliable removable pedals are made by MKS, and their quick release (QR) pedals are found on many folding bikes. Before swapping the pedals, let's take a look at the stock Brompton pedals.

Brompton left side folding pedal. A rather nice folding design, although there will be load passing through the plastic body when loaded in one of the directions.

Remaining width when the left side pedal is folded. This picture is misleading, as the pedal body is actually mostly behind the crankarm, with only the bearings exposed on the outside.

Left side pedal folded, with oversized bearings used to take the load.

The right side pedal is not a folding pedal, as there is no need to. When folded, the right pedal will be tucked in beside the front wheel, and does not stick out from the side or back of the folded bike.

Now, for the new MKS QR pedals, I chose the Promenade Ezy pedals as it has a simple design that will match the Brompton.

MKS Promenade Ezy pedals. The Ezy refers to the removable version of the pedals.

All the parts that come with the pair of pedals. There is a nice little pouch to hold the pedals if you need to.

Pedal washers will be needed if you have a recessed area on the crankarm, or if you want to adjust the Q factor of the pedals.

Yellow stoppers that clip onto the QR adapter, to prevent accidental release of the pedals.

Pair of MKS Promenade Ezy pedals weigh 355 grams

Brompton stock right side pedals...

Brompton stock left side folding pedals, very heavy for a pedal.

Stock pair of Brompton pedals, at 411 grams.

Before installing the pedals, I thought of checking the crank arm offset of the new Tiagra crankset, to see if I need to adjust the pedal position by adding pedal washers. The idea is to make sure that both pedals are located equidistant from the centre line of the bike, so that both left and right feet are positioned symmetrically.

To simplify measurements, I just used a vernier caliper to measure the distance from the Brompton main frame to the outside of the crank arm, where the pedal attaches. This method is shown below.

If you want to know the Q factor of the bike, just add up both measurements (left and right side), and minus off the diameter of the main frame.

Right side measurement is about 96.9mm

Left side measurement is about 99mm.

This measurement result is quite strange, as the right side is less than the left side. I had already placed a spacer of 3.6mm on the right side bottom bracket, and yet the right side measurement is less than the left side. I checked multiple times but always got the same result. Could the bottom bracket shell of the frame be offset to one side? Could it be due to the crankarm?

The outer diameter of the main frame is about 45mm. With these info, we can calculate the Q factor of this bike.

Q Factor = 96.9 + 99 - 45 = 150.9mm

This is after adding 3.6mm spacer on the right side of the crankset. The results show that in order to make the pedal position more symmetrical, I should add the pedal spacer on the RIGHT side, since the measurement is lesser than the left side.

Pedal spacer thickness is 1mm each. I shall put just one spacer, even though two will balance out the pedal position perfectly. Q factor is increased to 151.9mm.

Comparing the platform width of the stock right side pedal with the new MKS pedal. Almost the same, except for the missing bridge at the end of the MKS pedal.

For the right side pedal, there is no need for removal at all. The yellow stopper is thus installed on the right side to prevent any accidental removal.

MKS pedal adapter on the left side Tiagra crankarm, after the MKS pedal is removed. As the left side pedal will be removed more frequently, I opted to leave out the yellow stopper.

After folding the Brompton, the left side MKS pedal will be removed from the adapter for compact folding. As there is no yellow stopper on the left side pedal, I just need to take extra care during installation to make sure it is engaged properly with the pedal adapter.

What do you do with the left side pedal after removing it? If you are thinking of carrying it in a bag or somewhere else, there is a risk of leaving the left side pedal behind, separated from the bike. Luckily, there is a solution!

MKS QR pedal holder! Designed to hold onto the loose left pedal after removal.

This pedal holder will be installed on the rear hub axle, on the left side.

The pedal holder is designed to be fixed at a certain angle, ready to receive the pedal.

MKS pedal clipped into the pedal holder

After folding, the pedal holder will hold the left side pedal together with the bike, to prevent the pedal from being left behind somewhere.

With this new pair of MKS pedals, there is no need to fold the left side pedal anymore. Instead, the left side pedal is removed and clipped into the pedal holder.

Although it takes a bit longer to remove the pedal compared to folding the pedal, I prefer this as it eliminates the risk of scratching the frame, while it also makes the folded width a bit smaller. Also, the MKS pedals have a full metal construction for strength, as compared to the stock Brompton pedals which has some plastic parts on it. It is nice to use good quality pedals as compared to the lower quality stock pedals.

Sunday, November 11, 2012

Modifications to Flamingo London NX7: Crankset, Chainguard, Pedals & 1 Roller Wheel

Some upgrades to my humble Flamingo! Most of the time, an upgrade to the Flamingo is done not because I want to go faster, but just because it can be done!

I have recently upgraded the crankset for the Flamingo, from the stock Driveline 48T crankset to a new Shimano Sora 50T crankset. The inner 34T chainring was removed as it is not needed.

New Shimano Sora 50/34T crankset!

The stock chainguard cannot be used as the BCD of the crankset is different. The stock Driveline crankset has a 130mm BCD, but the Sora crankset has a compact BCD of 110mm. This is why I could not just install the same chainguard.

Without the chainguard, there isn't actually much of a problem. The chain does not drop off as it does not need to shift across a cassette at the back, because this bike uses an internal hub. The only issue is that because of the exposed chain,my leg sometimes touches the chain or chainring, leaving a mark on my leg.

Thus I sourced for a suitable 50T chainguard with a 110mm BCD. Ironically it is a Driveline branded chainguard.

The chainguard that comes with longer chainring bolts

Less common specifications, 50T with 110 BCD. Found only on compact cranksets.

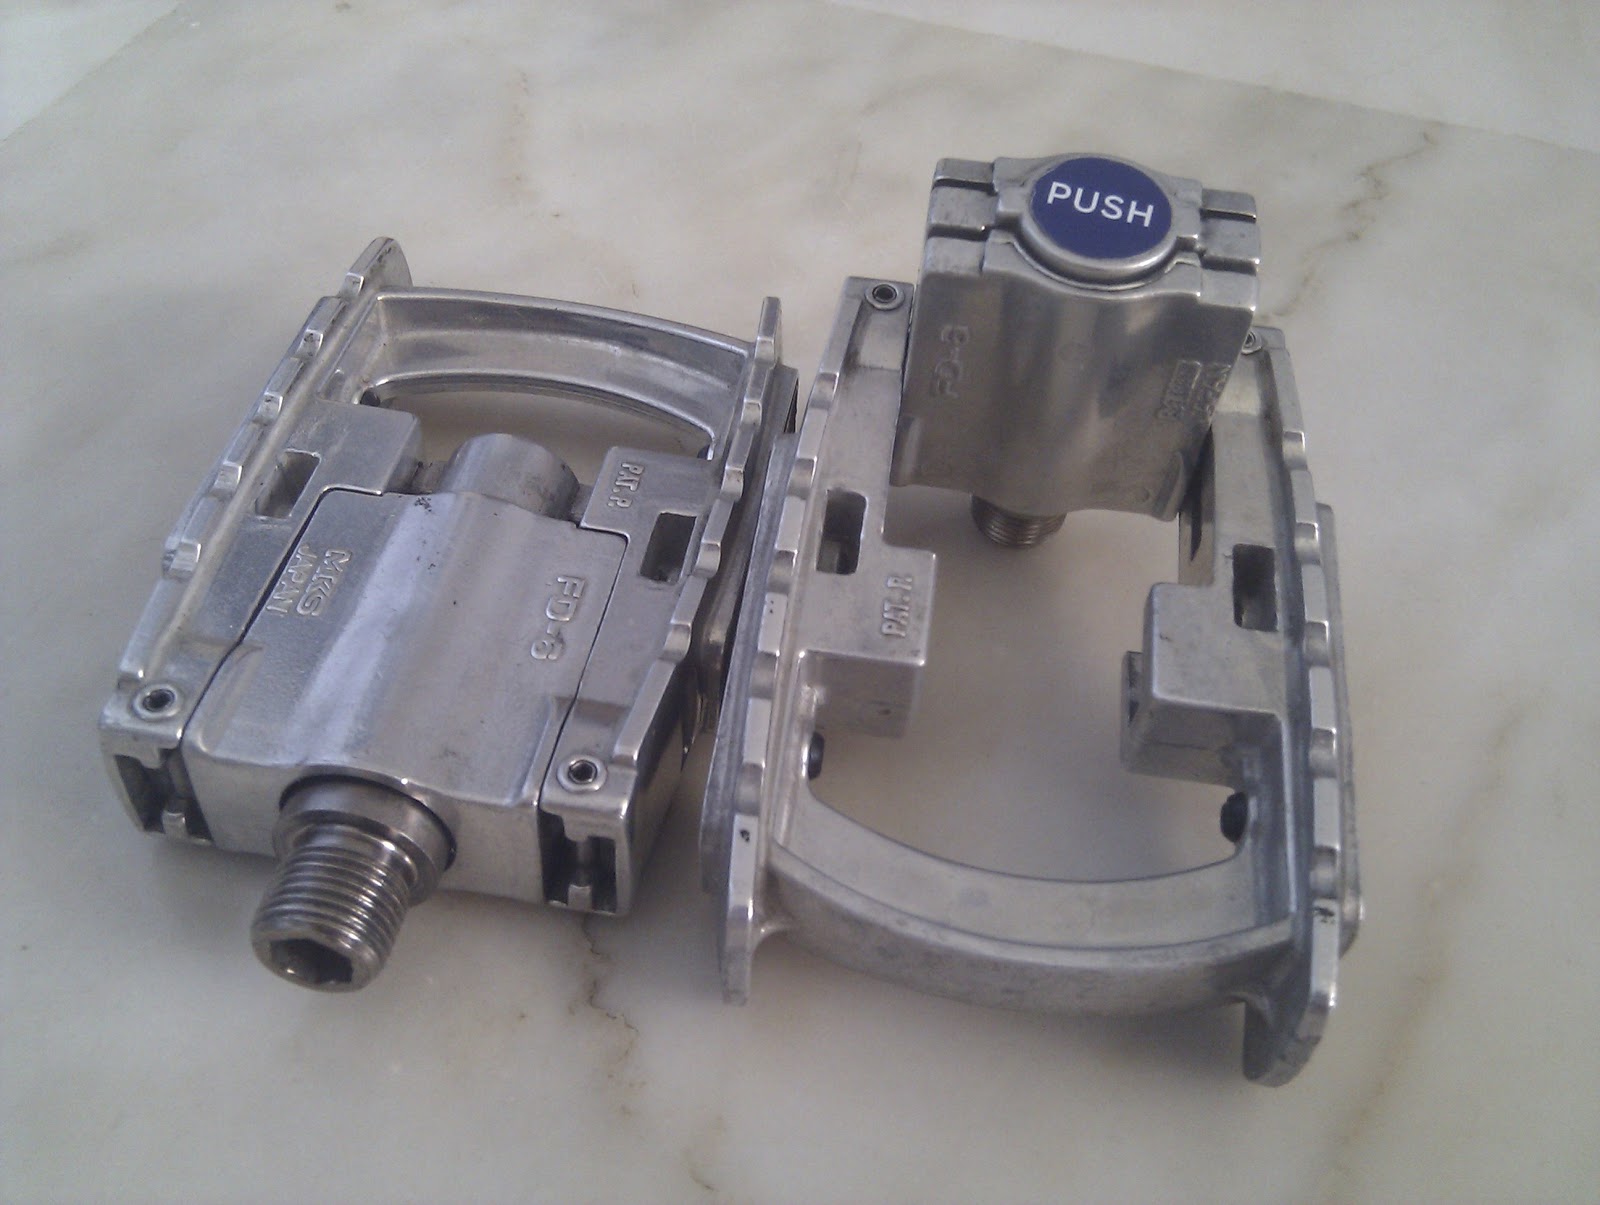
At the same time, I also got new pedals for the Flamingo. The stock plastic pedals are starting to develop quite a bit of play, and the bearings are becoming less smooth. Thus I got another pair of folding pedals. The best folding pedals that I know of are the MKS folding pedals, which I had used since my very first folding bike in 2008.

MKS FD-6 folding pedals

Chainguard and pedals installed!

The black and white artwork on the crankset and chainguard matches well with the Flamingo logo on the frame

Installing the chainguard was not so straightforward as there is very little clearance between the chainstay and the back of the chainring, when the bike is folded. This causes the rear of the chainring bolt to scrape against the chainstay when I tried folding the bike. I had to try a few different combinations of chainring bolts and spacers before I could get a good setup that allowed the bike to be folded.

Damage caused by the chainring bolts, before I figured out how to solve the issue.

The eventual arrangement of spacers, chainring and chainguard that solved the problem.

Another thing that I changed on the Flamingo is one of the roller wheels. I had previously changed the whole set of roller wheels to enable better rolling. As one of the roller wheel fixing points was bent, I had to use a bent bolt to realign the roller wheel. You can read all about it here.

As a side effect of that, one of the roller wheels is at a different level from the other 3. That causes the bike to lean to one side, and only 3 wheels touches the ground at any one time, which makes it a little unstable.

To solve that, I bought wheels that are slightly larger, about 10mm larger in diameter. By changing one wheel, it allows all four of the wheels to rest on the ground when folded.

Larger wheel shown on the right, larger by 10mm in diameter.


One big one small! Looks funny but it works well. 

With the larger roller wheel, all four wheels can rest on the ground at the same time, making the folded bike much more stable.

Flamingo with the modifications. Crankset, chainguard, pedals and roller wheels.

Saturday, September 10, 2011

Journey of the Boardwalk: Part 12 - LitePro Pedals

Finally found some time to write about the LitePro pedals! Previously I was using the MKS FD-6 folding pedals, which are very good folding pedals indeed. The MKS pedals have very smooth bearings, which is why many cyclists with folding bikes have changed to the MKS folding pedals.

However, being folding pedals, the folding joint is ultimately the weak link in the whole pedal body. After using it for about one and a half years, there is some looseness when the pedal is unfolded. The outer half of the pedal will have some play relative to the inner part which is bolted to the crank.

Of course, there is no big deal, as the pedals still work fine. Another reason I changed pedals is because with the new folding method that I am using for my Boardwalk, I find that there is actually no need for folding pedals. The pedals will actually be kept within the folded package, even without folding the pedals.

Comparing the pedals, these LitePro ones are actually much lighter than the MKS pedals. According to my slightly inaccurate weighing scale, the MKS pedals weigh 440g a pair, while the LitePro pedals weigh only 220g a pair, half the weight!

New LitePro pedals!

MKS FD-6 folding pedals

Installation was not too difficult, it only requires Allen keys of the correct size and some muscle power. Some people have asked me why I didn't get the gold coloured LitePro pedals instead. Actually I had considered it, but a whole slab of gold would look out of place. Also, I wouldn't bear to step on the shiny gold pedals! Black would fit the cranks better and not dirty so easily.

These pedals are actually about 1 cm shorter than the MKS pedals. Initially I was not used to the smaller platform, especially when I was wearing my oversized Crocs haha. However, when I used my cycling shoes, the size was just right. As long as you don't have huge feet, these pedals would not seem too small.

Size of the pedal fits my shoe nicely!

Also, since there is no folding joint, the pedals feels much more solid when I pedal hard. Can feel a slight improvement in power transfer. Even though the bearings in the LitePro pedals are not as silky smooth as the MKS pedals, I can't really feel the difference when pedalling.

Besides the seat clamp and these pedals, some other LitePro products that I am using include the gold chainring bolts and the gold stem for the handlebar.

Gold chainring bolts on the crankset

Gold stem to extend the reach of the handlebar!

More info regarding the LitePro chainring bolts and stem can be found at the previous blog entries!

http://handsonbike.blogspot.com/2011/06/new-bashguard-for-my-boardwalk.html
http://handsonbike.blogspot.com/2011/05/journey-of-boardwalk-part-8-advanced.html

Friday, January 28, 2011

Journey of the Boardwalk: Part 1 (Kinetix Comp & Avid Brakes)

Shall now document the upgrading of my Boardwalk, from its humble beginnings to its current version, Boardwalk Z9, where Z stands for Zhng, haha.

Some pictures of the almost stock Boardwalk, with 7 speed cassette, Grip Shift, original brakes, and Dahon Neos derailleur. The saddle was the first to go, bought a Biologic Aria saddle, still using it even now. This was followed by the brake pads, switched to Gigapower brake pads.


One of the first components that I upgraded was the pedals. Very smooth and nice looking MKS FD-6 folding pedals. Still using these pedals now.


Soon the poison began to seep in. Out went the stock wheels, in came the Kinetix Comp rims and the Marathon Racers. Got the rims second hand, so it was a good deal. Together with the new tires, there was a significant improvement in the ride! These fast rolling tires and wheels enabled my top speed to increase by at least 5 km/h, even riding casually seemed to take less effort. Plus, the 3M reflective strip on the sidewall of the tires look good too!


Next, the brakes were changed. I did not like the mushy feeling of the stock brake calipers, which seemed to flex too much. Also, the brake levers had too much play up and down, and did not feel assuring. Found that the Avid Single Digit 7 calipers and Speed Dial 7 levers have very good reviews, and are reasonably priced. As a bonus they come with stainless steel hardware, so I no longer have to worry about rusting on the brake parts.


Again, this upgrade proved to be worth it as the brake feeling has improved tremendously. The brake levers feel very solid, and the brake calipers rotate very smoothly on its bushings. The levers also come with a red knob to modulate the braking power, where you can control the force transmitted to the brake calipers. In the end I did not use that feature as all, just left it as it is.

Most importantly, the brakes also look good! In the next part of the Boardwalk Journey I will be describing the switch to 8 speeds and also the Ergon grips.