Showing posts with label Front Light. Show all posts

Sunday, April 7, 2024

Lumos Firefly: Quad Charging Mat and Handlebar End Mount

One of the cool accessories that the Lumos Firefly has is the Quad Charging Mat. The original Charging Cradle can only charge 1 light at a time, which is troublesome as I would usually charge at least 2 lights at one go.

With the Quad Charging Mat, I can charge 4 Lumos Firefly lights at the same time! Check out the pictures below to see how it works.

Quad Charging Mat for Lumos Firefly lights, available as an add-on accessory.

Plug in a USB cable into the Quad Charging Mat, and insert up to 4 lights to be charged wirelessly, at the same time!

Lumos Firefly: Bike Lights

Here are some modern bike lights with good connectivity! These are the Lumos Firefly which first launched on Kickstarter. It is very well funded on Kickstarter, and they provide detailed updates. Although the first shipment was slightly delayed, as per expected for almost all Kickstarter projects, it was not a big delay.

What's interesting to me is that the co-founded and CEO of Lumos, Eu-Wen, is based in Singapore. This meant that the backers in Singapore were the first to collect the Lumos lights in person, from a collection party at Kian Hong Cycle at East Coast Park.

Other than the lights, I also ordered other accessories as you can see below.

The lights and accessories are packed in a modular format, which makes it easy to customize the package according to what the user needs.

Pack of 4 lights! Includes stickers if you need to identify your lights.

Saturday, February 25, 2023

Specialized Aethos: Weight of Accessories and Tool Kit

Although the Specialized Aethos is a very lightweight road bike, the reality is that some accessories need to be added to the bike in order to make it more practical. 

Bottle cages and lights are necessary, as well as some simple tools to fix a puncture. You can always leave out some of these items, but there is a risk that you might get stranded if you can't fix a puncture yourself.

In this post, the weight of the bike accessories will be measured, to see how much weight is added onto a bare bicycle.

Specialized Zee Cage II side load bottle cage. A bit heavier as it is made of plastic instead of carbon fibre.

Generic carbon fibre bottle cage. Reason I got this is due to the gap between the two screw holes that allows an Airtag holder to be slotted in between.

Friday, December 10, 2021

Cycliq Fly 12 CE

Here is the latest generation of the Cycliq Fly 12 CE, which is an integrated front camera and front light. The first generation was called just the Fly 12, and it was a rather bulky unit. It was useful as a front camera to record incidents, and also as a front light.

However, it was always a pain to charge the original Fly 12, as there was no quick release mechanism to release the Fly 12 from the bike, in order to charge it. I had to park the bike next to a power socket, and connect the USB cable directly to the Fly 12. Also, the Fly 12 had to be loosened at the Gopro-style mount, in order to swivel it to access the charging port at the rear.

The alternative was to loosen the Gopro-style mount and remove the Fly 12 entirely, but it was troublesome as the interface was tight, and the angle had to be set again every time I removed it from the mount.

I mainly used it on my commuting bikes, the Avanti Inc 3 and then the Fabike C3. It is just too bulky and ugly to use it on my road bike, the Canyon Endurace.

Finally, the Fly 12 was retired ingloriously when the power button finally broke after long usage. Despite my best attempts to fix it, it only got worst after more usage. I finally decided to give up on it with little regrets.

Now, the second generation Fly 12 CE is out (June 2021), and it looks much smaller in size. Also, more importantly, there is now a quick release mount which will allow me to detach the Fly 12 CE easily for charging.

New Fly 12 CE!

Specifications of this new Fly 12 CE, with a more powerful front light.

Accessories that are inside the box for the Fly 12 CE. There is the Universal Adapter (middle) and the handlebar mount (right).

The locking shape of the Universal Adapter may look similar to the Garmin design, but it is not the same.

Before I installed the Fly 12 CE on the Focus Paralane, there was only a Garmin mount upfront for the Edge 530.

Comparing the Cycliq Duo Mount (aluminium) with the stock Garmin mount (resin).

New Fly 12 CE is more compact and squarish compared to the first version.

Camera and light positioned side by side

Charging port, SD card slot and reset buttons can be found under a waterproof trapdoor at the side. Much easier to access compared to the first generation design.

Power and Q button located at the side for easy access, as opposed to at the rear for the first version.

At the rear, there is only some holes for the beeping sounds to emerge.

Quick release tab located at the bottom of the unit, for easy removal from the bike. Very important feature.

Cyclic Duo Mount weighs 48 grams

Universal Adapter will be mounted to the Cycliq Duo Mount with a bolt using a Gopro-style interface.

Fly 12 CE unit itself weighs 195 grams, about 50 grams or 20% less than the previous version.

The total additional weight would be around 250 grams, which is roughly the weight difference between Ultegra and Dura-Ace. It is worth the additional weight if you want to record traffic incidents, or just record your ride.

Mounted under the Garmin, on the Cycliq Duo Mount.

Looks more compact compared to the first generation Fly 12. A big improvement.

Looks better with an all-black exterior, as compared to a large silver strip on the first version.

There are many noticeable improvements for this new Fly 12 CE, compared to the first generation. From the more compact size to the improved appearance, quick release function, easily accessible ports at the side as well as easily accessible buttons, it is much better.

Also, there was another issue with the first generation Fly 12, where the front light always turns on when you run the camera. It was not possible to use just the camera alone, without the light draining the battery unnecessarily. With the Fly 12 CE, the camera and light modes can be set independently.

I mostly use it as a camera only mode, as it ensures that the battery life will last the longest. I already have other front lights, so the Fly 12 CE front light only serves as a backup. 

It might seem like a waste to use this Fly 12 CE as only a front camera, when there are alternative cameras that are much cheaper. However, which other front camera can last more than 6 hours on one charge like this Fly 12 CE?

Overall I think that this is a good device to add to your bike, even though it is a pricey one.

Thursday, June 11, 2020

Moon Comet X Pro Front and Rear Lights

I have been using the Moon Comet lights on my bikes for many years, ever since they were first launched. I think they were one of the first to use COB (chip-on-board) LED lights, which gives a nice glow instead of sharp points of lights.

If you look back at my previous posts, I have been using the Moon Comet front light and also the Moon Comet rear light since year 2013, and they are still working fine! That is very impressive for a bicycle light.

However, recently the plastic Bracket that holds the light to the bike broke, and I had the choice to buy a new Bracket or buy a new light. Although the lights are still working, the battery life is now significantly shorter than before. This deterioration of battery life is to be expected due to repeated charging and discharging cycles. Therefore, I decided to retire these first generation of Moon Comet lights, and get a new set as replacement.

There is a specific reason why I still want to use these Moon Comet lights, as you can see later. Other than being good lights (bright, compact, lightweight, rechargeable), the Bracket that mounts it to the bike is special.

Moon Comet X Pro Front Light. The Pro version means a longer battery life compared to the non-pro version.

Other than being lightweight, there are multiple steady and flashing modes to make any user happy. Claimed runtime is also stated here for future reference.

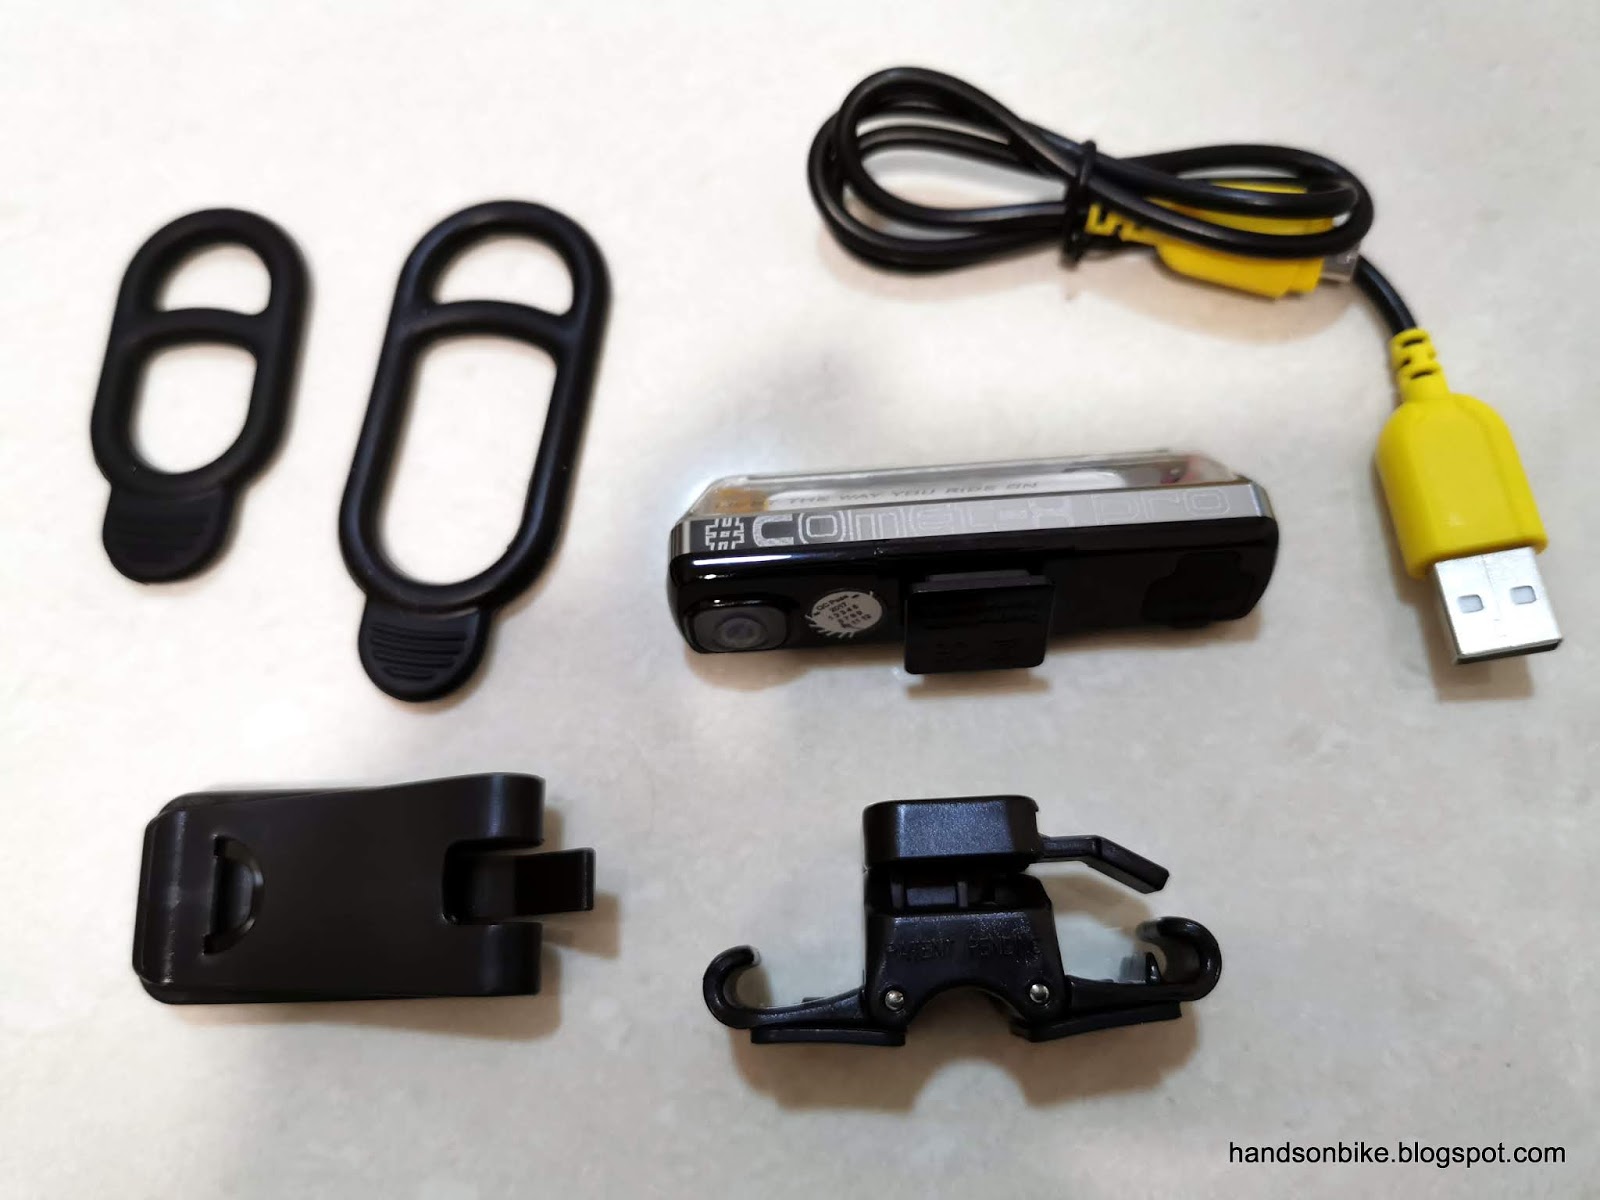
Other than the light, a USB charging cable, 2 rubber bands, a saddle bag clip, and a special mount is included.

The light has a clear transparent casing, so the internal battery and electronics can be seen.

Charging port is covered with a rubber flap, and a Micro USB port is now used instead of the near-obsolete Mini USB port that was used previously. I wouldn't mind if it was the latest USB-C port either.

Light plus special Bracket and rubber band weighs 46 grams.

At the same time, I bought the rear light as well. Although I already have the Cycliq Fly6 CE rear light + camera on my Cervelo Aspero, I wanted to use this rear light as a spare light. As already proven previously and also subsequently, it is necessary to have a spare light to augment the Fly6 CE, as it is not known for long battery life.

Moon Comet X Pro Rear Light, with the Pro version having a longer battery life.

Product information is in a different format compared to the front light. Optional accessories are also listed here.

For the rear light, other than the standard set of accessories provided with the front light, there is an additional saddle Bracket as shown at the top left corner.

Layout is the same as the front light. ON/OFF button located at one end, charging port at the other end.

Instead of having a clear transparent casing, it has a red transparent casing. Most likely it is the same plastic mold as the one for the front light, just with a red dye added. Clever way to save on different injection molding toolings.

Battery runtime and brightness stated clearly in the manual. I'm not too interested in the claimed lumens. If it looks bright enough to my eyes, it is good enough.

Here is the reason why I like these Moon Comet lights, because the innovative Bracket allows the front lights to be mounted on the front fork legs, freeing up space on the handlebars. This was first used on the Avanti Inc 3 commuting bike, where I mounted the Moon Nebula W front light. After that, I used it  successfully on the Canyon Endurace as well.

If I'm going to put front lights on the fork legs, might as well put on a pair for symmetry. Having two also allows built in redundancy, as it is very unlikely that both will run out of battery at the same time.

I mount them low enough so that the light from the opposite fork leg can shine through the wheel, instead of being blocked by the rims.

The special Bracket has a hinged V-shaped clamp that can be fixed on narrow fork legs, aero seat posts, or any round cylinder. Additionally, there is a sideways tilt, which is what makes this Bracket so versatile.

Mounting of the rear light is pretty standard on the seat post. The sideways tilt comes in useful again to shine the light horizontally. Normally the Fly6 CE will be there instead of this rear light.

The light is lightweight, compact, slim and bright. Only downside is the slightly higher price, but I think it is totally worth it.

I highly recommend this light, not just for the innovative Bracket, but for the overall package of compact size, lightweight, good brightness and battery life.

It also solves a problem that many road bikes have, where the front light cannot be mounted on the aero handlebar due to the shape or the size. By mounting the front lights on the front fork legs, visibility is very good, while it does not take up space on the handlebar or under the computer mount.

Thursday, October 17, 2019

Bike Friday HaD: Side Bags, Lights, Mudguards

Other than the accessories for carrying the child, there are also other accessories which are necessary for safety and comfort. On the Bike Friday Haul-A-Day cargo bike, there are massive side bags available for carrying cargo. These bags will also be useful when bringing the kid around, as their legs can slot inside the bags.

Big side bags by Bike Friday, which are specially designed for this bike. Weighs almost 600 grams for the pair.

Side bags mounted, one on each side. Other than hauling cargo, it also prevents the child's legs from touching the rear wheel.

When not in use, it does not add to the bike width at all. The widest part of the bike, other than the handlebars, will be the kick stand and wraparound bars.

The bags are ideal for the child's feet to rest inside, to secure the legs and help the child to stay balanced and upright.

These side bags can expand a lot, and can fit even a big school bag such as this.

When parked vertically, the side bags will more or less keep their shape. However, small items will fall out from the back as the rear of the bag is not fully covered.

When the bike is vertical, the holes at the rear of the side bag will allow items to fall out.

The side bags are super useful, as they can carry a lot of things with no fuss. Helmets, kick scooter, big bags, etc, no problem at all!

It is also good to install front and rear lights on the cargo bike, even though it will mainly be used in day time only. You never know when you will end up using it at night when it is dark.

There are many ways to mount a rear light, but I decided to mount it under the metal plate, using a tube to simulate a seat post. It is actually just a QR Axle Extender.

It is bolted to the metal plate via just one screw. Since it is hidden under the cushion, it is no problem.

This rear light is similar to the Moon type, but it is of the Entity brand, which is Polygon's own house brand.

The rear light wraps around the tube using a rubber strap, same as if it is strapped to a seat post.

Rear light is placed in a very visible spot, but it is also well hidden from damage, even when the bike is parked vertically.

Front light is a Moon Nebula W, which is bright and powerful, while also slim and lightweight. It straps onto the handlebar easily with a rubber strap.

Finally, the mudguards will also be installed. Weighs 452 grams for the set including all hardware.

As the SKS mudguards are from Bike Friday, they have been customized to fit the Haul-A-Day nicely, without any further DIY work necessary. Instructions for installation have also been included.

Front mudguard installed, with plenty of tire clearance. Spacers are needed under the bolts, to create clearance with the brake calipers.

Rear mudguard installed. Quite tricky to install with the rear wheel and side bags in place though.

No issue bringing along a kids bike as well!