Showing posts with label Stem. Show all posts

Sunday, May 5, 2024

Bestrider Pump Pro 20: Frameset, Handlebar, Seatpost, Saddle

It's time to disassemble the Bestrider Pump Pro 20, before starting the modifications! As there are some  stock components that are pretty good, I will be reusing them. As for the other parts which do not meet my requirements, I will swap them out for something better.

Bike frameset with most of the components removed!

Only the aluminium frame left!

Frame weight is 1370 grams, with one headset bearing. It was stuck and I could not remove both to weigh.

Using sealed headset bearings, which is much nicer than loose ball bearings.

Aluminium front fork, with the super tall crown and large width.

Front fork is 507 grams, which is pretty heavy. It can be lighter as proven by the Fnhon front fork.

Stock super short stem weighs 85 grams.

Stock stem length is just 35 mm, which is like a MTB stem.

Lightweight carbon headset spacers weigh 8 grams.

Freshly cleaned and ready for new components to be installed!

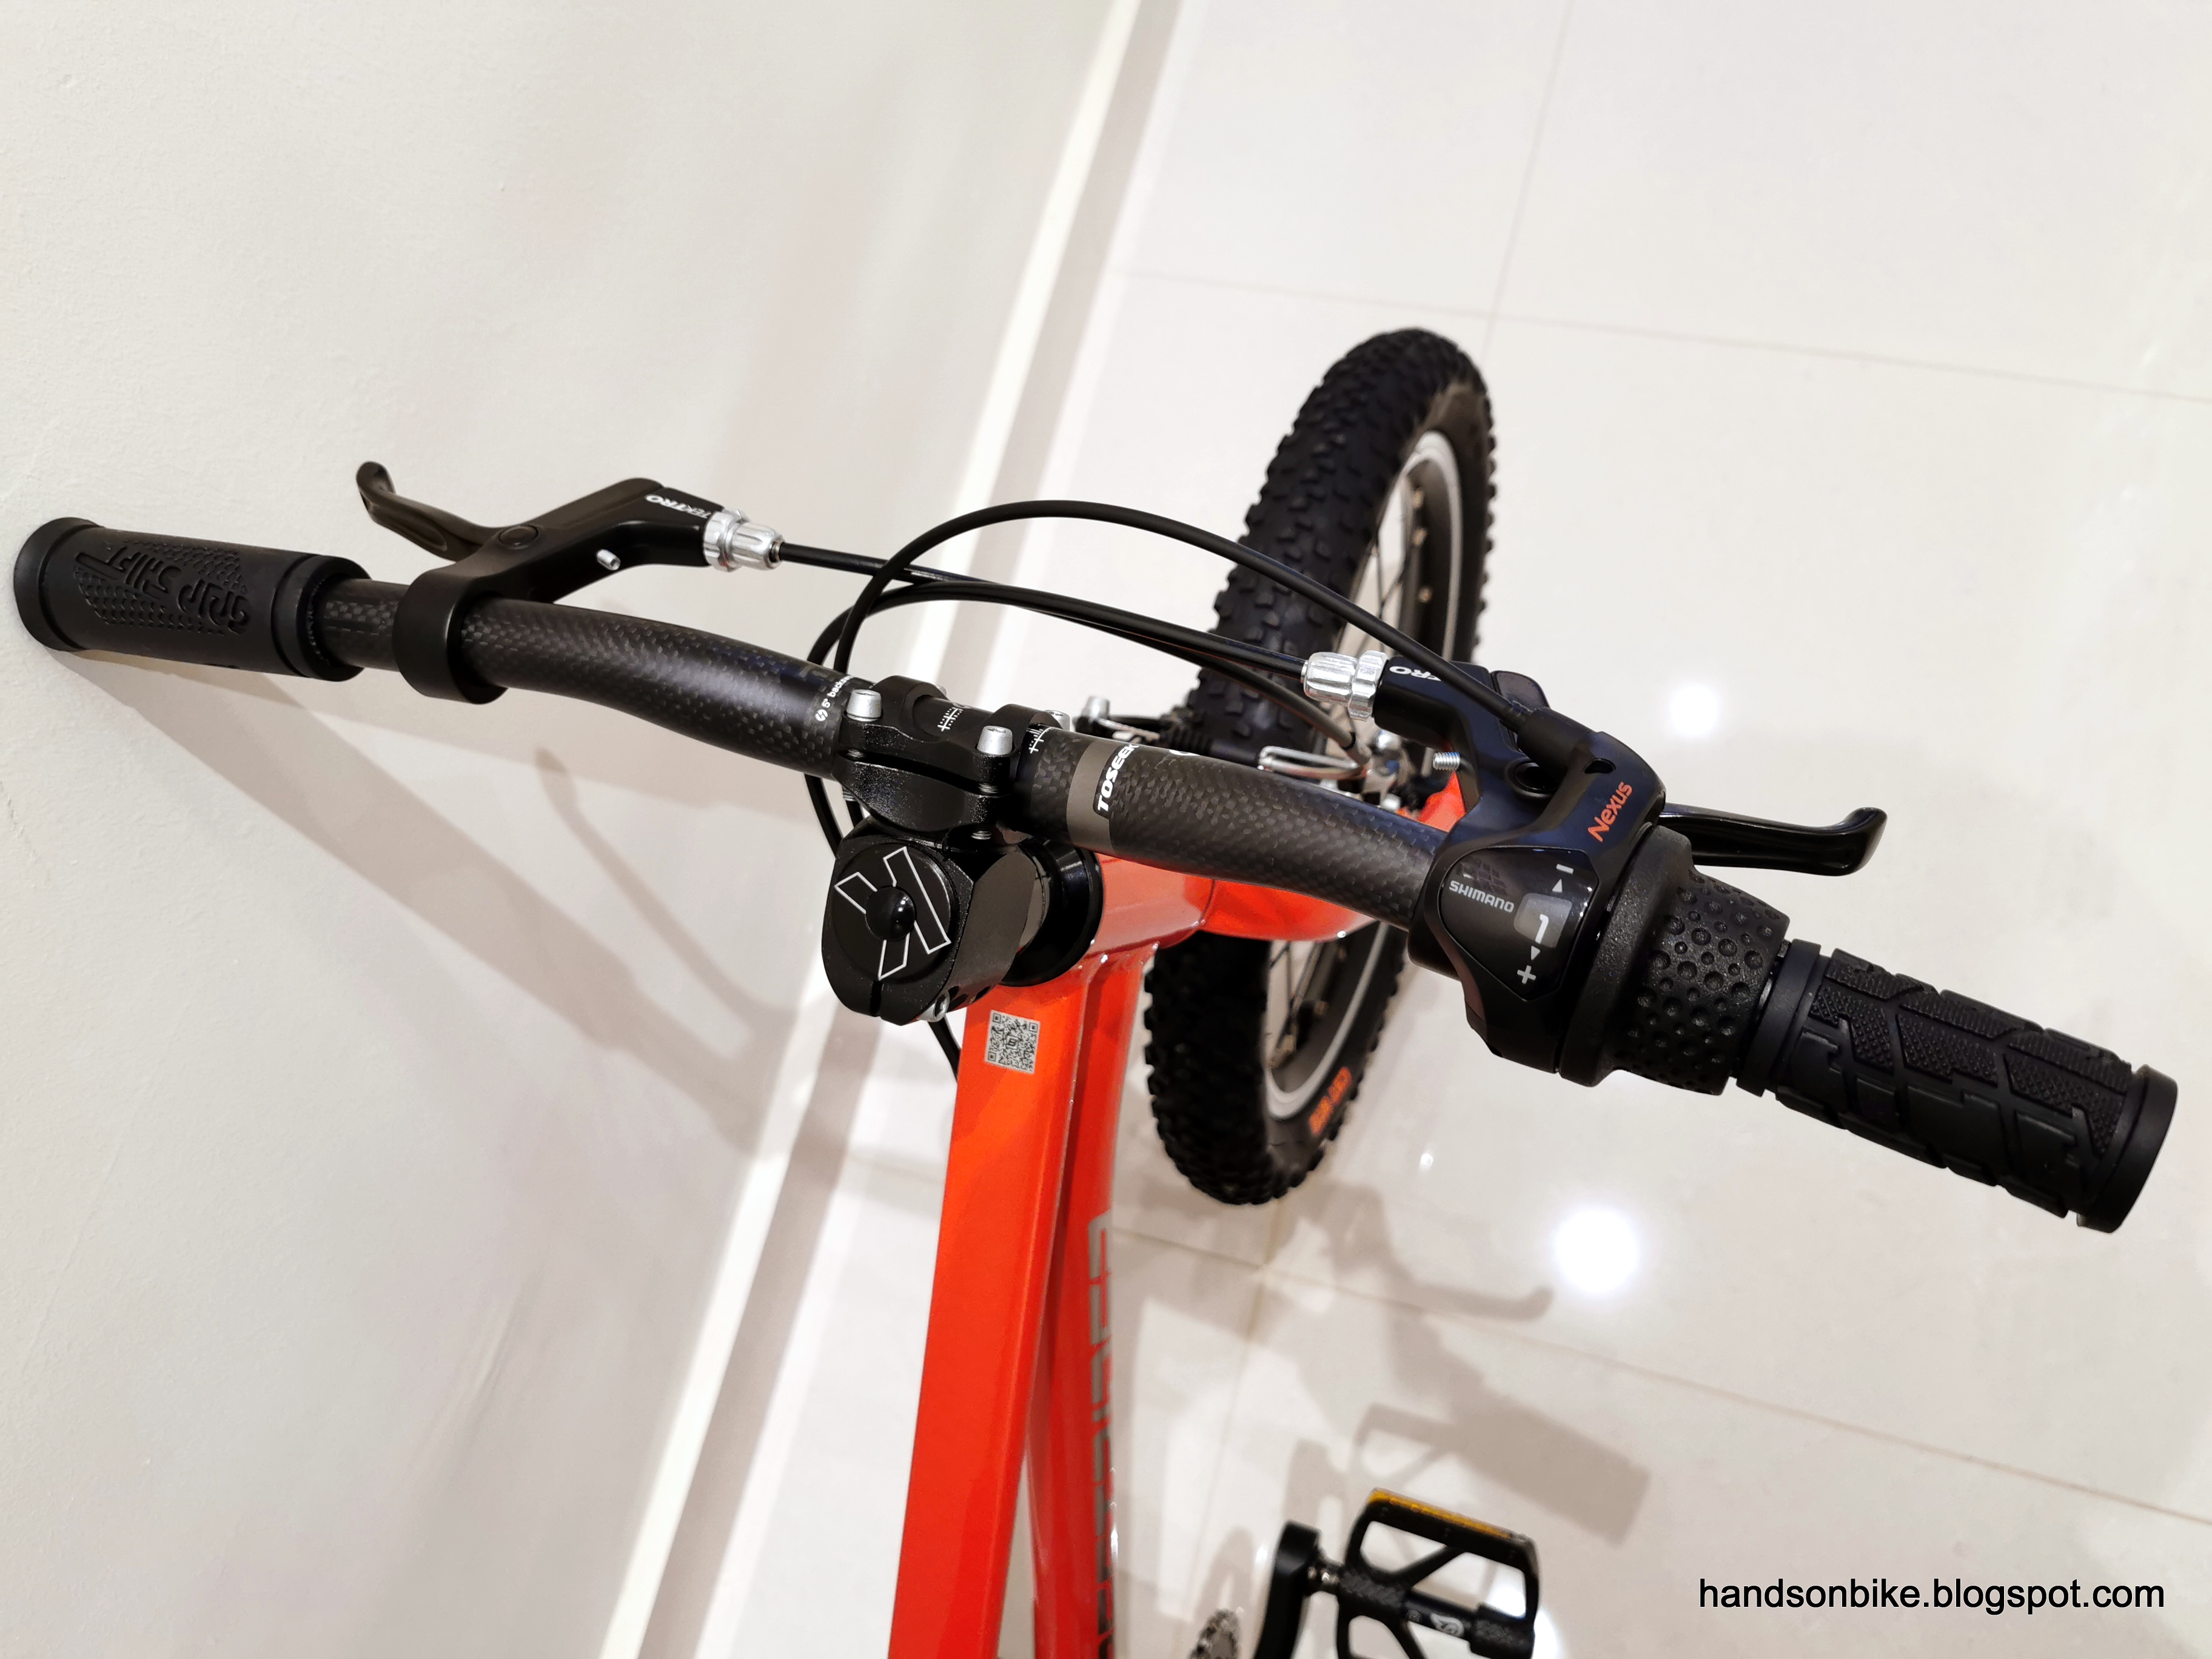
As mentioned in the earlier post, the stock riser handlebar is too wide and too high. Therefore, I will be changing to a straight handlebar that is also narrower.

On the previous Bestrider Pump Pro 16, I got a new carbon handlebar in the preferred width, so that I don't need to cut it myself. However, for this new handlebar, I could not find a stock handlebar that comes in the preferred width, so I need to cut it to the correct length myself.

New carbon handlebar with a width of 580 mm

After cutting to the preferred width of 520 mm, the weight of the carbon handlebar is 131 grams. 

I used a very general formula to calculate the ideal handlebar width. Based on this guide, the handlebar width should be about 0.44 of the rider's height. This gives a handlebar width of 520 mm. The weight is pretty OK but there are lighter ones available. The one I used on the Birdy is just 107 grams for 580 mm width. Not sure why this one is significantly heavier, probably because I got a cheaper one.

As mentioned in the first post, the stock seat post and saddle is pretty bad, which is why I have to change them. 
Stock saddle and suspension seat post! Let's see how much they weigh.

Saddle is only 185 grams which is light, but that it because it does not have saddle rails for adjustment.

Stock suspension seat post is heavy at 408 grams, despite the short length.

The saddle and seat post which I got for the Bestrider Pump Pro 16 was good, which is why I decided to get another set for this bike.

Stock carbon seat post of 350 mm length before cutting. Diameter is 27.2 mm.

As the seat post length is too long to insert into the bike frame, I had to cut 60 mm to ensure it can fit at the lowest saddle position. Weight is 203 grams after cutting.

One more SDG Fly Junior saddle for the new bike!

Blue colour was chosen to match the new bike frame

Weight of 260 grams, which is pretty heavy considering the smaller kids size.

The weight of the original saddle + suspension seat post is 185 + 408 = 593 grams. Changing to the new SDG saddle and carbon seat post is 259 + 203 = 462 grams, a savings of about 130 grams.

There are other new components for the Bestrider Pump Pro 20 kids bike, they will be introduced in the next few posts.

Saturday, December 24, 2022

Specialized Aethos: S-Works SL Stem and PRO Vibe Superlight Handlebar

In the earlier posts about the Specialized Aethos, I have shared some information about the frame, fork and other small parts that come with the frameset.

As the Aethos is designed to use a standard stem and handlebar, with no integrated cable routing at the front, it means that I am free to choose a stem and handlebar to use. I like it this way as I am not a fan of integrated cockpits. Although it looks very neat and clean, it takes a lot of effort to assemble this kind of integrated cockpits. If you leave this job to the experienced bike mechanics at the shop, it is not an issue for you. However, if you prefer to work on your own bikes, I would definitely prefer to have a non-integrated front end that I can work on easily.

For a lightweight build, the weight of every part needs to be considered carefully, as every gram counts. I have considered using super lightweight parts from Darimo, but the price is just too high for me to accept, at $750 for a handlebar and $650 for a stem. An alternative is to use Specialized own stem, which is pretty lightweight. It also matches the S-Works frameset which is a nice touch as well.

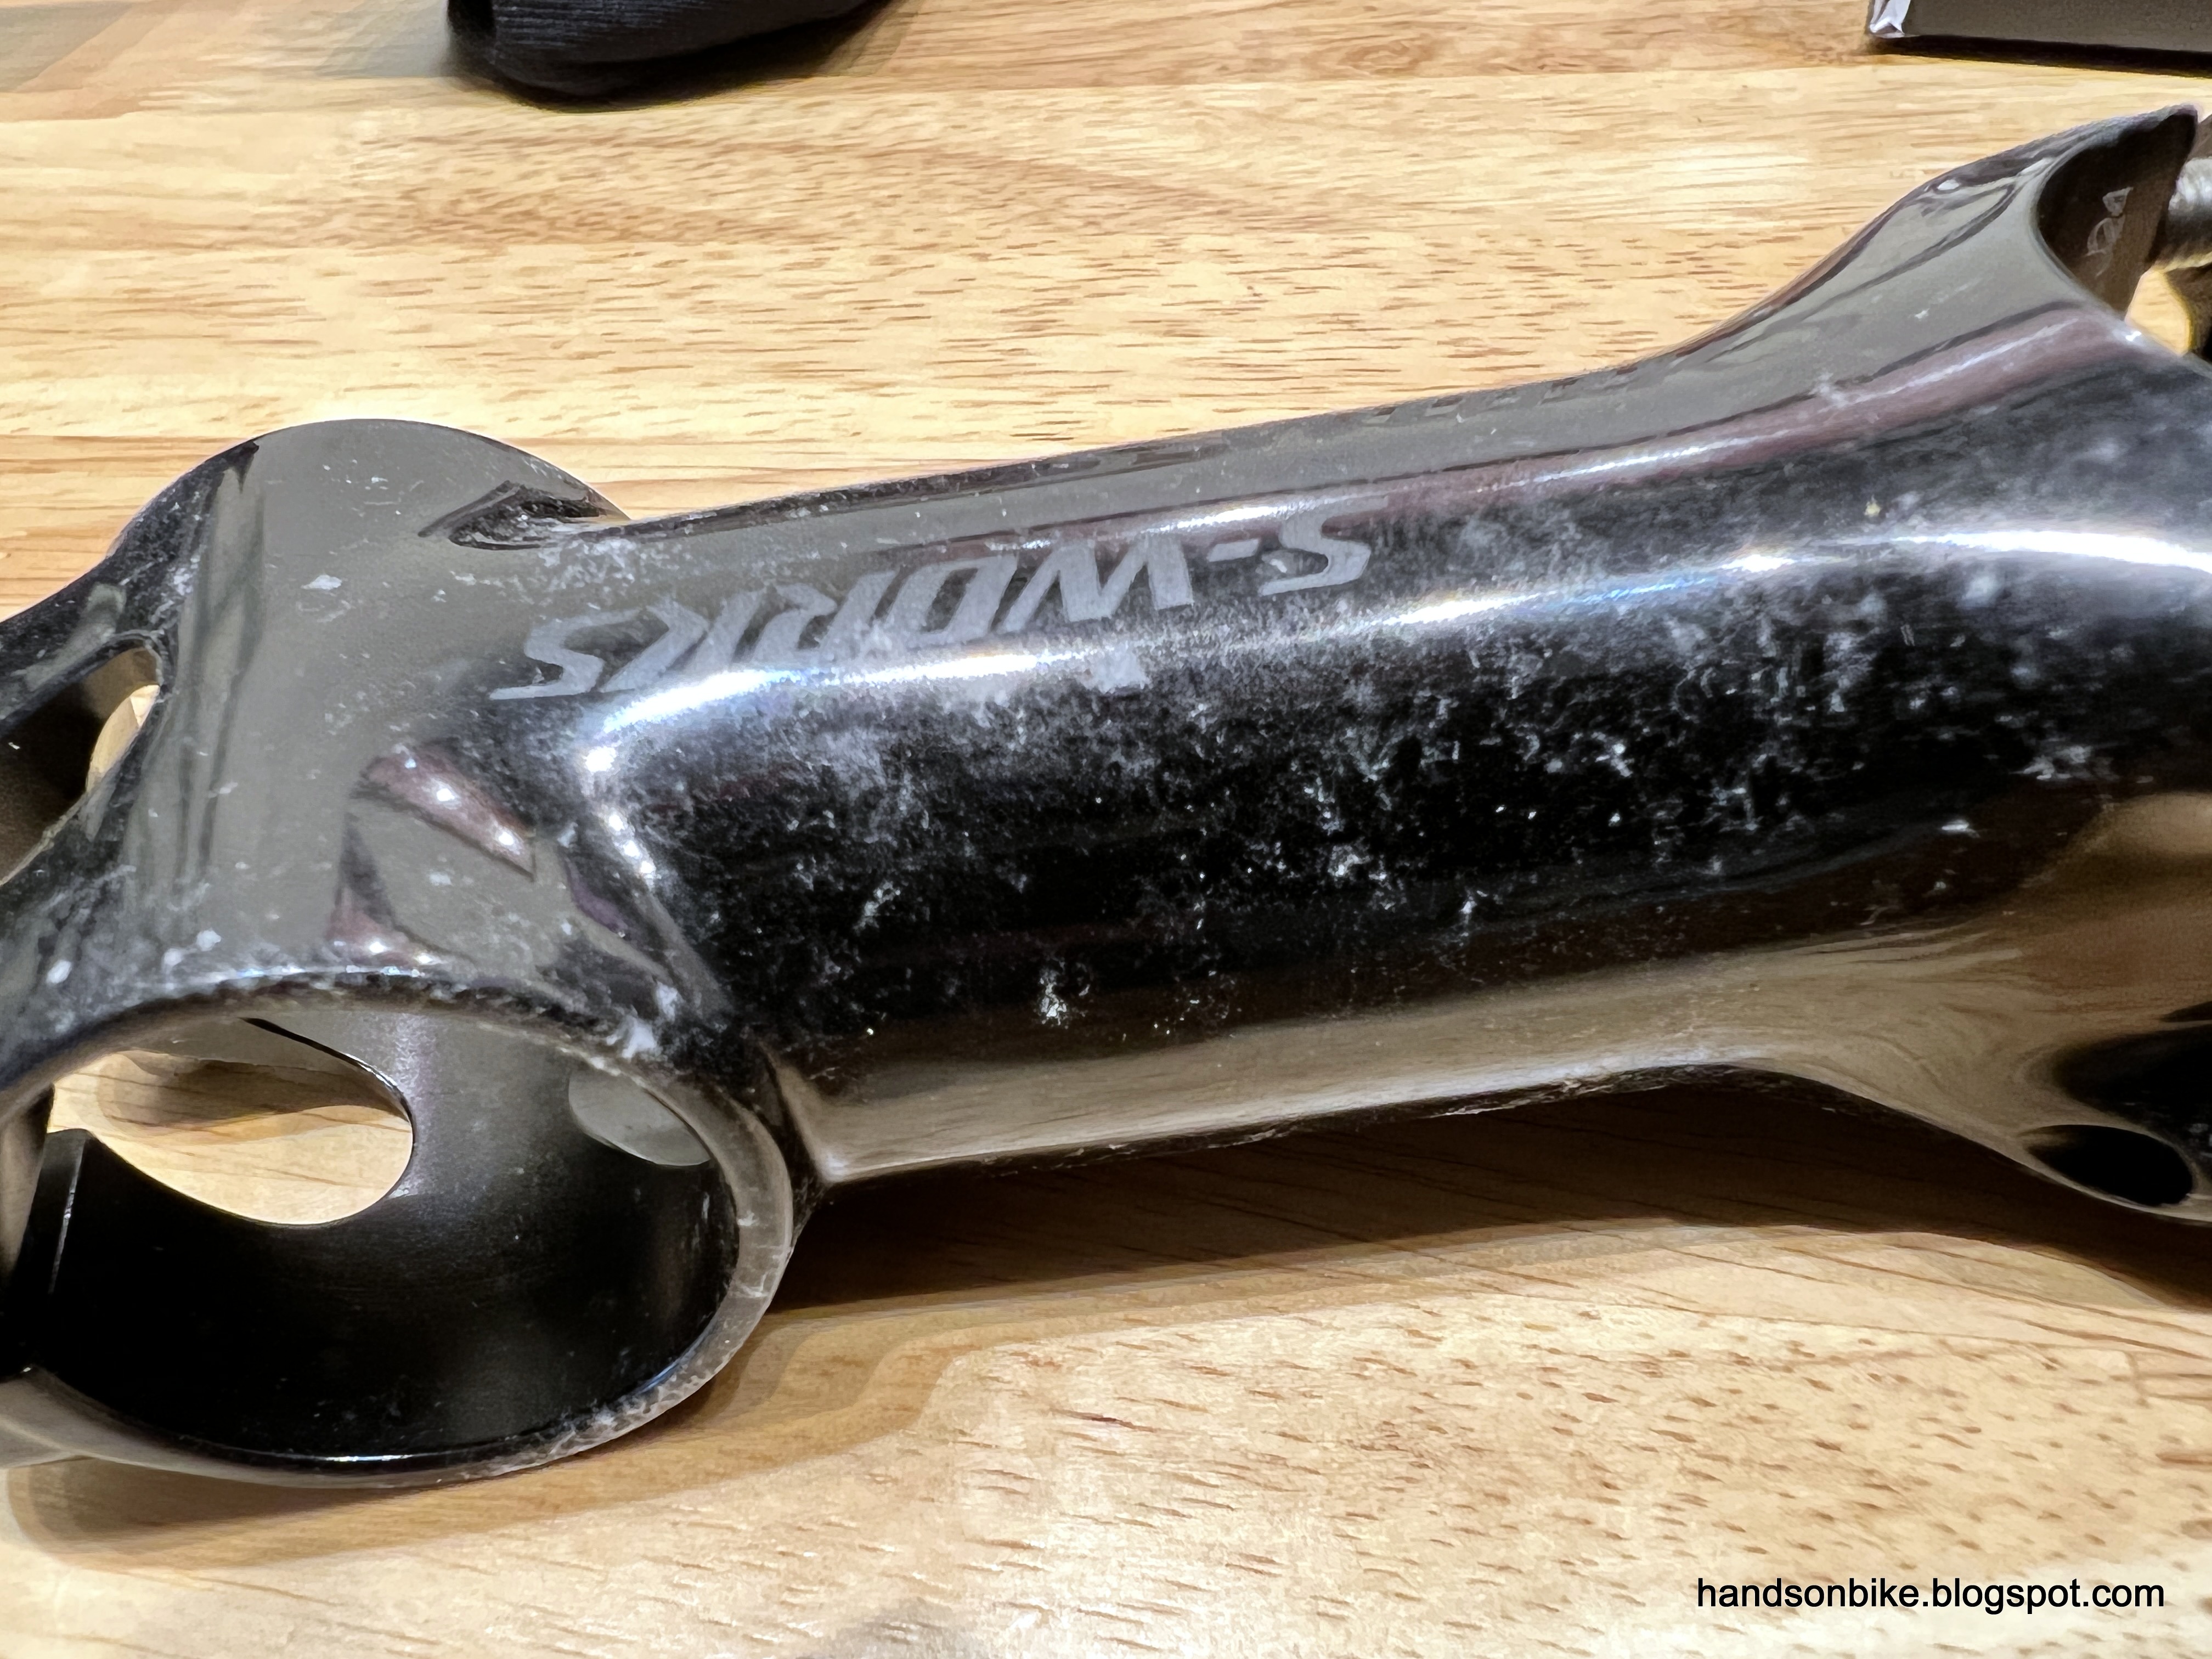
Specialized S-Works SL Stem, ordered online from the Singapore Specialized store.

I was surprised to see how moldy it is straight out of the box!

Saturday, June 11, 2022

Bestrider Pump Pro 16: Stem Upgrade + Exploration

This is probably the last upgrade post for this Bestrider Pump Pro 16 that I will be writing in a while. Starting from the stock bike, the drivetrain was upgraded from single speed to a 3 speed internal hub system. The tires were changed to slick type for lower rolling resistance, while the saddle and seat post were also changed to allow saddle position adjustment.

Now, I will be changing the stem, to improve the handling of this bike. I placed a GoPro on the stem cap of the bike, to record some riding videos from my kid's point of view. It is very interesting, and I found that the handlebar swerves left and right quite a bit even when riding in a straight line.

As I am unable to ride the bike myself to check the geometry, I suspect that this could be due to sensitive steering. It could be due to insufficient trail on the fork or some other geometry problem. Instead of being able to self-center when riding the bike in a straight like, the steering might be too sensitive, requiring constant input and correction to prevent it from steering towards the left or right side. I encountered this issue when I used a handlepost that was too short on the United Trifold.

Stock setup with a super short stem, MTB style.

Sunday, February 20, 2022

Focus Paralane: PRO Stealth Superlight Saddle, PRO PLT Stem, GRX Rear Derailleur

On the Focus Paralane all-weather road bike, I have installed a few new components recently. This was partly done during the bike fitting session at LOUE Bicycles, where some components were swapped or adjusted to optimize my pedaling efficiency on the bike.

Prior to the bike fitting session, I had already purchased a new saddle, the PRO Stealth Superlight Saddle, as I have heard many good reviews about it. I was not able to test one before buying it, so it was a leap of faith to buy a new saddle. That said, most saddles are bought without testing, unless there is already a bike with your targeted saddle for testing.

Previously I have been using the Selle Italia SLR Kit Carbonio Flow saddle, which has served me well. I used it across quite a few different bikes, also in the SLR Titanium version. It is lightweight and quite comfortable as well. However, the saddle width seems to feel a little narrow, especially after I tested some slightly wider saddles recently.

These pictures were taken before the bike fitting session, where the new PRO Stealth saddle was installed onto the bike at LOUE Bicycles.

One of the many PRO Stealth saddles in the Stealth saddle family.

This is the superlight version, with a one piece carbon base, and of course the highest price tag.

142 mm wide saddles seem to be the most common nowadays. It has a claimed weight of 145 grams, more than the Selle Italia SLR Kit Carbonio Flow, which is just 121 grams. Still lightweight though.

The cardboard packaging has a tool to help you set your saddle position as shown. However, I am not sure how useful it is.

Here it is, the PRO Stealth Superlight saddle! Subtle decals at the top, not flashy white ones like the older Stealth saddles.

Large center cutout with carbon bridges going across. The nose is quite wide as well.

Carbon shell at the end, with the Stealth logo.

Side view, with a thin shell and low profile. Slight upward curve at the rear of the saddle.

Carbon saddle rails, with a 7 x 9 mm oval dimension.

Carbon rails are moulded right into the carbon shell! This is why it is so expensive.

Same integrated construction at the front of the saddle.

There are two threaded holes at the bottom of the saddle, which can be used to mount accessories like lights, cameras, tool kit, etc. Unless you DIY, a PRO camera bracket is needed.

Weighs 157 grams, instead of the claimed 145 grams. 8% overweight, which is unacceptable for such a high end product where weight is a key selling point.

Here is how it looks on the bike! From this angle it looks really wide.

More details on the saddle fit over at the LOUE Bicycles post, but the first impression is that it fits me well. There is better support due to the wider shape and upward curve at the rear.

Other than the saddle, the stem was also changed. Similarly, I had also purchased a new stem prior to the bike fitting, as I felt that the stem length was not quite correct.

To be fair to Timothy of LOUE Bicycles, he did not switch to the new saddle and stem just because I brought it along. Rather, he first noted that what I had on my bike wasn't quite suitable, and asked me if I brought anything to swap. What he recommended was exactly what I had brought along, both in terms of a wider saddle and also a longer stem, as shown below. Seems that I already had an intuition about what I needed to change on my bike, even before the bike fitting session.

A 90 mm version of the 80 mm PRO PLT Stem that I first used when building up the Focus Paralane.

90 mm stem installed on the bike! A slightly longer stem was recommended to get the proper reach and riding posture for road bike riding.

Looks exactly like a normal road bike, before I reinstalled the SKS mudguards.

Finally, another modification that I made was to change the rear derailleur. Previously, when I installed the Sunrace RX1 11-36T cassette on the Focus Paralane, I used a Wolf Tooth Roadlink DM adapter to extend the reach of the Dura-Ace rear derailleur. This is to allow the Dura-Ace rear derailleur (rated for max 30T sprocket) to reach the larger 36T sprocket.

It worked quite OK, but there was always a bit of problem when shifting between the smallest 12T and 11T sprockets. At this position, the guide pulley of the rear derailleur is too far away from the sprockets to produce reliable shifts. This is because the Wolf Tooth Roadlink DM basically just shifts the rear derailleur lower, allowing it to reach the larger sprockets. However, this also moves it too far away from the small sprockets, sacrificing shifting performance.

Since I have the GRX RD-RX815 rear derailleur available for use, I decided to install that on this bike. Previously it was used on the Canyon Endurace and then the Cervelo Aspero, for a 2x11 speed gravel/road hybrid drivetrain. Since I have already converted the Aspero to a dedicated front single gravel drivetrain, it uses a different rear derailleur (RD-RX817).

The GRX RD-RX815 is a rear derailleur that is designed for a maximum sprocket size of 34T, instead of 30T for the Dura-Ace rear derailleur. That means using this GRX rear derailleur on a 36T large sprocket is only slightly beyond the rated capability, which I believe it will handle with no issue. Most of all, I hope it can solve the intermittent shifting problems I faced between the 12T and 11T sprockets.

GRX RD-RX815 rear derailleur installed onto the Focus Paralane.

The GRX rear derailleur has a clutch, which can be useful for chain management, but probably not required on this road bike. It can be turned off to reduce shifting effort and thus conserve battery power.

After testing, I am pleased to find that it shifts well across all the gears, including the smallest 12T and 11T sprockets! Shifting performance restored.

The SKS mudguards look pretty stealthy, as the high profile carbon wheels helps to camouflage it.

With a new saddle, new stem and new rear derailleur (relative to this bike), the Focus Paralane has been refreshed yet again. My bikes are always evolving, as I test and swap various components, depending on my requirements (which also changes from time to time).

Wednesday, February 2, 2022

Bike Fitting at Loue Bicycles - Initial Fitting

Although I have been riding bikes for quite a number of years now, I have never gone for a proper bike fit. I have always adjusted my bikes based on my feeling and advice from experienced cyclists. So far it has worked pretty well, with the handlebar and saddle positions more or less optimum.

However, on faster or longer rides, I will tend to feel uncomfortable, as if some setting is wrong. The hamstrings or calves will feel stretched, even though the saddle is not too high. Generally it is OK to ride but I just feel like it is not optimized.

That is why I decided to go for a proper bike fit, to see what is the issue. A better position will improve the efficiency of my cycling, more than any equipment upgrade. Based on recommendations, I went to Timothy of Loue Bicycles for a Classic Dynamic Bike Fit.

There is a 3 month waiting time, so I had to wait patiently after booking a bike fit session. Apparently each bike fit takes quite a few hours, so there is only a limited number of bike fits that can be done each day.

The day has arrived! Loue Bicycles is located just above the F45 gym at 11A Lichfield Road.

Brought my Focus Paralane road bike there, to get it fitted properly for road riding. Removed all the accessories to make it easier for adjustments.

Here we are!

With the bare minimum components necessary, even the mudguards have been removed.

I have never gone for a bike fit before, so I was not sure what to expect. Before I started pedaling on the bike trainer, Timothy started by analyzing my body posture and balance while barefooted. This will help to find any issues with flexibility or motion limitations.

Since I was using MTB SPD cleats, he also reset the cleat position to a more efficient and stable location.

Apparently my cleat position was too far forward, which can lead to ankle instability and calf strain during hard pedaling. A better position is to place the cleat slightly behind the joint of the big toe, which will improve the pedaling stability.

To do that, he pasted a tiny magnet on the joint of my big toe, and then I wore my shoe with the magnet attached to my foot. From the outside of the shoe, he used another magnet to locate the magnet on my foot, this transfers the toe joint position to the outside of the shoe.

Then, using markers, he traced the position of my toe joint all the way down to the bottom of the shoe, where the cleat will be fixed.

Using markers to indicate the position of my toe joint, and trace it all the way down to the bottom of the shoe, where the cleat is.

The cleat is set slightly rearward of the toe joint, for better ankle stability and pedaling efficiency.

See how big the difference is! The new position is shown on the left, while my old cleat position is on the right. I think it shifted by almost 20 mm.

Only then did I get on the bike and start pedaling, with the new cleat position.

The new cleat position felt different, as a 20 mm change is very big. However, it felt better, as the ankle is really more stable, due to the shorter distance between the ankle joint and the cleat. To think that I have been cycling with a poor cleat position for such a long time!

The bike trainer is placed on a movable platform, which can swivel 360 degrees. This is because there are cameras at the sides, while the Retul bike fit sensors are on another wall. By swiveling the platform, the cameras and sensors can view and measure all around the bike.

Timothy noticed that while I was pedaling, my right hip was swiveling forward. He actually predicted this earlier, when I did a plank posture on the floor. He noticed that my right hip dipped downwards quite a lot compared to the left side.

True enough, this natural asymmetry of my body causes my right hip to swivel forward on every pedal stroke. When the hip swivels forward, it effectively shortens the distance from the saddle to the pedal. The result is that the saddle height is too low for my right leg, while it is too high for my left leg.

Picture from the rear, showing how my right hip swivels forward on every pedal stroke.

This asymmetry is made worse by the saddle, which he says does not provide me with enough support. I have been using the Selle Italia SLR Kit Carbonio Flow saddle for many years, and I have a titanium rail version of it on my other bikes as well.

Although this saddle shape is nice and are super lightweight, they are not wide enough for me, at just 130 mm wide.

By placing a pressure sensitive mat on my saddle, it can map the pressure points exerted by my sit bones. Here is how it looks like below.

Pressure map on my Selle Italia saddle, with more pressure on the left side compared to the right side.

The saddle pressure points correlates with the observation from the camera, where the right hip swivels forward. Since my saddle height was set (unknowingly) at the mid point between my right leg and left leg reach, it means that the saddle is actually too high up for my left leg. On every pedal stroke, my left leg has to overextend in order to reach the bottom of the pedal stroke, which is why there is higher pressure on the left sit bone. This was the discomfort that I felt, but I could not explain what it was, without the cameras and sensors showing what is going on.

Apparently most people have some degree of asymmetry, so it is quite normal. From his experience, it is difficult to correct body asymmetry, as the body tends to revert back to what it is used to under high load or stress. It is more sustainable to adjust other parts to suit the body asymmetry.

For a start, I need a saddle with better support, which means a wider saddle. Somehow I had already felt that the saddle might be one of the causes of my discomfort, which is why I had already bought a new saddle, but did not fit it on the bike yet.

This is the PRO Stealth Superlight Saddle, which is the lightest version of the Stealth saddle. Everyone I know who has tried the Stealth saddle has high praise for it, which is why I got one as well without even testing it. A separate review of the saddle will be done subsequently after more riding.

PRO Stealth Superlight Saddle, with a monocoque carbon shell integrated with the saddle rails.

Since I had already brought the saddle to the bike fit, Timothy helped to fit it onto the bike, and also adjust the saddle height. After some height and angle adjustments, the saddle pressure was checked again.

This time, the saddle pressure is much more balanced between the left and right side, as shown below. It is amazing how a wider saddle can improve this asymmetry between my left and right pedaling strokes.

With the new PRO Stealth saddle, the saddle pressure is almost equal between the left and right side (right view is with the new PRO Stealth saddle).

Using the side camera to help optimize the saddle height and position. This has to be done before moving on to the handlebar position.

Although the PRO saddle has much better support, it still does not completely solve the asymmetry caused by my right hip rotation during pedaling, as there is still a slight leg length difference. There is another adjustment that Timothy did to the cleat, which I will explain in the next post.

For this bike fit, we started with the cleat positioning, followed by the saddle position. This pedaling platform has to be set correctly before we can move on to the handlebar position.

With the saddle height adjusted, next is to adjust the height and reach of the handlebars. Based on what Timothy sees, the height of the handlebar is OK, but the reach can be longer. I had also bought a longer stem, in anticipation of this issue. It seems like I roughly knew what was wrong with my riding posture, but without an expert analysis, I could not quite highlight the exact issue.

By swapping the stem from 80 mm to 90 mm, the reach is better for road riding. 

PRO PLT Stem, 90 mm long.

So far, the saddle has been changed to a wider one, while the stem has also been changed to a longer one. During handlebar adjustment, he also asked why I used a 38 cm wide handlebar. It was strange as I was sure I was using a 40 cm wide handlebar as I always did.

Upon measurement, we found that although the handlebar is labeled at 40 cm, it is 40 cm wide only at the drops. At the top where the shifter hoods are, it measures about 38.5 cm. There is some flare on the handlebar which explains this difference, which I have never noticed.

I can either keep this slightly narrower handlebar for better aerodynamics, or change to a proper 40 cm handlebar next time. For now, no problem to continue using it.

Finally, after the bike has been adjusted to be optimum for me, it is time to record down the measurements, so that this same measurements can be transferred to other bikes. I thought he was going to measure the dimensions one by one to record them down, but it ended up being much more high tech that I expected.

With the Retul sensors on the wall recording the position of the probe, he started tracing the position of critical points on the bike. Using the probe, he followed the sequence on the screen to trace the required areas on the bike.

For example, to log the centre of the bottom bracket, he inserted the tip of the probe into one of the chain ring bolts, and turned the crank one round to mark the centre of the bottom bracket. Next, he traced the profile of the saddle, and this automatically gives the saddle height relative to the bottom bracket. Other measurements include tracing the shifters to give the handlebar height and reach, etc.

This is basically measuring the entire bike using a Coordinate Measuring Machine (CMM), where the key dimensions of the bike is traced and recorded.

Bike geometry definitions

And this is my bike fit data! All these measurements are automatically calculated based on the probe tracing of the key bike components.

I was very amazed by the CMM measurement of the bike geometry, it is so much easier, faster and accurate than manual measurements. With this data, I can transfer the same setup to another bike for the same bike fit.

Summary of changes:
1) Cleat position shifted rearwards by about 20 mm
2) Saddle width changed from 130 to 142 mm
3) Stem length changed from 80 mm to 90 mm
4) Saddle height adjusted based on new cleat position and saddle

There are other changes, which I will explain more in subsequent posts.
5) To get better insoles with more support for the foot arch
6) Cleat shim added under left cleat


It will take some time to get used to the new bike fit, but it should get better once I ride more in the new posture. The whole session took 3 full hours, 1 on 1 with Timothy. I learnt a lot and now I know the value of a good bike fit. There is no point getting the best bike if you don't fit well on that bike.

To be continued!