The next component to be removed was the crankset. As this is not the more common Hollowtech II crankset, it took me a while to figure out how to remove the crankset. Luckily it did not require any special tools, or it would not have been possible to remove it.
As a FSA Goassamer crankset, it is considered a mid-high end crankset, much like the Shimano 105 crankset. This FSA crankset does have a larger spindle which is 30mm in diameter, which is bigger and stiffer than the 24mm Hollowtech II type of spindle. Also, it has a BB386 spindle, which means that it is BB30 compatible, with a press fit BB width of 86mm.
Large diameter BB386 spindle looking pretty stiff
Weighs 519 grams on the right side including 52/36T chain rings
251 grams for the left crank arm, including the integrated crank bolt
Total weight of 777 grams including the spring washers. Very similar to the weight of the Shimano 105 5700 crankset.
Overall view of the clean crankset
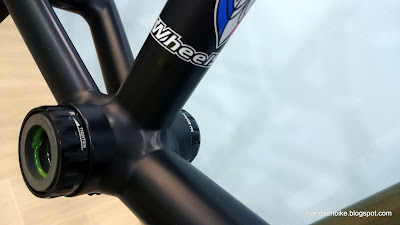
Press fit bottom bracket in the frame. Nice and clean now!
After removing the crankset from the frame, it was easy to clean up the bottom bracket area. As it is a press fit bottom bracket, it is not worth the trouble to remove the bottom bracket.
Also note the rear caliper brake which is mounted underneath the chain stays, supposedly for better aerodynamics as compared to being mounted on the seat stays. It is also a direct mount brake, which should give better braking force as compared to the usual type that is mounted with the centre bolt. One major disadvantage of being mounted underneath is the difficulty of servicing the brakes. Most of the time, it is necessary to remove the crankset or chain rings to make adjustments to the brake, as the chain rings will block access to the brake.
This bottom mounted rear brake also does not have a quick release adjuster, which makes it more troublesome to remove the rear wheel. More elaboration on this issue can be found later on.
Bike frame is flipped upside down for better cleaning of the rear caliper brakes.
In order to allow the rear wheel to be removed, the rear caliper brake needs to be opened up. However, since there is no quick release adjuster, Merida added an inline cable adjuster to the rear brake cable, near the handlebar area (shown below). However, this is not ideal as it is not as convenient as a quick release lever, and is it not possible to get back the same cable tension setting after removing and installing the wheel.
Original setup, with the inline cable adjust for the rear brake.
A better solution is to use an inline quick release adjuster, such as the Shimano SM-CB90 Brake Cable Adjuster, which has a quick release lever. This should have been used, instead of the stock cable adjuster, since the rear brake does not have a quick release lever. I decided to change the stock adjuster to the SM-CB90 brake cable adjuster for future convenience.
At the same time, since the original brake cable adjust needed to be removed anyway, I changed out the rear section of the brake outer casing to a new section. This involved some internal routing through the frame, and so it took quite a bit of time and effort.
Changed to the SM-CB90 Brake Cable Adjuster, which is the correct part to match the rear brake caliper.
Rear section of the brake cable outer casing, passing through the frame
Direct mount front caliper brakes by Tektro. Cleaned and lubed for smooth operation.
Scuffed right side shifter and name plate, which was probably sustained at the same time as the scratches on the rear derailleur.
Cassette is clean and shiny after a thorough cleaning. As you can see, there is very little wear on the sprockets which means low mileage on this bike.
The shifters were not removed, because they were not really dusty, and also because it was too troublesome to remove the bar tape and the shifters. With that, the disassembly is complete!
Now, since most of the components are already off the bike, I took the chance to clean and wax the bike frame. As a bike frame with a glossy finish, it is great to make the frame nice and shiny again.
It is now time to reinstall all the cleaned up components. Assembly in progress!
Bike is partially assembled, to be continued!
Part 3 to be continued


