Monday, March 30, 2015

Bike Shops at Downtown San Francisco

I recently had the chance to go to San Francisco, United States, and I took the chance to check out some bike shops there. If you do have the chance to go there, you can follow the brief guide that I have below to check out some bikes and accessories.

The area that I was visiting is downtown San Francisco, where the main shopping malls are located. From Westfield San Francisco Centre at Market Street, I walked around to visit the 5 bike shops that were within walking distance. Of course, I had to do some research beforehand to locate these bike shops and the most efficient way to visit all of them.

Map of 5 bike shops at downtown San Francisco. I visited them in the order shown above.

1st stop, Pacific Bicycles. Not to be confused with the Taiwanese company Pacific Cycles.

Lots of nice high end Santa Cruz MTB in here, with a great selection.

They also have Scott and Giant bikes, and lots of road bikes too

Very nice Giant Propel aero road bike with Dura-Ace 9000 components

Trek road bike with a lovely Bianchi green colour scheme!

Next, I walked all the way down to Marin Bikes

As the shop name says, they have many different models of Marin Bikes. Did not really see other brands of bikes.

The third bike shop is Mike's Bikes which is nearby

The bike shop is divided into 2 sections, with a retail section and a service section.

In here, they have some of the latest components. Shown here is the Shimano road hydraulic Di2 shifters, ST-R785.


Mike's Bikes is a really big store with multiple levels of racks for all kinds of bicycles

The rear half of the shop has lots of cycling accessories and apparel

Lots and lots of cycling accessories!

There is even a second level to the shop, with some classic bikes and folding bikes displayed here

The 4th shop, Huckleberry Bicycles, is located at a premium location along Market Street.

In here, it has very trendy stuff that will appeal to the fashionable adult riders

In some areas, it looks more like an apparel store than a bike store, which is amazing.

At the back of the shop, there is a well equipped work area with lots of upgrade options displayed along the walls.

SRAM Red road hydraulic shifters also spotted

They also have Bromptons here, which is not surprising, considering that most of the apparel and accessories here would appeal to the Brompton-loving demographic.

The 5th and last bike shop, Warm Planet Bicycles, is also located along Market Street.

This shop specialises in folding bikes, with all kinds of brands such as Dahon, Tern, Bike Friday, and many more.

A rather unusual handlebar setup as seen on a Bike Friday. With this setup, it will look and ride more like a cruiser bike.

In total, I visited 5 bike shops, and took about than 2 hours. On average I lingered at each bike shop for about 10-15 mins. Most amazingly, I did not buy anything from any of the bike shops! One reason is that I already have everything that I need, and secondly, the items in the shops are more expensive than what I can find online.

I am quite impressed at the standard of the bike shops that I visited here. At every one of the shops, the work area is always very well equipped with at least 2 workstands and a whole array of quality bike tools on the wall. Also, from the way the mechanics work on the bikes, I can see that they are well trained and know what they are doing.

If you have a chance to go to San Francisco, and have a few hours to spare, you can check out these bike shops too!

Wednesday, March 25, 2015

Can I Install Tern Handlepost/Fork on Dahon Frame? Part 5: Adjustments and Accessories

This is the 5th and last part of the project, "Can I Install Tern Handlepost/Fork on Dahon Frame?". Continuing from the previous part of the project, where I completed the installation of the Tern handlepost and fork onto the Dahon Boardwalk, this final post will wrap up the whole project.

As stated at the end of the previous post, I encountered a steering problem when I test rode the bike after installing the Tern handlepost and fork. It is kind of difficult to describe the problem clearly in words, but I will try.

Normally, a small wheeled bike such as my Dahon Boardwalk will have a more nimble steering feel as compared to bikes with standard wheel sizes. However, test riding the newly upgraded Dahon Boardwalk felt really strange. I found it difficult to keep the bike travelling straight even on a straight and smooth road. The bike tends to auto-steer to the sides, and it was taking a lot of effort to keep the front wheel pointing straight.

Having rode a folding bike regularly since 2008, I have a few years of experience riding small wheeled bikes, and I am familiar with the steering feeling. Although some bikes are naturally more twitchy, this felt different and wrong.

It got so bad that after a while, I could not steer properly while riding! Upon steering to the side, the handlebar stayed to the side and did not want to return to the centre. Luckily, I was going slow and only test riding around the estate, so there was no great danger. At that point I knew that something was seriously wrong with the steering.

My first suspicion was that the headset may have been tightened too much, causing the headset bearings to seize and stop rolling properly. However, even after I loosened the top cap inside the handlepost, the steering still felt stuck.

The next step to troubleshoot this problem is to remove the handlepost, and see if I can spot any anomalies. Upon removing the handlepost, I noticed some wear on the gold coloured headset bearing cup.

Signs of wear at the front of the gold headset bearing cup

Metal shavings can be seen between the headset bearing cup and the base of the handlepost

Abrasion marks and metal shavings found along the inside edge of the handlepost base

From the signs of wear that I spotted, I found that the edge of the handlepost base was rubbing against the headset bearing cup. This meant that the clearance between the handlepost base and the headset bearing cup is not sufficient to allow for smooth rotation. When there is no load on the handlepost (Eg. in the workstand), the handlepost can rotate smoothly. However, during riding, the load from my weight on the handlebars will close up the tiny gap, causing intermittent rubbing. This excessive friction eventually caused the handlepost to jam up and stop rotating properly.

One way to solve this would be to grind away the bottom edge of the handlepost base, to create more clearance. However, since the handlepost is already assembled with the rest of the handlebar, it is too troublesome to remove the handlepost for grinding at the workshop.

The other way is to add a spacer above the headset compression ring, so that the handlepost rests slightly higher. This will create more clearance between the base of the handlepost and the headset bearing cup. This spacer diameter is the same as a standard headset spacer, but they usually come in 5mm or 10mm thicknesses, which is far too thick. Therefore I sourced for thin headset spacers from Taobao.

Set of thin headset spacers

3 x 0.3mm spacers, 1 x 1mm spacer, 1 x 2mm spacer, 1 x 3mm spacer

From what I see, adding just one 0.3mm spacer will create sufficient clearance to avoid rubbing. However, I took the chance to add back the rubber seal that was on the base of the Tern handlepost. Therefore, I chose the 1mm thick spacer and placed it on top of the headset compression ring.

1mm headset spacer on top of the headset compression ring. This will reduce the clamping length by 1mm.

Rubber seal that comes with the Tern handlepost. It was previously removed due to insufficient clearance.

Rubber seal re-installed to the base of the Tern handlepost

After putting the Tern handlepost back onto the steerer tube. Slightly shorter clamping length, but it will have to do as there is nothing else I can do to increase the clamping length.

Rubber seal can be seen between the base of the Tern handlepost and the gold headset bearing cup. This minimises the amount of rain and dust that enters the headset bearings.

After making these adjustments, the steering feel of the Dahon Boardwalk is back to normal! The front wheel is now able to auto centre itself as designed, making steering much easier and natural, instead of me having to try so hard to keep the front wheel straight.

Now that the Tern handlepost and fork has been mounted successfully on the Dahon Boardwalk with no issues, I can now add on more accessories to the handlepost and handlebar. One accessory that I want to add to the Dahon Boardwalk is the Shimano Sport Camera.

The camera has previously been installed on the Merida Scultura 5000 road bike, using the K-Edge Go Big GoPro handlebar mount. If I want to mount the camera on other bikes, I would need to get additional mounts to allow quick and easy transfer of the camera from bike to bike.

However, the biggest problem here is that the K-Edge mount is really expensive! From Taobao, I found similar GoPro mounts at a fraction of the cost. They may not look as nice as the original K-Edge mount, but they have the same function and are much cheaper.

GoPro handlebar mount from Taobao. Looks almost the same as the K-Edge version.

Same as on the K-Edge mount, I moved the mounting piece to the top of the mount.

As there is no more space on the top of the handlebar for mounting this GoPro mount, I mounted it sideways on the Tern handlepost. Although the camera will be tilted to the side, the camera is able to auto rotate the video to the correct orientation.

As seen from the front. Loads of accessories!

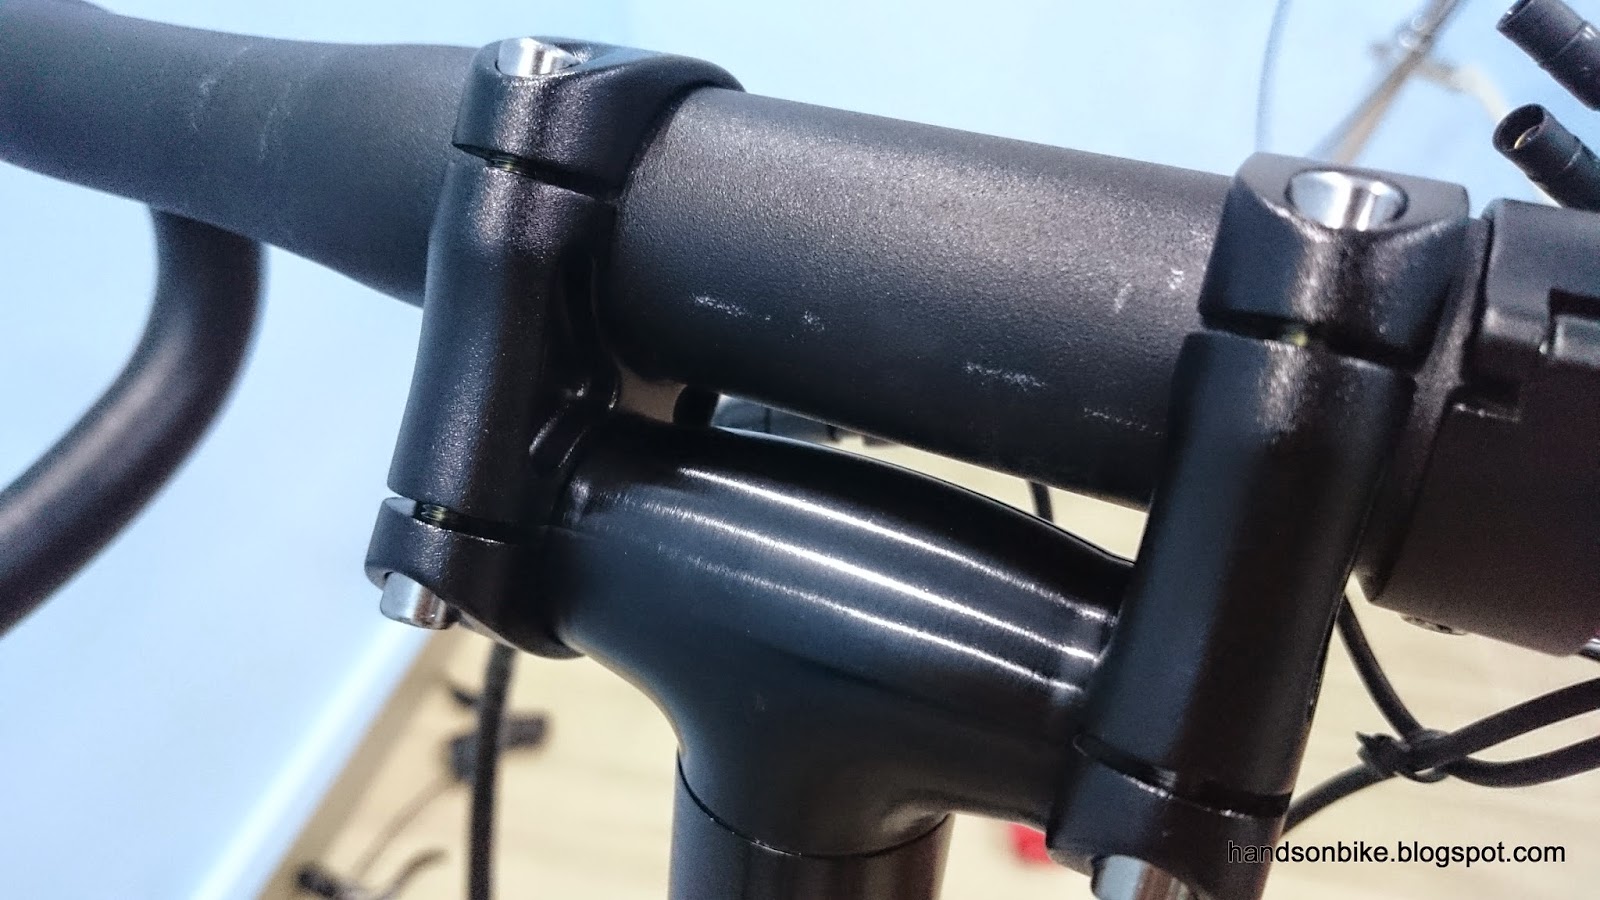
The Controltech Stem is tilted slightly forward to put the handlebar at the correct reach. This is because the vertical part of the handlepost is further back as compared to Dahon/Fnhon handleposts, due to the taller handlepost base.

Tern handlepost locking lever with the green protective sticker removed. Looks very glossy and elegantly designed!

Final view of the upgraded Dahon Boardwalk with the Tern handlepost.

Yet another project completed successfully!

Through this project, I have learnt much about the design, construction and installation of the Tern handlepost. As for the ride quality, I have not detected any large improvement in handlepost stiffness, as the previous Fnhon 27cm 4 bolt handlepost is already very stiff. In fact, when I pull hard on the handlebar, I can feel some flex coming from other parts of the bike, such as the long seatpost and the main folding joint on the frame. The stiffness of the bike frame and handlepost is probably as good as it gets with this Dahon Boardwalk frame.

Tuesday, March 24, 2015

Can I Install Tern Handlepost/Fork on Dahon Frame? Part 4: Installation

In the previous part of this project, I have completed the measurements and considerations for fitting a Tern handlepost and fork to my Dahon Boardwalk frame. The conclusion is that I will need to cut the steerer tube as it is too long for my Dahon Boardwalk frame.

Before cutting the steerer tube, it is important to calculate and measure how much to cut. The ideal length is when the steerer tube rests just below the top edge of the handlepost base. This will maximise the clamping length for best stiffness and strength.

The tricky thing about this modification is that the starnut is already in the steerer tube. As the starnut cannot be removed without damaging it, the only way to continue using the starnut is to push it further down into the steerer tube, before cutting the steerer tube to the required length.

Starnut comes pre-set in the steerer tube of the fork. Standard depth is about 10-15mm.

My plan is to cut about 12mm off the steerer tube, as shown by the marking here.

Marking on the inside to show the initial position of the starnut.

Special starnut setting tool by Park Tool. Used to set starnuts to a depth of 15mm.

As I needed to set the starnut even deeper than 15mm, I swapped out the pin at the end of the tool for a longer pin. This pin will not thread into the starnut, but will be inserted through the hole to help centre the tool on the starnut. Washers are also added to control the depth of the starnut during the hammering of the tool.

Washers are used to control the depth of the starnut, and also to ensure that the thread of the starnut is not damaged.

The gap between the tool and the steerer tube before pushing the starnut further in. Upon proper setting of the starnut, the tool will rest fully on the edge of the steerer tube.

Before hammering the tool, the fork is set on a sturdy workstand for proper support. This method prevents damage to the fork ends.

After pushing in the starnut. It has been pushed deeper by about 10mm.

Now that the starnut has been pushed down, away from the area that will be cut, it is now time to shorten the steerer tube. My preferred way of cutting a tube is to use a proper tube cutter as shown. This is the same tube cutter I used when I shortened the handlebar of my Avanti Inc 3.

To cut the steerer tube, tighten the cutting blade onto the marking (12mm) made earlier.

Turn the tool around the cutting line, and tighten the tool after every 1-2 turns. Eventually the cutting blade will cut through the thickness of the steerer tube.

After cutting, the steerer tube is now 12mm shorter than the original length of 140mm.

New crown race from the LitePro headset for the new Tern fork.

Installed the crown race onto the Tern fork. For more info on installing headset for Dahon/Tern bikes, click here.

Now that the Tern fork has been modified, it is ready to be installed onto the Dahon Boardwalk! Before that, I double checked the instruction manual that came with the Tern handlepost to make sure that I am installing the Tern handlepost and fork correctly.

Instruction manual for installing the Tern handlepost

Before installing the new Tern handlepost and fork, the old handlepost and fork first needs to be removed from the Dahon Boardwalk.

Amount of steerer tube that protrudes from the top of the headset.

From my measurement, the length of steerer tube that protrudes above the headset is about 36mm. This is 3 times more than the 12mm of steerer tube with a Dahon handlepost and fork! With this large increase in clamping length, the interface between the handlepost and the fork will be a lot stronger and stiffer.

After installing the Tern handlepost on the Tern fork, this is how it looks. The steerer tube could have been about 1-2mm longer, but it does not matter too much.

Using the top cap to pre-load the headset bearings. The bolt of the top cap threads into the centre of the starnut in the steerer tube.

Two clamp bolts at the base of the handlepost tightens the handlepost securely to the steerer tube.

Tern handlepost and Tern fork installed onto the Dahon Boardwalk

In order to install the Controltech Stem, it needs to be slid on from one side of the drop bar. This means removing the bar tape, shifter and accessories from one side of the drop bar.

Installing the Controltech Stem onto the drop bar

As the stem and handlepost design is different from the previous Fnhon handlepost, the Di2 wires will need to be adjusted to account for the different length and location.

Controltech Stem installed onto the T-bar of the Tern handlepost. Note that the gap between the handlebar and the handlepost is very small!


Found a new place for the Di2 Digital Gear display! Also, the stem area is much neater with only 5 visible bolts, as compared to 10 previously.

With all the accessories mounted on the handlebar again

Finally, the Tern handlepost and fork have been installed successfully onto the Dahon Boardwalk. However, this project is not over yet. As I found out later on during test riding, there is some problem with the steering, which makes the bike quite difficult to ride.

In the final part (Part 5) of this project, I will reveal more details about the steering problem and describe how I finally managed to solve it. Also, I managed to find space to install a mount for the Shimano Sport Camera!

Part 5 is now up! Click here to continue reading.