Since I have already changed from the Panaracer GravelKing SK to the WTB Venture 47 gravel tires, the bike is now more capable of going off-road. As such, I decided to explore some off-route sections that are a bit further away from my place.
Normally, if I rode a MTB from my place to the trails, I would be tired by the time I reached there. This is due to the distance and also the low efficiency of pedaling a MTB on the roads.
However, with a gravel bike, the same distance is easily covered, as the road bike geometry and drop bar makes it more suitable for riding longer distances efficiently. The gravel tires also roll better than a MTB tire, but of course not as well as a standard road bike tire.
In any case, I managed to reach the trails feeling relatively fresh, excited to ride some real off-road sections. If it gets too rocky or technical, I will just get off the bike and push. Going to explore the off-road sections on the Cervelo Aspero gravel bike!

This is at the Dairy Farm area, along the park connector. Going down this off-road section will lead to the Bukit Timah MTB trail.

This is the gravel/dirt track that runs parallel to the MTB trail. Very beautiful place, only accessible on bike or on foot. You could ride all the way into the distance!

Here is the start of the Bukit Timah MTB trail. I know there are some sections that are quite challenging, but I'm going to check it out anyway. This section with gravel is no issue at all.

Took a shortcut out from the MTB trail, as it was getting too technical. This dirt track outside is much more suitable for my gravel bike.

Some areas are a bit muddy, but it was generally dry on that day.

The outside trail cuts across the real MTB trail, which runs from the left to the right of this picture.
By exploring the MTB trail, now I have a good idea on what terrain the Cervelo Aspero can handle. It rolls fast through the trails, but technical sections slow me down as I don't have much off-road skills.
I would definitely be able to tackle those sections on a real MTB, but on the other hand, a more skilled MTB rider would also be able to tackle those sections on this Aspero gravel bike. No matter what, I had a great time doing some off-road exploration, testing the limits of the gravel bike!

The Aspero is a great gravel bike, and I really like the WTB Venture 47 tires.

Lots of mud on the tires and basically everywhere, even though the ride was mostly dry. Guess it only takes one muddy section to dirty the whole bike.

Lots of mud under the downtube and all over the drivetrain!

Stripping the components off the bike for a thorough cleaning with water and sponge.

Looks just like a MTB after a trail ride.

Not good! Lots of circular marks on the frame caused by mud that accumulated on the chain rings.

After cleaning the mud off, I found that these areas have been permanently scratched by the mud.

The scratches are not caused by the chain ring itself, but by the abrasive mud that got stuck onto the chain rings that go round and round.

Another view of the scratches on the frame.

On the outer chain ring area, there are less scratches than at the inner chain ring area.
There are also some scratches at the ends of the Dura-Ace R9100 crank arms, caused by contact at off-road sections. This is despite the short 165 mm crank arm length.
I was surprised at the scratches on the frame, as I was not expecting that. However, I am personally not too bothered by it. As a gravel bike, it is OK to have some scratches as a result of off-road riding.
Still, it is better to prevent further damage if possible. Not for strength reasons, but more of to protect the fabulous paint job on the Aspero frame.
Therefore, I got some clear protection stickers from my friend who is a MTB rider. They are used to pasting protective films on MTB to protect the frame, so they know what is good and how to apply it properly.

Before applying the protective film.

After applying the protective film. Somehow, the clear film magically hides the scratches! Not only are the scratches invisible, the film is invisible as well. Looks just as good as new.
Another suggestion was to check the chain line of the crankset, as it seems that the chain rings may be too close to the frame. Although the Aspero is compatible with 50/34T road cranksets, the chainline will affect the actual frame clearance.

Small clearance of 1 mm between 34T inner chain ring and chain stay.

Small clearance of 1 mm between 50T outer chain ring and chain stay.
Previously when I installed the Wheels Manufacturing bottom bracket, I did not add the optional spacers, as it was not needed. Now, with the clearance between the chain rings and the chain stay to be so small, it will be a good idea to add some spacers.

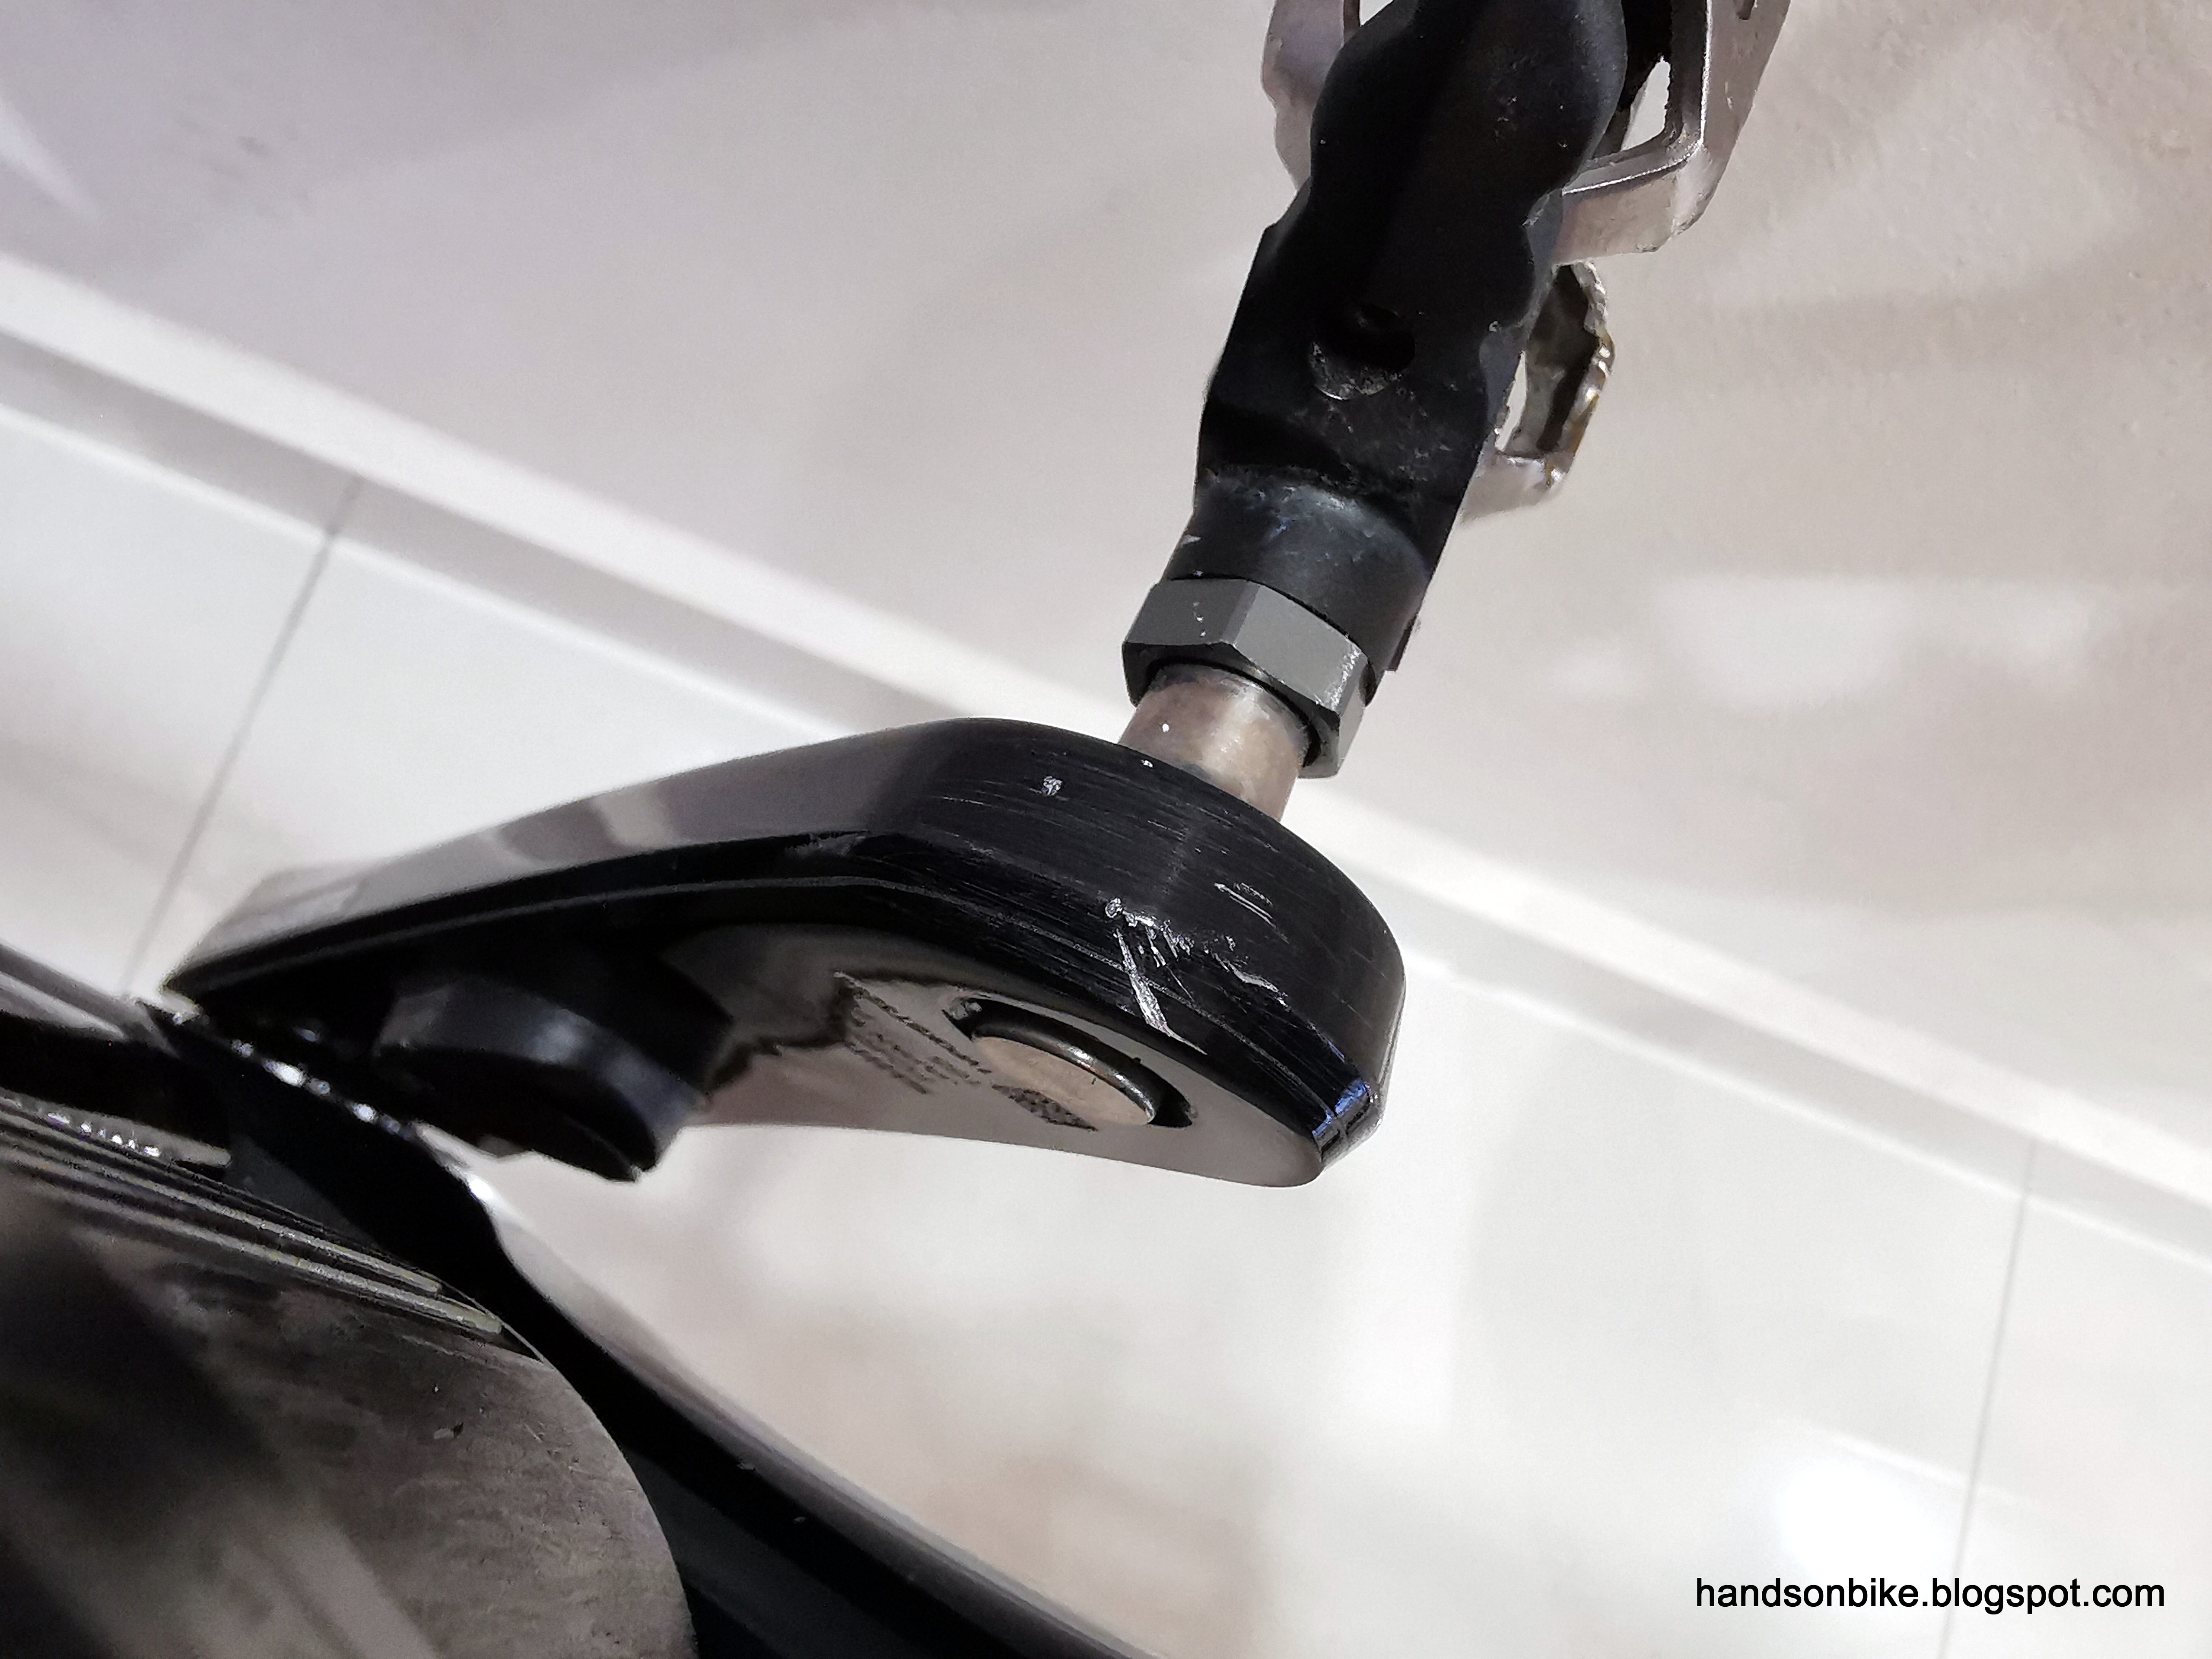
1 mm spindle spacer added on the drive side, to push the chain rings outwards for more clearance.

I wanted to add a 1 mm spacer on the non-drive side as well to balance the Q-factor, but it was too much. Even a 0.5 mm spacer was not possible, as the safety pin on the crank arm could not be inserted. Therefore, there is no spacer on the non-drive side.

After adding 1 mm spacer on the drive side, the inner chain ring clearance is now 2 mm.

Outer chain ring clearance also increased to 2 mm.
With the chain ring clearance increased, there would be less chance of having the same scratches on the frame when riding off-road. Together with the additional protective film, the frame itself would be better protected.
A side benefit of having a chain line that is 1 mm more outwards, is the availability of 1 more gear.
Previously, when I was in the small inner chain ring, I was only able to use up to the third-from-top gear sprocket (15T). It is the 11 speed 11-34T HG800 cassette. If I shifted to the 13T or 11T sprocket, the cross chain condition will cause excessive rubbing between the chain and the front derailleur chain guide. This is despite the auto trimming of the Di2 front derailleur.
Now, with a crankset chain line that is 1 mm more outwards, I can use up to the second-from-top gear sprocket (13T) when in the front 34T chain ring.
Previous highest gear when on small chain ring: 34/15 x 28" = 63 gear inches
New highest gear when on small chain ring: 34/13 x 28" = 73 gear inches
With this adjusted chain line, I am able to use a higher gear when on the inner chain ring, without having to shift to the outer chain ring to achieve a higher gear. Now I understand why the new GRX crankset has a chain line that is 2.5 mm more outwards compared to a normal road crankset chain line.
Finally, having rode off-road on the Aspero, I found that the stem may be slightly too long. The PRO Vibe stem length is 90 mm, but during descending on rough terrain, I felt that the weight shifts forward too much. Makes it too "exciting" during descending. Therefore, I decided to change to a slightly shorter 80 mm stem, which moves the centre of gravity a bit rearwards for safer descending. Not too sure how much difference 10 mm will make, but no harm trying.

The 80 mm stem is strangely 2 grams heavier than the 90 mm stem.
At the same time, since I was changing the stem, I decided to change the headset spacers as well, to the thin wall type. Previously I had changed to the special PRO Vibe spacers, but I was not too happy with how it looked. It was also relatively heavy, at 32 grams for a 40 mm length.
Therefore, I got some thin wall carbon spacers, which should be ideal for matching both the stem shape and also the headset cover.

Thin wall carbon spacer on the right, which has a smaller outer diameter than the usual type on the left. The inner diameter is the same.

40 mm tall, thin wall spacer weighs 12 grams.

The normal carbon spacer weighs twice as much given the same length, as a 20 mm tall section weighs 12 grams.

With the 40 mm thin wall carbon spacer installed! Matches better to both the stem at the top and the headset cover at the bottom.

I'm pretty happy with how it looks, better than the previous iterations (thick carbon spacer, or aero PRO Vibe spacers).
Summary of changes, after the off-road ride:
1) Added 1 mm spindle spacer to the drive side, for more chain ring clearance.
2) Added protective film around the bottom bracket and chain stay area.
3) One more higher gear can be used when on the 34T inner chain ring.
4) Changed from 90 mm to 80 mm stem to shift the weight backwards slightly.
5) Changed to thin wall carbon headset spacers for better appearance.
Nice. How's the tire clearance on 47? 650B or 700? mud rubbing on insides?
ReplyDeletePlenty of tire clearance.
Deletehttps://handsonbike.blogspot.com/2020/04/cervelo-aspero-wtb-venture-47-650b.html
I just discovered your blog. Very insightful and informative. Thank you for chronicling your rides and works. Recently got an aspero and staying in SG too!
ReplyDeleteAwesome article! But wait a second - in the pic captioned '1 mm spindle spacer added on the drive side...', shouldn't the order of the spacer and the bearing seal be the other way around?
ReplyDeleteNot quite sure what you mean. The 1 mm spacer is placed onto the spindle of the crankset. It goes in between the drive side BB bearing seal, and the datum surface of the crankset spindle.
DeleteIn your photo, the bearing seal is on the outside of the spacer, so the spacer is sitting between the seal and the bearing. However, the spacer should be on the outside of the bearing seal, or the seal will not be protecting the bearing. Maybe you didn't ultimately install it that way, but that's how it's shown in the photo.
DeleteThe second last photo in your "Birdy AXS: Suncord Wheelset Installation" post also shows the same problem, the bearing seal is placed outside the spacer.
Thank you so much for your article! My wife just recently bought this frame with similar specification. Dis you use a GRX or Road Di2 front derailleur with your road crankset? Looking for 165mm alternatives!
ReplyDeleteI used a road front derailleur to match the road Crankset. The chain line is different between gravel and road components, so it needs to be the same type.
Delete