Now it is time to start the Focus Paralane bike assembly! This was actually done many months ago in September 2020, but I just did not have the time to write about it until now.
One problem I saw on this frameset is the big opening under the bottom bracket. Since I am not using a mechanical front derailleur, I removed the entire front derailleur cable guide. However, this also leaves a big hole underneath which will collect a lot of water and dirt, more so since this will be an all-weather bike. Therefore, it is necessary to cover up the hole properly, to seal it against the weather.
I used the leftover protective film that I pasted onto the Cervelo Aspero, where it was used to protect the chainstay. In this case, it will be used to cover up the big holes under the frame.
Leftover protective film to be used to seal up the holes under the frame.
Two big holes covered with the protective film, and a small hole covered with a rubber grommet. The small hole might be useful to let excess water drain out.
Protective film covers the hole, but I purposely made a tiny opening to allow water to drain out instead of collecting inside. Water will definitely enter the frame from other openings such as the headtube area or seatpost area.
The slot at the back of the seat tube was also covered with the protective film, together with the Fizik rubber ring around the seatpost.
Added some grease around the headset bearings for additional protection against rain.
The steerer tube length is pretty much perfect after cutting, leaving just enough space for a thin spacer on top.
Using a 80 mm PRO PLT stem that is more conventional, not the unique PRO Vibe stem.
I wrapped foam around Junction B, and stuffed it into the frame, outside the bottom bracket area.
Ultegra R8000 11-32T cassette installed onto the wheelset. This was what I tested previously on the Fabike C3.
Shimano RS770 wheelset, with GP5000 tires, 11-32T cassette and RT900 rotors.
Using a handlebar holder to prevent the handlebar from moving when bleeding the hydraulic brakes.
Before bleeding the brakes, I had already made sure that the shifters and handlebar are in the correct positions, as this is necessary to ensure correct brake hose length. This was what I prepared earlier.
Pressing in the press-fit bottom brackets with a proper bottom bracket tool. Prior to this, I had already tested to make sure that the brakes and shifting work fine.
Pressing in the bottom bracket cups carefully and evenly. Grease it to avoid creaking issues later on.
Ready for a test ride! Now is the time to make fine adjustments to the shifter positions if needed.
Routing the brake hoses and Di2 wire neatly with black cable wrap. Hose length is very important if you want a neat setup.
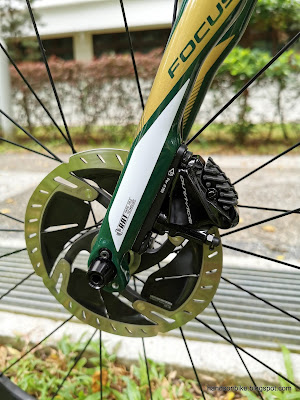
Dura-Ace brake calipers and brake rotor. Also note the Robert Axle thru axles!
Looking good!
Front wheel installed, also with the aftermarket thru axles.
Also using Dura-Ace brake components at the front.
At this point, it looks like a lightweight race bike!
Test ride completed, now I am ready to lock in this position.
Once the shifter position has been fixed, the bar tape can be wrapped to complete the bike. If I was using it as a race bike, this is all that is needed. However, since I will require it to be an all-weather bike, more parts need to be added to the bike...


No comments:
Post a Comment
Every comment is moderated before publishing due to spam bots. If you don't see your comment yet, it is likely that it is currently being reviewed. Thank you for your patience!