Sunday, April 5, 2015

Spurcycle Bicycle Bell

During my recent trip to San Francisco, I cycled from Fisherman's Wharf to the Golden Gate Bridge. Along the way, I came across a nice bike shop named Roaring Mouse Cycles. While in the bike shop, I found some goodies.

 Shimano Road ST-RS685 Hydraulic Disc Brakes with Mechanical Shifters
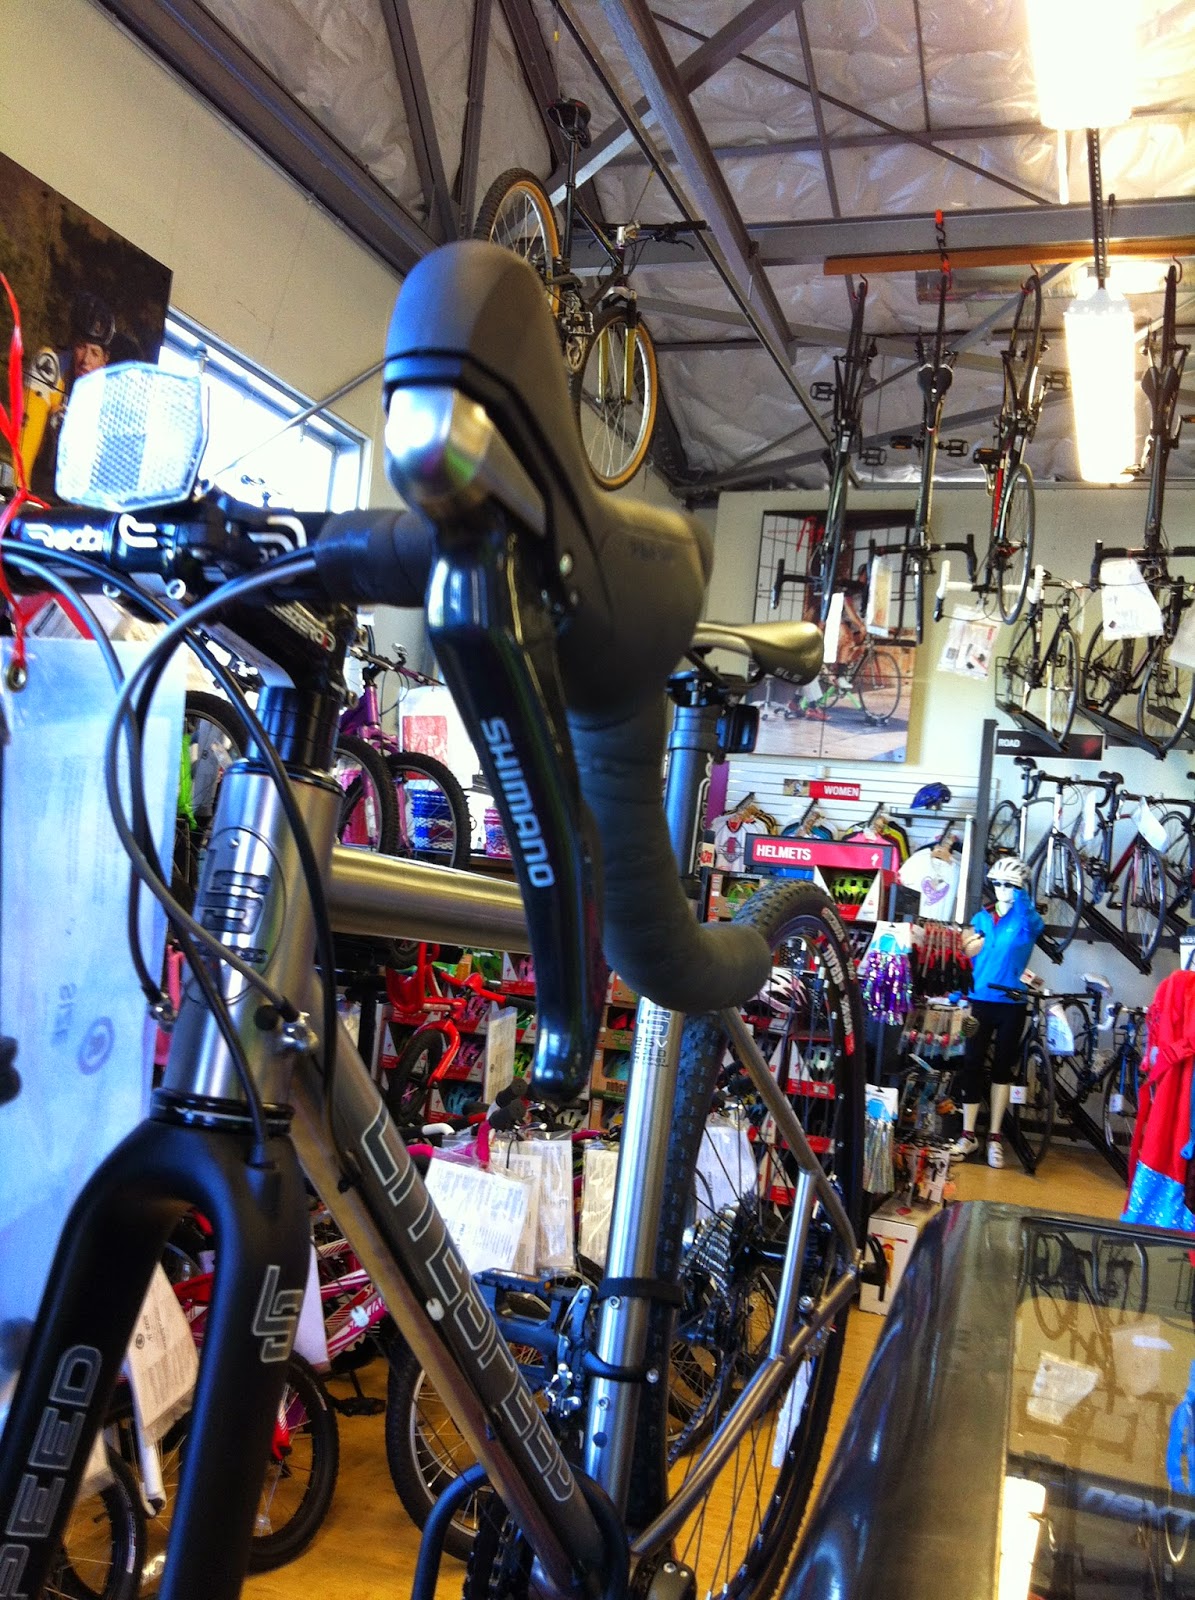
The view of ST-RS685 from the front. Amazingly, the size of the mechanical shifter with hydraulic reservoir is quite compact.

Anyway, I also came across the expensive but great sounding bell, the Spurcycle Bicycle Bell. It is more of a nicely crafted artifact than a mass produced bell, as can be seen from the background behind it and how it is being produced.

Spurcycle Production Video

I really loved the sound of the bell, and so, despite the price and the fact that I already have too many bells, I decided to get a Spurcycle bell for myself.

Comes in a retro form of packaging, a cardboard box with hot-stamped gold printing.

It claims to suit any type of bike, including road bikes

Made in USA bicycle bell, a real rarity nowadays

Upon opening the box, we see the bell and 2 metal bands of different lengths

Installation instructions are printed on the inside of the box. As stated, choose the metal band that suits the size of your handlebar.

That's all that is in the packaging. Clean and simple just like the product itself.

Black metal dome with a brass knocker for the unique sound

2 rubber pads at the bottom for secure resting on the handlebars

For the weight weenies, here is the weight of the bell plus the long metal band. At 44 grams, it is about the weight of a small light.

To install the bell, slot the metal band into both sides of the bell, and tighten the bolt at the top of the bell. This will pull the metal band into the bell, and tighten the metal band around the handlebar.

As shown here, use a Allen key to tighten the bolt on top of the bell. I decided to install this bell onto my Merida Scultura 5000 road bike.

Managed to squeeze in this bell alongside the Shimano Sport Camera and Cateye Strada Digital Wireless cycle computer. It is getting crowded here!

The bell is installed facing forward for easy activation of the bell lever by the thumb. The compact size and simple design allows it to blend in nicely on the road bike drop bar.

As for the sound, you can check out the video below created by other users. The ring is very loud and clear, and very long lasting. It also feels more polite and high class than the cheap and rude ring-ring-ring bells seen and heard on many market bikes.

Actual sound of the Spurcycle Bell

I really like the bell, and if not for the fact that it is expensive, I will get more of the bells and install them on my other bikes. The compact size and simple design really allows it to suit any type of bike.

Friday, April 3, 2015

Endura Xtract Rainproof Jacket

Does the rainy season stop you from cycling? Most people will choose not to cycle when it is raining, due to various reasons. After riding in the rain, most bicycles will need to be serviced to prevent long term damage from rain. It is also not so safe to ride in the rain, due to wet and slippery roads and reduced visibility. Lastly, riding in the rain will soak the rider, and having wet underwear and socks never feels good.

Ever since I bought my Avanti Inc 3 all-weather commuting bike 1.5 years ago, I have felt liberated at not having to let the weather dictate when I can cycle or not. Previously, when I only had my Dahon Boardwalk, I did not want to cycle when it was raining, or when it looked like there was a chance of rain, or even when the roads were wet. This was because of the tremendous amount of maintenance required to clean up the bike after a wet ride.

Now, with my ideal commuting bike, the Avanti Inc 3, I can cycle even when it is raining. This is important if I am commuting to work by bicycle, as I still need to turn up for work even when it is raining. Of course, if the rain is too heavy, I will not cycle as it is too dangerous due to poor visibility.

While the all-weather bike is not affected by the rain, I myself will still get wet. Therefore, I decided to get a rainproof jacket, so that I can use it to stay warm and dry when I ride in the rain. There are many different brands and types of rainproof jacket, but the most important thing is to be rainproof and also being breathable. High visibility is of course an added bonus.

After doing some research and comparing a few different brands of rainproof jackets, I settled on the Endura Xtract Rainproof Jacket. It is supposedly very breathable, so that you don't feel like you are steaming inside a plastic bag. The luminous yellow colour also helps greatly in making myself more visible on the bike. Lastly, it folds down into a really small package, so that I can store it in the pouch on my Avanti Inc 3.

Overall view of the Endura Xtract Rainproof Jacket

Front zipper goes all the way up to the collar for better rain-proofing around the neck.

The inside of the collar is lined with felt for better comfort and warmth, which I really like.

Large mesh inside the jacket, at the back area helps to ventilate hot air to the outside

The mesh from the inside leads to a covered flap on the outside of the jacket, to vent out hot air without letting rain seep in. 

Small zippered pocket at the side allows small items to be kept safely and well protected from the rain.

Very thin but effective waterproof membrane on the outside of the jacket

Inside layer of the jacket allows hot air to move outwards, but prevents water from seeping in.

Reflective strips along the arms and back of the jacket help to enhance visibility

The little carrying pouch that is used to store the rainproof jacket after it is folded

The inside pocket of the jacket can be used to store small items too, such as the carrying pouch.

The size of the jacket after folding it tightly. It can still be compressed slightly to reduce the size further.

This jacket will be stored in the pouch on the Avanti Inc 3 bike. Since I will only use the rain jacket when I ride the all-weather Avanti Inc 3, this is a good place to store the jacket.

I have tested this rainproof jacket in the rain for a few rides, and I am amazed to say that it works really well. Even in relatively heavy rain, the water does not seep through the jacket. My body stays dry and my body core temperature is maintained. The jacket is also quite breathable, as I don't feel myself overheating inside the jacket.

After the ride, it just takes a quick rinse to wash the jacket. It also dries relatively quickly as the fabric does not really absorb any water. Overall, this is a good rainproof jacket for those who want to stay dry and warm while cycling in the rain.

Wednesday, April 1, 2015

Cycling in San Francisco and Long Beach

Besides visiting bike shops in downtown San Francisco, I also managed to find time to cycle at San Francisco! A must-go location for cycling in San Francisco is to cycle across the Golden Gate Bridge. At Fisherman's Wharf at San Francisco, there are many bike rental shops where you can rent a bike for a day.

For me, I did some research on the Internet and found some bike rental shops with a better review. The bike shop I eventually chose is San Francisco Bicycle Rentals, located at The Cannery.

The route that I planned for the day would be to cycle across the Golden Gate Bridge to the town of Sausalito. The map shown below plots the route that I took that day. However, when I was cycling, I did not really plan out the route. It was more of just following the crowd and following the cycling path. It is an easy route to follow, as the Golden Gate Bridge is very visible in the distance. You just need to cycle towards the Golden Gate Bridge, and it is quite difficult to get lost.

After the ride, I plotted this route which showed the actual cycling route taken. It is about 15km one way to Sausalito.

This is where I rented the bikes from, San Francisco Bicycle Rentals.

Performance Hybrid for myself, and the Comfort Hybrid for my wife.

The Performance Hybrid is a Specialized Sirrus, with a 3x9 speed drivetrain.

Comes with Shimano ST-EF51 shifter/brake levers, which is very common on rental bikes. I also brought my own GoPro mount and the Shimano Sport Camera to film the ride. Video can be found below!

From the bike rental shop, just follow the crowd towards Fort Mason. After rolling across the lush greenery, follow the cycling path beside the road.

At some points along the way, you can spot the Golden Gate Bridge in the distance.

Along the cycling path, there were vast green fields where people were engaging in all kinds of sports, such as soccer or frisbee.

Looking back at the San Francisco Bay


As we near the bridge, there are some short but steep slopes to climb.

Almost reaching the Golden Gate Bridge!

To cycle on the Golden Gate Bridge, we had to pass under the bridge, and enter the west side walkway. This arrangement is only for Sundays, where the west side walkway is exclusively for cyclists, and the east side walkway for pedestrians.

Cycling along the west side walkway of the Golden Gate Bridge. Great weather, but very windy on the bridge!

Cycling across the Golden Gate Bridge, from the south end to the north end

At the end of the bridge, there is a car park on the left side. Go through the car park and you will roll down an enjoyable downslope that brings you under the bridge and towards the jetty.


This is the magnificent view at the jetty, after rolling down the above-mentioned slope.

Follow the road towards Sausalito town. Mostly downslopes along the way. 

At Sausalito town, we stopped for lunch and cycled around to explore the town. It took us almost 3 hours to get here as we stopped frequently to take pictures and to enjoy the scenery.

Here is an edited 5 minute video of the ride, from Fisherman's Wharf to Sausalito and back! Check out the wonderful scenery and the bike friendly route, as well as the areas that were not shown in the pictures above.


Misc: Bike lanes along many streets in downtown San Francisco

Misc: Green wave for cyclists at 15 mph. This means that if you cycle at 15 mph, you will enjoy a wave of green lights along the designated route.

Besides San Francisco, I also went to Long Beach. Over there, I also wanted to rent a bike to explore the place. However, I soon discovered that at Long Beach, the only bike I could rent was a cruiser bike. There are practically no road bikes or mountain bikes or any other bikes for rent.

Rented a cruiser bike from Bikestation at Long Beach, near the train station.

This was the cruiser bike that I rented. Comes with a gigantic saddle and a creaky front basket. The tires were a massive 26x3.45", which is the size of fat bike tires.

3 speed shifting with a Shimano Nexus internal hub and a Revoshifter.

Cycling along the bike path, along the marina. 

Reached the beach which Long Beach is famous for.

Flat and wide beach, but is curiously almost deserted

It was possible to cycle on the sand with the fat tires. Quite fun, but also very draggy due to the soft sand.

I returned the bike to the bike shop after just 1 hour, as there was nothing much more for me to explore. The other reason was that I did not enjoy cycling on the cruiser bike. Not only was the bike really heavy, the wide cruiser handlebars were difficult to steer with. Worst of all, the bike only had coaster brakes. This meant backpedaling to brake, which was very difficult for me as I could not brake and also put my foot down at the same time. All in all, it was not a nice bike to ride.

Cycling at San Francisco was much more enjoyable, as the bike was nice to ride, and there was great scenery to enjoy. Do remember to check out the cycling video above for the route across the Golden Gate Bridge!