Monday, March 21, 2016

Wheelsport Ultegra 2x11 Speed: Part 10 - Ultegra 6800 Mechanical

The Wheelsport Fantasy 2x11 speed mini velo that I have is currently using the Ultegra 6870 2x11 speed Di2 groupset, which was inherited from the Dahon Boardwalk folding bike that I had previously. On the other hand, the Merida Scultura 5000 road bike is using the Ultegra 6800 2x11 speed mechanical groupset.

My plan is to swap the groupsets for these two bikes, so that the Di2 groupset goes onto the road bike, while the mechanical groupset goes onto the mini velo. I started with disassembling the mechanical Ultegra 6800 road shifters from the road bike. The Ultegra rear derailleur was already removed from the road bike previously, while the front derailleur was exchanged from a band type to a brazed on type.

With the Ultegra 6800 shifters, RD and FD ready, the building process for the mini velo can begin! First, the Di2 components were taken off the mini velo and put to one side. These Di2 components will be installed onto the Merida road bike later on.

Since the Wheelsport Fantasy mini velo is already using the Ultegra 6800 crankset, and an 11 speed cassette, it is actually not too difficult to disassemble and assemble the bike since it is already half done.

Started by removing the Di2 components from the mini velo 

Reinstalling the parts that are required for mechanical shifting. The cable guide that goes under the bottom bracket, and the cable adjust bolts for adjusting the cable tension for the shifter cables.

Cable guide goes under the bottom bracket...

...while the cable adjust bolts go onto the outer casing stoppers that are located under the downtube

New polymer coated shifter inner cables and outer casing for smooth and light shifting

Ultegra 6800 2x11 speed mechanical shifters from the Merida road bike!

Ultegra 6800 11 speed short cage RD also from the Merida road bike

Ultegra 6800 front derailleur installed onto the custom FD mount for best performance

Road shifters installed, bar tape wrapped!


Full Ultegra 6800 drivetrain (with Dura-Ace cassette and chain)

View of the full bike! Ultegra 6800 groupset looks really good on this mini velo

The hand pump and the tool bottle mounting was rearranged as the Di2 batter mount has also been removed

Simple graphical guide for trimming the front derailleur with the new road shifters

Yet another project has been completed! The Wheelsport Fantasy mini velo has been successfully converted from Ultegra 6870 Di2 to Ultegra 6800 mechanical shifting. It still rides and shifts beautifully, especially with this lightweight build. In fact, it rides better and faster than the Dahon Boardwalk folding bike that I previously had as this mini velo frame is much more rigid and does not flex when pushing the bike hard.

Finally, the full specifications and weight of this bike! Lightweight at less than 7.8 kg without pedals.

Friday, March 11, 2016

What is a Side Swing Front Derailleur? Shimano SLX Side Swing FD-M672

In the new 11 speed Shimano XTR series, a new type of front derailleur (FD) was introduced. This is the side swing FD that is different from all FD before this. Previously, FD design was either by top swing or down swing type, depending on the frame design.

For a comprehensive list of FD types and mountings, check out this excellent article by Bike Radar.
Front Derailleur Types and Mounts Explained

With this new Side Swing technology, the FD swings sideways during activation, and it has some advantages over traditional top swing or down swing types of FD.

Main Advantages:
1) More efficient cable routing
2) Improved tire clearance
3) 100% more powerful outward shifting
4) Multiple mounting style

More efficient cable routing refers to the path that the inner cable and outer casing takes when running from the front shifter to the FD. By taking a shorter or straighter path, it reduces the friction loss at bending areas. It is said to be 15% more efficient when used together with the new polymer coated inner cable.
More direct cable path from the front shifter to the side swing FD improves efficiency


One big reason a side swing FD was created is to provide more tire clearance, especially for bikes that have a larger wheel (Eg. 29" bikes), a special rear suspension frame design, and yet need a shorter chain stay to maintain agility. Previously, the limiting factor was that the tire would touch the FD mechanism. The workaround was to have longer chain stays or do away with the FD totally with a front single setup. With this side swing FD, tire clearance is improved, allowing bike frame designers to incorporate an FD without compromising on other frame geometry.
15mm more tire clearance when using side swing FD compared to previous top swing FD 


As for the claim of more powerful outward shifting, it comes from the new design, where the link axle of the chain guide is closer to the chain touching point. This gives more leverage and provides a more direct force to push the chain onto the larger chainring.
Shorter distance between link axle and chain touching point improves the outward shifting performance 


Lastly, the side swing FD is designed to be mounted in 4 different ways, in order to fit all sorts of frames. This means that there is a suitable FD to use regardless of what frame design you use.
Clockwise from top left: High Clamp, Direct Mount, E Type, Low Clamp

After learning about the side swing FD, I was interested to know how well it will actually work, and whether it is actually better than the current FD that I am using. Since side swing is now only available for MTB FD, the only bike that I can install a side swing FD on is my Polygon Cozmic CX 3.0 MTB.

For now, side swing is only advertised as for 11 speed MTB drivetrains, on XTR M9000 and Deore XT M8000. However, I found that 10 speed versions have also been quietly introduced. The SLX grade FD-M672 and Deore grade FD-M612 are 10 speed compatible side swing FD. I decided to get the low clamp type of SLX FD-M672 to replace the current FD on my MTB.


Mechanism and cable fixing bolt are located above the chain guide, instead of behind the seat tube

Top and low limit screws face forward at a 45 degree for easy accessibility. Also uses a very small alignment block (in white) to preset the FD for easy setup

Stopper for inner cable. A plastic end cap is required at the end of the shifter outer casing.

Axles and guide spring for the FD are located vertically due to the side swing construction.

Weighs 135 grams for the L sized (diameter 34.9mm clamp, without adapters) FD

This FD does come supplied with M sized (left side) and S sized (right side) for diameter 31.8mm and diameter 28.6mm seat tubes respectively.

Correct orientation for installing the adapters can be found in the user manual

Before installing the new side swing FD, let's take a look at how the cable routing and the FD looks when using the old top swing FD.

The stock Deore FD-M590-10 is activated from a top pull position, with the shifter inner cable coming in from the top as shown. The inner cable runs along the bottom of the top tube and behind the seat tube, down to the FD.

Since the FD mechanism is located behind the seat tube, it reduces the clearance to the tire. In this case there is still plenty of clearance though due to the hard tail frame design.

Installing the new FD is straightforward. Since my seat tube is 34.9mm in diameter, I don't need to use any adapters. Just clamp it on and adjust the FD vertical setting and parallelism setting. The only new part is the routing of the shifter inner cable. All adjustments are done the same way as traditional top swing or down swing FD.

Side swing FD mounted! Inner cable has also been clamped on.

Plenty of tire clearance, since only the FD clamp band is between the tire and the seat tube.

The front shifter cable will run along the bottom of the downtube, together with the cable for the RD and also the hydraulic hose for the rear brake. From there, it will join smoothly to the side swing FD.

Although this frame does not have any dedicated cable mount for side swing FD cable routing, it is easy to convert it for side swing FD use. The original FD cable routing is now left empty.

I was surprised at how easy it was to do the cable routing for the side swing FD, even though the frame does not have any dedicated cable mount for side swing FD routing. Also, the end result gives a rather clean routing of the cables which is nice to see.

As for shifting force, I measured the shifting force required at the left shifter before and after the change. The difference is between the old top swing Deore FD and the new side swing FD. There is a 10% decrease in shifting force when I changed to the side swing FD. This amount is not that significant as a 10% difference in shifting force is not that obvious. However, any decrease is always good as it means easier and lighter shifting.

Finally, for shifting performance, is it really 100% more powerful? Unfortunately, I am unable to confirm this as the original Deore FD already works very well, and so I cannot detect any improvement in performance when it is already near perfect. Perhaps there will be an improvement when I try to make an outward shift during high pedaling torque, but it is difficult to test it objectively, unless it is a controlled test using a standard testing machine.

In any case, this is a nice upgrade as I get a lighter front shifting force, as well as the chance to try the side swing FD. If you are having problems with tire clearance with your current FD, you might be able to solve it by changing to a side swing FD!

Tuesday, March 1, 2016

Shimano SM-CB90 Brake Cable Adjuster

Did you know that most road brake calipers come with a quick release lever? This quick release lever is used to open up the brake caliper temporarily, allowing the wider tire to pass between the brake pads. With this feature, a quick wheel change or removal is possible without deflating the tire or inner tube.

However, there are some cases whereby even with the quick release lever opened up, the brake caliper still does not open wide enough for the tire to pass through. This usually happens when the tires are wider than normal, or if the brake pad clearance to the rim is small. In this case, it will be very troublesome to remove the wheel as the tire will need to be deflated and then re-inflated.

Also, with the introduction of the Shimano direct mount road brake calipers, there is no quick release lever on the rear brake caliper which mounts under the bottom bracket. In this case, it is necessary to install a separate quick release if the wheel needs to be removed quickly.

Shimano Ultegra Direct Mount Rear Caliper Brake BR-6810. No quick release lever on the brake.

In my case, the front wheel of the Merida Scultura 5000 road bike cannot be removed quickly as the brake caliper does not open up wide enough to clear the 25C Schwalbe One tires on Ultegra 6800 wheels. Curiously, there is no such issue with the rear wheel as it can come out easily when the rear brake caliper is opened.

Front tire cannot clear the brake pads even when the quick release lever on the brake caliper is opened

To solve this issue, I decided to install a separate brake caliper adjuster, which is originally designed for use with Direct Mount brakes. This is the Shimano SM-CB90 Brake Cable Adjuster, which opens up to give more slack to the brake cable, allowing the brake pads to open up wider. Note that this device was actually installed before I changed to Dura-Ace brake calipers, hence the Ultegra brake calipers shown in the pictures.

Shimano SM-CB90 Brake Cable Adjuster. Comes with a lever to lock or loosen the brake cable, and also a barrel adjuster.

It works by allowing the brake outer casing to move inwards when the lever is opened, creating more slack in the brake cable and thus brake caliper.

This brake cable adjuster is installed inline with the brake cable outer casing. This also means that the outer casing needs to be split at some point, and the brake cable adjuster installed in between. The brake cable is still the same and passes through the brake cable adjuster.

By flipping the lever to the closed position, the brake outer casing will be locked at the end during normal operation. Flipping it to the open position will allow the brake outer casing to move inwards and create slack in the brake inner cable.

In the locked position, with the lever flipped downwards to lock the brake outer casing at the end for normal operation. 

In the opened position, with the lever flipped upwards to give some slack to the brake inner cable. The quick release lever on the brake caliper is also opened up. Now there is sufficient clearance between the tire and brake pads!

By opening up both the quick release on the brake caliper and also the lever on the brake cable adjuster, the total slack in the brake cable is sufficient for the front wheel to be removed easily. Installation of this device is quick and easy, and it makes it more convenient to remove the wheel during transportation of the bike.

It does not really affect the braking feeling as it is very rigid, and acts just like another section of outer casing. During installation, it is necessary to find a suitable section of the outer casing to install on, for convenient usage and also to prevent the device from hitting and scratching the frame over bumpy roads.

Sunday, February 21, 2016

Wheelsport Sunny vs Wheelsport Smart 1.0 Wheelset

Many people have asked me what is the difference between the Wheelsport Sunny and the Wheelsport Smart 1.0 wheelset? Upon first look, those two wheelsets look quite similar. However, upon closer look, there are actually a few differences that separate these two wheelsets.

The Wheelsport Sunny is a more budget version compared to the Smart 1.0 wheelset, with a retail price that is usually $100 less than the Smart 1.0 wheelset. Let's see what are the differences!

Note that these observations are my own, and are not the official specifications made by Wheelsport. Especially since different generations or batches of wheelsets can have some differences, such as a slightly different hub or rim design. As discussed in the Wheelsport Rear Hub Maintenance Guide, hubs made in different years or for different OEM customers can have different specifications such as the type of rear hub used.

What I would highlight are the differences that can be seen from the outside, and also a bit about the rear hub design. The red wheelset shown below is the Wheelsport Sunny 451 wheelset from the Wheelsport Fantasy 2x10 speed mini velo, while the black Wheelsport Smart 1.0 451 wheelset is from the Wheelsport Fantasy 2x11 speed mini velo.

Ratchet design of the rear hubs, after the freehub body is removed. Both have similar rear hub ratchet designs.

Freehub body of the Wheelsport Sunny wheelset. 3 pawls with 3 individual springs.

Freehub body of the Wheelsport Smart 1.0 wheelset. 6 pawls with 1 large spring for all 6 pawls.

Are 3 pawls or 6 pawls better for a freehub design? It depends on what you want in your freehub.

Advantages of 6 pawls over 3 pawls:
1) In theory, twice as much engagement between ratchet and pawls
2) Less stress on each pawl, since the force is divided across 6 instead of 3 pawls

Advantages of 3 pawls over 6 pawls:
1) Less drag during freewheeling, as there are less pawls to compress during freewheeling
2) For the hub manufacturer, 3 pawls are cheaper to produce than 6

To the layman, 6 pawls may seem better as it will be stronger with more points of engagement. However during actual riding, it is unlikely that all 6 pawls will be fully engaged simultaneously due to manufacturing tolerances. In fact, if the ratchet and pawls are sufficiently strong, 1 or 2 pawls are already sufficient. 6 is actually overkill and can create more drag during freewheeling.

In this case, I actually prefer the 3 pawl design of the Wheelsport Sunny rear hub with 3 individual pawl springs. If one of the pawl springs break, there are still 2 more working pawls to support the load. Compared to the Wheelsport Smart 1.0 rear hub with 6 pawls and 1 spring, if the spring breaks, all 6 pawls will not function and the hub will not work. In terms of reliability, the 3 pawl design with 3 individual springs is actually more fail safe. In any case, pawl spring failure is rare and should not be something that you need to worry about.

These are the internal differences that will not matter to most riders, as they are not able to feel it during cycling anyway. The other difference is the freehub design.

For Wheelsport Sunny, it is only available in 10 speed freehub designs (correct as of end 2015). This means that if you want to install an 11 speed drivetrain, you cannot use the Wheelsport Sunny wheelset. Instead, you need to get the Wheelsport Smart 1.0 wheelset which comes with 11 speed compatible freehubs. 11 speed freehub bodies are 1.85mm longer than 8/9/10 speed freehub bodies.

Freehub body on the Wheelsport Smart 1.0 wheelset, with the 11 speed compatibility clearly labeled.

The other difference between Wheelsport Sunny and Smart 1.0 is the rim height. The Wheelsport Sunny has a low rim profile of around 19mm, while the Wheelsport Smart 1.0 has a 30mm rim profile. This difference is not obvious unless you put the two wheelsets side by side for comparison.

A higher profile rim is usually seen to be more aggressive and more aerodynamic, as seen by 50mm rim heights used by most road bikes. However, on small wheeled bikes, the speed is usually not fast enough to make a noticeable difference in aerodynamics. Also, a high profile rim can be more prone to side winds that will make the bike unstable, as experienced on the Dahon Boardwalk in Taiwan.

Another problem for higher profile rims is that the valve length of the inner tubes used need to be long enough, in order for sufficient protruding length for pumping the inner tubes. This is usually not a big issue, just something to take note of when buying inner tubes for high profile rims. Otherwise, you can always use a valve extender to extend the valve length.


19mm rim height on the Wheelsport Sunny rim on the left, 30mm rim height on the Wheelsport Smart 1.0 rim on the right. Also notice the different types of spokes used.

Lastly, the spokes used are also different. Wheelsport Sunny uses the more ordinary round spokes, while the Wheelsport Smart 1.0 uses the supposedly more aerodynamic bladed spokes. Bladed spokes on the Wheelsport Smart 1.0 look good and differentiates it from the lower cost Wheelsport Sunny.

The tire height also affects the overall rim profile. As seen below, a 406 sized Wheelsport Sunny with large Kojak tires has almost the same tire circumference as a 451 Wheelsport Smart 1.0 with low profile Schwalbe One tires.

A higher rim profile is usually also heavier in weight, as more material is used to produce the taller rim profile. In this case, if the same hub is used, the Wheelsport Sunny may actually be lighter than the more expensive Wheelsport Smart 1.0, given the different rim height. I am not able to give accurate numbers for the weight of the Wheelsport wheelsets, as they differ quite a bit from year to year. This variation is caused by the different rear hub used, different rim profile and different wheel size (406 or 451). The only accurate way to get the weight of the wheelset is to weigh the actual set that you are buying.

Similar overall tire circumference, despite the different rim size (406 vs 451) and different tires

In summary, the main differences that I noticed between Wheelsport Sunny and Wheelsport Smart 1.0 wheelsets are:
1) Rear hub pawl design (3 vs 6 pawls)
2) Freehub body design (10 vs 11 speed)
3) Rim height (19mm vs 30mm)
4) Spokes (round vs bladed)

If you are going for a no frills wheelset that works well, the Wheelsport Sunny is an excellent choice at a very reasonable price. That is why I chose the Wheelsport Sunny wheelset when I built the Dahon MuEX, in order to hit a certain price point.

On the other hand, if you are going for the latest 11 speed drivetrain, or want a wheelset that looks more sporty with a slightly higher rim profile and bladed spokes, the Wheelsport Smart 1.0 does the job. Both are good wheelsets that are mainly differentiated by the features listed above.

Sunday, February 14, 2016

Shimano 105 5800 vs 5700: Rear Derailleur and Front Derailleur

During the recent conversion of the Wheelsport Fantasy mini velo from flat handlebar to drop bar setup, I had the chance to compare the rear derailleurs and front derailleurs before and after the upgrade.

When it was a 2x10 speed flat handlebar setup, the rear and front derailleur were from the Shimano 105 5700 series. After upgrading, the rear and front derailleurs have been upgraded to the latest 105 5800 series. One thing to note is that the 105 5800 series components are designed for 11 speed, but I am using it for a 10 speed set up on this mini velo. Not recommended, but it still works.

105 5700 series components are 10 speed components, while the latest 105 5800 components are 11 speed components. As they are one generation apart, the design and construction of the rear and front derailleurs from these two groupsets are very different. The latest 105 5800 components are modeled after the Dura-Ace 9000 and Ultegra 6800 series, and are targeted at bikes with a lower price point.

Let's start by comparing the rear derailleurs and see the similarities and differences. Both are black in colour (also available in silver) and are short cage versions (also available in mid cage versions for larger cassettes).

Upon first look, there does not seem to be any big differences between the 105 5700 RD on the left and 105 5800 RD on the right...

...however, the cable fixing point is much further towards the front for the new 5800 RD on the right side. This is due to the change from 10 to 11 speed construction. The cable fixing bolt is also flatter for the new RD.

Bottom view. Notice the different guide spring hooking points between the 5700 RD at the top and the 5800 RD at the bottom. This gives a more consistent spring force across the gears. The inner link of the new RD is also black instead of silver colour for the older RD.

The cable adjust bolt area is also quite different. There is an extra sleeve on the new 5800 RD to minimise the rubbing on the polymer coating of the new low friction polymer-coated inner cables. All black cage set for the new 5800 RD, unlike the 5700 RD which still has some silver coloured parts.

From the back view, both of them look quite similar

The short cage 105 5700 RD weighs about 223 grams

The new short cage 105 5800 RD weighs a little bit more at 226 grams

To tell the difference between the old 5700 RD and the new 5800 RD, look at the colour of the inner link and the cage set. The new 105 5800 has an all black colour construction, which is different from the 105 5700 RD.

Next, we will look at the 105 5700 FD and the new 105 5800 FD. It is very easy to tell the FD apart, as the look is very different.

105 5700 FD on the left, 105 5800 FD on the right. Both are brazed on type and not clamp band type. As shown here, they look very different.

The size of the outer link is very different. The new 5800 FD has a long arm construction which gives more leverage for a light shifting feeling. It is also hollow in the middle, both for reducing weight and also for adjusting the support bolt.

One of the downsides of having a long arm construction is the frame compatibility with some small wheeled bikes. For example, the long arm will interfere with the frame when installed on a Dahon Mu frame or Tern Verge frame, as the tall seat stays are very close to the FD mounts. This rules out the use of long arm FD on these frames.

I suspect this is one of the reason why there is only the Tern Verge X18 (2x9 speed, with old short arm design), instead of a high end 2x11 speed Tern Verge, as the new long arm FD is not compatible with the frame.


5700 FD has a sticker for the logo, while the new 5800 logo is embossed onto the chain guide. Not as nice in my opinion as it is not very visible and looks cheap. Also note the additional plastic skid plate on the chain guide which minimises chain rubbing noise when the trimming function on the shifter is not used correctly.

The difference in arm length is very evident here. Note the extra pin near the cable fixing bolt on the 5800 FD, which is used to adjust the path of the inner cable to suit different frames.

The guide spring on the 5800 FD has more coils, which will give a flatter spring force across the working range. There is also the support bolt sticking out from the middle of the 5800 FD. When adjusted from the other side, this bolt will contact the frame and make the whole FD more rigid for better shifting.

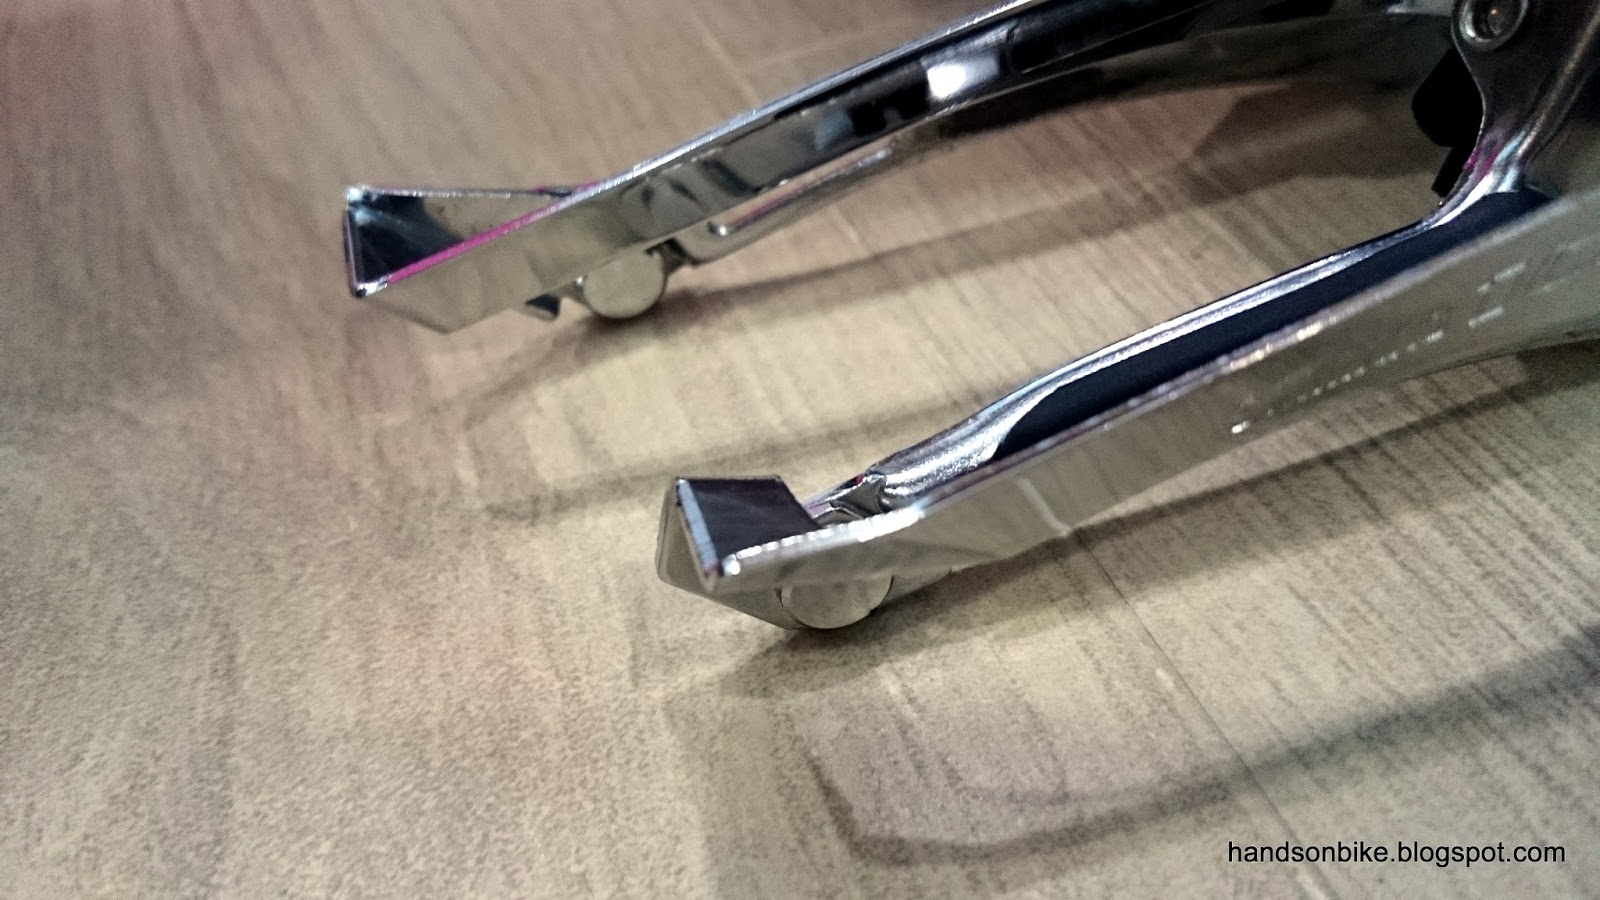
5700 FD on the left has a longer chain guide than the 5800 chain guide on the right.

This different length is partly due to the different bending design used, as shown here. It caused some chain rubbing issues on the Wheelsport frames when the FD mount is not designed correctly. For more details check out these two links below.

Wheelsport Ultegra Di2 2x11 Speed: Part 4 - Installation Issues and Solutions
Wheelsport Fantasy 2x10 Speed: Part 7 - Solving Chain Interference

Weight of 105 5700 FD, about 86 grams

Weight of new 105 5800 FD is slightly heavier at 89 grams

From these comparison pictures, it is obvious that the design of 5700 and 5800 are quite different, and is also quite easy to differentiate by eye. So next time when you check out a road bike, you can tell easily whether it is using the older 105 5700 groupset (2x10 speed) or is using the latest 105 5800 (2x11 speed) components.