Wednesday, September 5, 2018

Dahon MuSP: Di2 Battery Placement and Wiring Layout

Once I decided to install an electronic shifting system on the Dahon MuSP, the next question was, where would the Di2 battery be installed? There are internal type and external type of Di2 batteries, and I need to see which one is more suitable for this frame.

For a start, this Dahon MuSP frame was never designed for Di2 wiring, let alone internal wiring. However, since I already have the frame in hand, I can experiment to see how to wire up the whole Di2 system.

My first thought was to use the internal Di2 battery and try to fit it somewhere within the frame, since there are openings in the frame and also sufficient space within the frame.

 Shimano Di2 internal battery, BT-DN110. It is long and slim, unlike the external type battery that I used on the Dahon MuEX.

As I did not have an extra internal Di2 battery on hand, I could not check if the battery can fit into the frame or not. What I did have was the battery dimensions which I found online. I tried to find an item of similar dimensions, and use it to test fit it into the frame. Coincidentally, I found that one of my screwdrivers has almost the exact same dimension as the internal Di2 battery!

Internal Di2 battery size is about 16mm in diameter, and about 160mm in length.

The diameter of this screwdriver is almost the exact diameter of the internal Di2 battery!

The length is almost the same too, although this is less important for testing the fitting.

The idea is to slot the battery inside the frame, through the holes at the joint area. Let's take a look at the joint area first.

The holes that are found at the frame joint. Although the joint is big, the holes are quite small...

The metal sleeve is first removed from the frame. This metal sleeve guides and protects the outer casing when it crosses the joint area.

Using the screwdriver to test, it is just unable to go into the hole, by a small margin.

Unfortunately, based on the testing, the internal Di2 battery is unable to fit into the frame through the holes at the joint area. Even if it just manages to fit inside, it is also not recommended as it will be almost impossible to get it out the next time, unless there is sufficient space to pull it out.

Therefore, I have to drop the idea of using the internal Di2 battery on the Dahon MuSP. It would be a really clean setup if the battery can be stored internally, but it is not possible for this frame design.

The only way is to mount the Di2 battery externally, same as on the Dahon MuEX. The best location will be behind the seat tube, where it is relatively well hidden and does not interfere with the folding of the bike.

I removed the external Di2 battery and battery mount from the Dahon MuEX to test the fitting on the Dahon MuSP frame, as shown below.

Ideal location of the external Di2 battery. However, the two curved parts of the frame seems to get in the way.

It will protrude from the top of the seat stays slightly.

At this position, still able to open the lever to remove the battery from the battery mount.

Just for record, the battery plus battery mount weighs 102 grams.

With the battery location decided, the next step is to think how to attach the battery mount to the frame. Last time, I made a custom adapter so that I can velcro the battery mount to the seat tube. This time, it will be the same concept.

With a scrap piece of aluminium, I cut the shape to the required design, and tapped 2 x M4 thread holes for mounting the battery mount. This aluminium piece weighs about 50 grams.

Spray painted black colour to blend in with the frame. Two short M4 bolts are needed as I did not drill and tap the holes fully.

On hindsight, I should have designed the adapter in 3D software, and 3D printed the part. It would save me a lot of hands on effort, be lighter in weight, and probably fit better to the frame. That is what I would do if I had to design an adapter the next time.

Mounting the battery mount onto the aluminium adapter.

With the battery secured in place. The cutout under the battery mount is for the velcro strap to go through.

Due to the limited space around the seat tube, this is the only location available for the velcro straps. Cannot be higher up or lower down, this is already the optimized position.

View of the battery location from the back. Well hidden by the tall seat stays on either side.

Sufficient clearance to open the lever to release the battery from the mount. I also added a piece of rubber in between the seat tube and the aluminium adapter for additional grip.

Although this method may not seem very secure, it is actually good enough. Apart from being extensively tested on the Dahon MuEX, which uses essentially the same design, I also tested this Dahon MuSP on a long ride of 60+ km and there was no issue at all.

The battery may sometimes shift slightly to the left or right side, but it will not slide downwards as the two velcro straps plus the rubber provides sufficient grip to hold the battery.

With the battery location finalized and confirmed, the complete Di2 wiring layout can be made. This is a new arrangement which is not conventional, and which I am trying out for the first time. The good thing about the Di2 E-Tube system is that the components do not need to be wired up in any specific order. As long as you have the components located somewhere within the layout, it will work fine.

Di2 wiring layout on the Dahon MuSP

Referring to the Di2 wiring layout above, let's take a look at the conventional and also non-conventional areas. For the rear of the bike, between the rear derailleur, battery mount and Junction B, it is a standard layout. The Junction B will link up the battery, rear derailleur and the front of the bike. This is quite standard and similar to on the Dahon MuEX, except that this time the Junction B will be placed internally instead of behind the seat tube.

As for the front of the bike, the usual layout is to link the two shifters to Junction A, with one wire linking up Junction A to Junction B. In my case, a different layout was used.

From the diagram above, the left shifter will be linked to Junction A, by running the Di2 wire internally inside the handlebar. The wireless unit will be installed in series, also inside the handlebar. Also note that this Junction A is an internal bar end type, which I will show more in another post.

The wire then runs from Junction A, out of the handlebar and into the right side shifter, before another wire runs from the right side shifter to Junction B. This simplifies the wiring layout and avoids duplicate wires running up and down the same area.

Weight of the six Di2 wires used in the wiring layout above.

New challenges in this Di2 wiring layout:
1) New type of Junction A, which goes into the end of the drop bar instead of being exposed outside.
2) Running Di2 wire internally through the drop bar.
3) Hiding the wireless unit inside the drop bar.
4) Internal wire routing through the frame.

Some of these points have not been elaborated on, but it will be shown in the next post.

Thursday, August 30, 2018

Dahon MuSP: Di2 Shifter and Rear Derailleur

One of the highlights of this new Dahon MuSP is the electronic shifting setup. It is not the first time that I am setting up Di2 electronic shifting on a folding bike, as I have already done it before on the Dahon Boardwalk and Dahon MuEX a few years ago. However, what is new here is internal cable/wire routing for this Dahon MuSP frame, which increases the challenge quite a bit.

Prior to getting these electronic components, I already had the Dahon MuSP frame in hand, in order to study how to set up and assemble the Di2 components onto this frame. I have a plan in mind, but this will be shown in a later post. Only after that was I able to get the required Di2 components, as the set up is rather unconventional.

For this post, let's take a look at the main electronic components, which are the Di2 rear derailleur and the Di2 shifters.

The Ultegra Di2 R8050 rear derailleur is new, as it is a Shadow type road rear derailleur, much like the Dura-Ace R9150 version on the Canyon Endurace. At the same time, it is also styled to look similar to the mechanical version, which is the Ultegra R8000 rear derailleur.

Ultegra Di2 RD-R8050 rear derailleur. Dark grey colour to match most bikes.

Rather strange combination of black and silver bolts here, especially as the black bolt does not match the dark grey colour.

Silver B-tension screw, and the two High and Low limit screws. Easily accessible and visible.

Di2 port is relatively well hidden, behind the main structure and on top of the motor unit. Saver unit also shown here.

View of the cage set. Made of aluminium inner and outer plates.

Inner link shown here with a rough texture, and looks like it is made of glass fibre reinforced plastic.

Weighs 239 grams for this Di2 rear derailleur, which is about 40 grams more than the Dura-Ace Di2 version.

This Ultegra Di2 rear derailleur weighs 40 grams more than the Dura-Ace Di2 rear derailleur, but it is about half the price, with a similar performance as the motor unit looks to be the same. The rational, and more value-for-money choice here would be the Ultegra version, as it is more cost effective compared to the Dura-Ace version.

These shifters are the electronic shifting, mechanical braking version. In other words, it is designed for Di2 shifting, and will be paired with the mechanical road caliper brakes. Although the trend now is for hydraulic disc brakes, it is not suited for this folding bike, which is why I am still using the mechanical brake version.

Ultegra Di2 ST-R8050 electronic shifters with mechanical braking.

Textured rubber hood for better grip and a more high end appearance.

The electronic shift levers have been reshaped and enlarged slightly for better ergonomics.

The tactile feedback of the buttons have also been improved, to give a stronger click feeling, much like the Dura-Ace shifters.

On this Ultegra version, there is even the extra button on top! Previously it was only available on Dura-Ace shifters, but now even Ultegra grade Di2 shifters have it which is really useful.

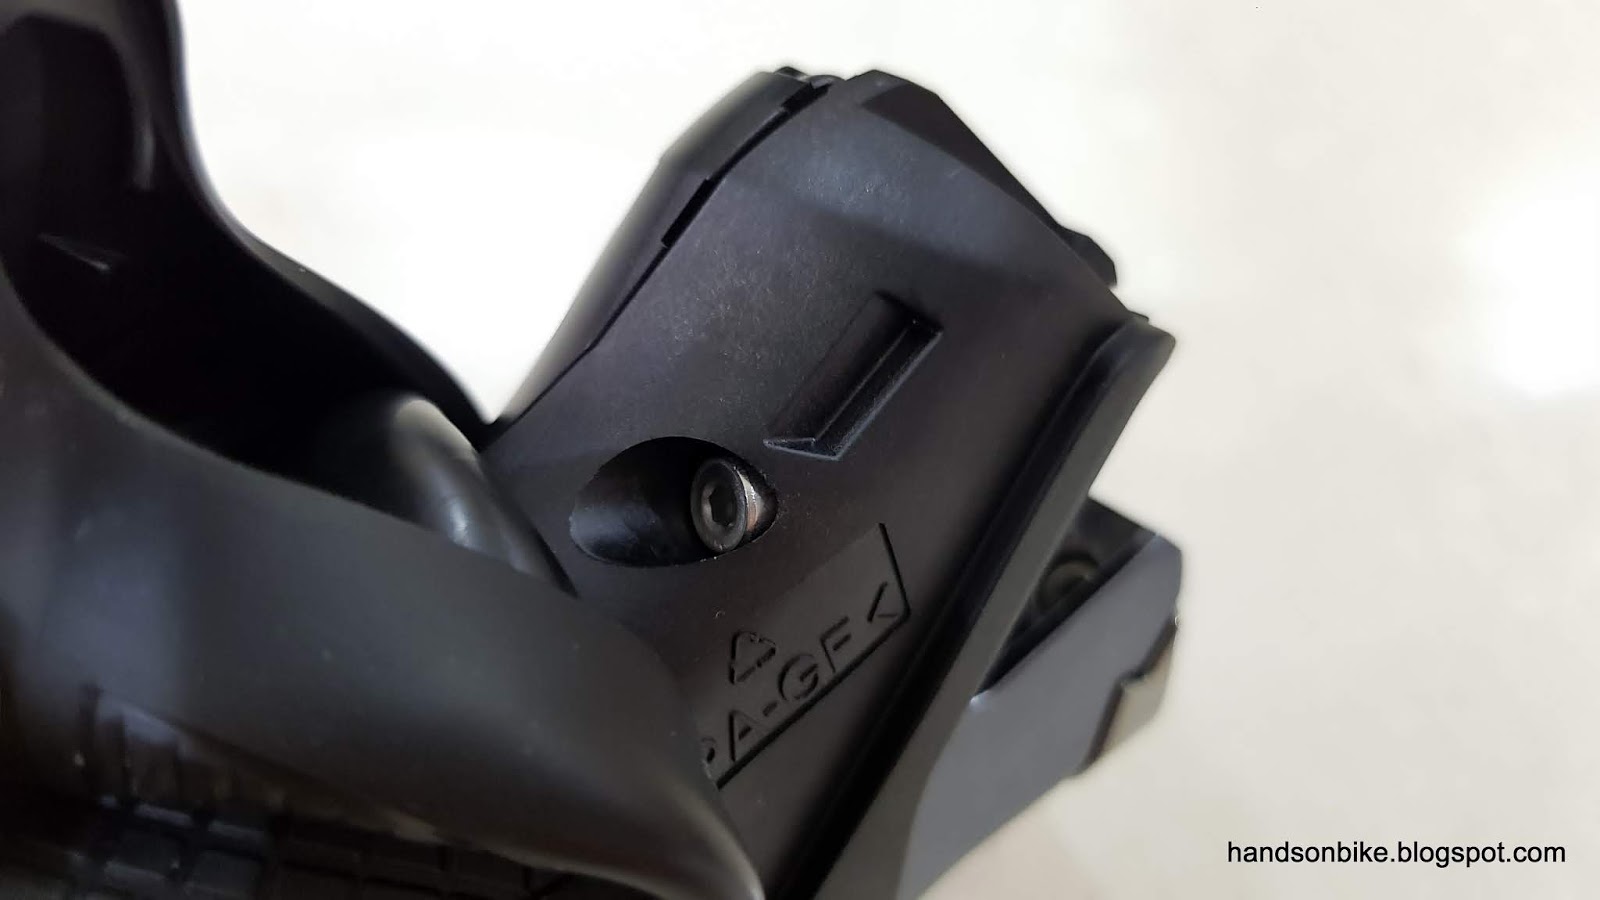
Hole at the front of the shifter for holding the cast head of the brake inner cable. Also note the grip adjust screw at the left side.

Small hole on the left side is for the brake inner cable to pass through, while the larger brake outer casing will slide into the holding area around the small hole.  

Grip adjust screw located here, which is used to adjust the lever position.

As this shifter will be used by a rider with small hands, the grip adjust screw is turned all the way in, to minimize the reach of the brake lever.

Comparing the position of the lever before and after adjusting the grip adjust screw.

Hidden under the rubber hood are also 3 Di2 ports, which is increased from 2 previously.

This pair of Di2 shifters weigh just 303 grams! Much lighter than the Ultegra 6800 mechanical shifters which weigh 424 grams per pair.

For this new generation of shifters, the hood shape has been adjusted so that regardless of mechanical or Di2 shifting, mechanical or hydraulic braking, the hood should feel similar in the hand. Let's try to compare this Ultegra Di2 shifter with mechanical braking to the Dura-Ace Di2 shifter with hydraulic braking, which is found on the Canyon Endurace.

Comparing the shifters side by side. The hydraulic shifter on the right has a slightly bigger head, but the body size looks similar.

Similar curves on the brake lever, buttons and hood

Appearance comparison from the front. As always, the Dura-Ace lever always looks much more glossy.

Once again, the Ultegra Di2 shifter has practically all of the functions of the Dura-Ace Di2 shifter, except that it weighs a bit more. If you can accept this, then the Ultegra shifters is a much better deal as it is much cheaper than the Dura-Ace shifters.

Sunday, August 26, 2018

Dahon MuSP: Crankset and Cassette

On the Dahon MuSP, a front single setup will be used. This means a 1x11 speed drivetrain, which is sufficient for everyday casual riding. My preferred front single crankset would be a Shimano road crankarm with Wolftooth Drop Stop chainring.

From my experience, the 105 5800 crankset is a great choice for setting up a front single crankset. The 105 right crankarm (340 grams) is just slightly heavier than an Ultegra right crankarm (325 grams), but is quite a bit cheaper. However, I want to install a full Ultegra groupset, and not mix the components. Therefore, I still decided to use the new Ultegra R8000 crankset for this setup, even though it is more expensive.

Ultegra R8000 crankset, with the chunky right crankarm as seen here. Similar to the Dura-Ace R9100 crankset used on the Canyon Endurace.

Right crankarm weighs 325 grams, which is only a little bit lighter than the 105 version.

Wolftooth Drop Stop chainring, 46T. This is larger than the 44T chainring which I used on the 451 Wheelsport Fantasy and also Java Freccia mini velo.

Comparing the 46T narrow wide chainring to the original Ultegra R8000 50T chainring

However, with the new chunky crankarm design, it is not a straightforward swap to the Wolftooth chainring, as there is some interference on one of the four arms. Therefore, some cutting and filing is required on the Wolftooth chainring, in order to make it fit on the Ultegra R8000 crankarm.

Special curved profile on the original Ultegra R8000 chainring, to clear the crankarm.

First we need to know which area on the Wolftooth chainring to remove. This can be done by placing the Wolftooth chainring onto the Ultegra chainring, which fits neatly on the chainring bolts.

Once placed together, the area to cut off can be seen here. Need to match the profile on the original Ultegra chainring.

Mark the area to remove with a marker, and either cut or file off the interference area. It was quite a bit of workout, as the chainring is made of heat treated aluminium which is quite hard.

Blue coloured Litepro chainring bolts to match the overall blue theme of the bike. It comes in a set of 5, but only 4 is needed.

With the Wolftooth chainring and blue chainring bolts installed! The blue chainring bolts really stand out.

Right side crankset weighs 426 grams.

Left side Ultegra R8000 crankarm weighs 194 grams.

This gives a total crankset weight of 620 grams, which is considered quite lightweight. Note that the crankarm length for this R8000 crankset is 165mm.

Moving on to the cassette, we will use an Ultegra R8000 11-30T cassette. Previously, when building the Crius AEV20 folding bike, I used an Ultegra R8000 short cage rear derailleur with the 11-32T cassette. The maximum recommended cassette size for short cage rear derailleur is just 30T, not 32T. Therefore, it was difficult to get the rear shifting tuned properly, although it can be done.

This time, I decided that it would be better to stick to the recommended specifications, which means a maximum sprocket size of 30T for the Ultegra Di2 R8050 rear derailleur.

The gear sprocket sizes for the 11-30T cassette is 11-12-13-14-15-17-19-21-24-27-30. This gear range should be sufficient for casual cycling, with more gearing details shown later in this post.

24-27-30 teeth sprockets are mounted on the same aluminium spider

19-21 teeth sprockets are mounted on a carbon fibre spider for lower weight.

In total, the Ultegra R8000 11-30T cassette weighs 270 grams. This is a big increase from the Dura-Ace R9100 11-30T cassette, which weighs only 206 grams.

Cassette installed on the Wheelsport rear wheel! All new and shiny.

With the 11-30T cassette, the gear range is quite wide, and sufficient to handle most conditions. Using the different sized chainrings will just shift the gear range higher or lower.

From my past experience, a 44T chainring is good for 451 wheels, while 48T is used on 406 wheels. Both gives a top gear of 88 gear inches, which is sufficient most of the time. The only time when this top gear is lacking is when we want to pedal down a slope.

This time, I decided to shift the gear range slightly, by using a 46T chainring instead of a 44T chainring for the 451 wheels. As shown below, this yields a higher top gear ratio, at the expense of a higher low gear.

Gear range of 46T chainring with 11-30T cassette, on 451 wheels is 33.7 to 92 gear inches.

At the top gear ratio of 46/11 teeth, a cadence of 100 RPM will move you at 40km/h, which is more than sufficient for a folding bike.

For sustained efforts, if you can maintain 90 RPM at the top gear ratio of 46/11 teeth, your speed will be 36km/h, which is not easy even on a road bike. In other words, this gear range is surely sufficient for the folding bike for casual riding.