Most people would not know what are the full components required for the Di2 system, and how to connect everything together. This is understandable as electronic shifting is a relatively new technology, and most people would not even have tried it before. At first, I was also not sure how the entire system works. I only knew roughly what are the components, but had no idea how everything is supposed to go together. There isn't much help or info available online, as most articles about Di2 only talks about the usage and how it works. Shimano does have its own installation manual for Di2, but even then it may be challenging without proper guidance or hands-on experience.
I asked for advice from more experienced and knowledgeable people, and finally I understood how everything is supposed to work together. It is actually quite simple, with a simpler circuit than Dura-Ace Di2 7970 series.
Let's start with the wiring of the shifters.

The pair of Ultegra 6770 shifters. It has 2 buttons in place of the usual shifter levers. Better ergonomics is possible as there are no internal mechanisms to bulk up the hood.

The handlebar wires. Also called Junction A. Purpose is to link up the two sides of the shifters, and also acts as a battery indicator.

The satellite shifters, SW-R600. Put this anywhere for an auxillary shifting position.

The special tool for inserting and removing wires from the ports. This is to prevent damage to the wires, as they need to be inserted tightly. The left forked end is for removing wires from the ports, while the enclosed end on the right is for inserting the wires. This tool comes with the shifters.
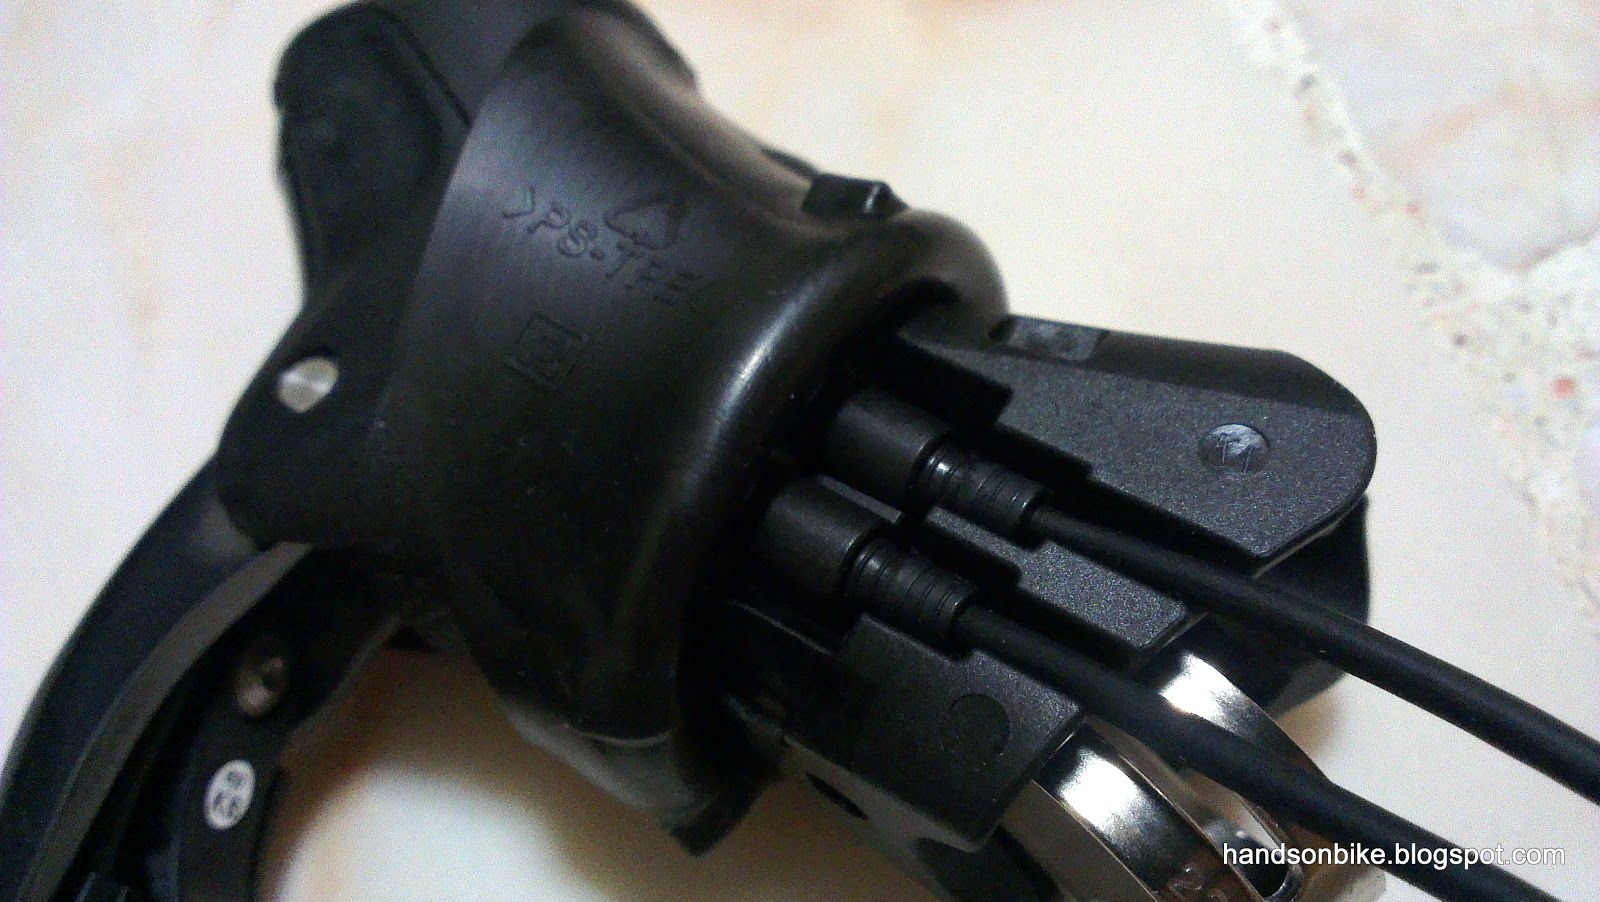
Inserting one side of the handlebar wire plus the satellite shifter wire into the right shifter. The satellite shifter is connected to the system by running through the road shifter.

How it looks when the rubber hood covers up the ports

Basic handlebar wiring. This whole section will be mounted entirely on the handlebar.
Once the shifters are hooked up to Junction A, the next step would be to hook up Junction A with Junction B. Junction B is the part that links up all the components, namely the shifters (through Junction A), battery, RD and FD. This distance from Junction A to B varies a lot from bike to bike. For me, I measured the length required if I run it along the rear brake housing, and it is about 1200mm.

The long 1200mm wire. This connects up Junction A to Junction B.

Junction B. It has 4 ports for the 4 wires. Plug into any of the ports as it doesn't matter.

How it looks like when Junction A is connected to Junction B. The other wire is from the battery.

The battery on the battery mount. Connect the wire to the battery mount. I used the 300mm wire for this.
So far, we have connected the battery and the shifters (through Junction A) to Junction B. The other 2 ports are for the RD and FD.

Connecting up the wires to the FD and the RD. I used the 300mm wire for the FD and the 500mm wire for the RD. Note that all wires are interchangeable, use a length which is long enough but not excessively long.

How Junction B looks like when all the components are connected to it.

Testing out the whole system before installing it onto the bike. It works!
Once you know how the Di2 system is wired up, it only takes you a few minutes to connect everything together. It is always a good idea to test out the whole system before installing the components onto the bike.It seems easy to set up the Ultegra Di2 system, right? However, the challenging part is to put the whole system onto the bike! Especially for a bike that is not specially designed for a Di2 system, and even more so for a folding bike with non-conventional frame dimensions! In the next part of the article you can see how everything goes onto the bike, and what are the workarounds I had to use to fit the battery and Junction B onto the bike.
Part 3 of the Ultegra Di2 upgrade is now up! Click here to continue reading.
Great! How about the weight vs the conventional system? Do you think it can be installed in a Bike Friday? Thanks!
ReplyDeleteI will be showing the weight comparison in the next part. For bike Friday with Di2 check out the link below. Seems that you need to modify the frame, and folding will be a major issue. http://bikefriday.com/blog/?p=844
Delete