After preparing the Nexus 3 speed shifter and the 3 speed internal hub, these parts are now ready to be installed on the Bestrider Pump Pro 16 kids bike.
As the frame does not come stock with an internal hub setup, we might encounter some complications for this project.
For a start, the frame has a horizontal dropout for its single speed drivetrain, so this enables chain tensioning by adjusting the rear hub position. I will also need this feature for the internal hub drivetrain.
Next, the rear frame width, or rear OLD (Over Locknut Distance) has to be able to accommodate the rear hub. The frame itself has an OLD of about 115 mm, which is considered narrow, but normal for single speed bikes.
The Nexus 3 speed internal hub SG-3R40 has a hub width of about 120 mm, if the roller brake is installed. Without the roller brake, the hub width would be narrower. I can add spacers on the hub axle, in order to match the OLD of the frame.
3 speed internal hub placed into the frame. This side with the sprocket cannot have spacers installed.

Without the roller brake, the hub width is narrower than the frame. Spacers can be added on this non-drive side to match the frame.

Added a 3 mm locknut to boost the hub width to match the frame width.

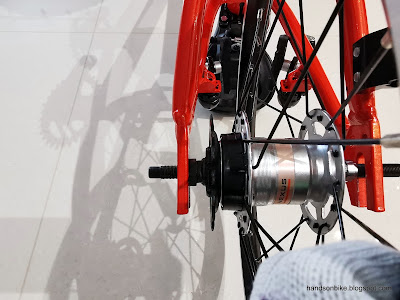
Yellow non-turn washer and axle nut with rounded cap on the non-drive side. Fits well.

On the drive side, a shorter nut with flange is used, as the bell crank needs to be attached to this nut.

Based on the manual, I need about 8 to 12.5 mm of axle protrusion from the end of the nut.

Axle protrusion is measured to be about 9 mm, so its within spec. This will vary depending on the thickness of the frame.

After inserting the push rod into the hole of the hub axle, it should protrude by about 14 mm. There are different push rod lengths available.

Protrusion is about 14 mm, so the push rod is of the correct length.

Stock single speed chain removed, to be swapped to a nicer chain that is more rust resistant and also lighter.

Dura-Ace HG901 11 speed chain, can be used on this drivetrain as the sprocket and chainring are of the thin tooth type. This is the leftover chain from combining two chains last time, on the Bike Friday Haul-A-Day cargo bike.
11 speed chain installed on the rear sprocket.

Chain length adjusted to give maximum rearward adjustment of the hub axle.

Here is the weight of the bell crank and push rod. This bell crank is of the nicer zinc die-cast type, SM-BC03.

Push rod installed in the hub axle, ready for the bell crank to be put on.

Trying out different cable routing along the frame. First I tried under the chain stay...

...above the chain stay...

Finally I decided to route the cable along the seat stay instead.

Bell crank with the lower cover removed. The shifting cable will pull on the linkage inside, which pushes the push rod into the hub.

Shifting cable connected to the link.

Cable needs to be trimmed, so that it is short enough to swing around inside the bell crank and lower cover.

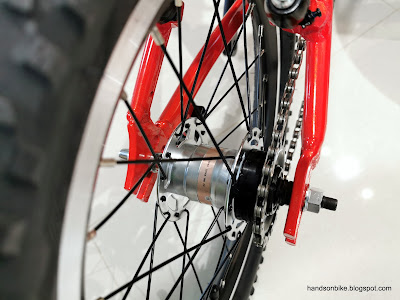
Bell crank installed successfully on the frame. No complications encountered.

Cable routes along the seat stay, and joins up with the rear brake cable to look neat.

Chain is tensioned by pulling the hub axle towards the rear. Tricky to get the chain tension just right, so that it is neither too loose nor too tight.

Bell crank and 3 speed internal hub installed!

Happy to have this 3 speed drivetrain installed on this kids bike. Definitely one of a kind.
This frame has a standard design, without any fancy dropouts or frame shapes, therefore the 3 speed drivetrain could be installed relatively easily. With this conversion complete, let's check out the full upgraded bike and the bike weight in the next post.
No comments:
Post a Comment
Every comment is moderated before publishing due to spam bots. If you don't see your comment yet, it is likely that it is currently being reviewed. Thank you for your patience!