If you deal with bikes that have a press fit bottom bracket, you will probably dread removing a press fit BB from the frame. The traditional method requires inserting a metal tool behind the BB cups, and hammering the tool from the other side.
I always dread doing this process, as applying a high force to a carbon frame is always risky. It takes two people to do it properly, as the first person needs both hands to brace the frame properly, while the second person will hold the tool with one hand and a hammer on the other hand.
Sometimes the BB fits into the frame very tightly, and it takes a lot of hard but careful hammering to remove it from the frame. I dislike this kind of brute force method as there is chance of damage to the frame, and the BB will most likely be damaged after it is removed.
I had a few bikes that uses a press fit BB, such as the Java Freccia mini velo, the Canyon Endurace, the Cervelo Aspero and now the Focus Paralane. Installing the press fit BB is not an issue, as there is a threaded tool to press it in smoothly. However, the tough part is removing the BB to access the Di2 wires, hydraulic hose or other stuff inside the frame.
Traditional press fit BB removal tool. The flexible prongs at the end will brace against the back of the BB cups from the inside, while you hammer on the other end.
...until it passes through the inner diameter and expands to rest against the rear of the BB cup.
Once the tool is in place, hold the frame securely and hammer on the other end of the tool, hoping that the BB comes out smoothly. This has to be the task that I dislike most when servicing a bike.
However, I recently came across this new wonderful tool that makes it so much easier to remove a press fit BB from the bike! If you deal with press fit BB regularly or even just occasionally, you should seriously consider using this tool. Let me introduce this amazing tool to you.
Press fit BB tool kit by Toopre. This is just part of the set, there are different adapters for different BB sizes.
The key innovation is this split ring adapter which goes behind the BB cups, instead of the flexible prongs on the traditional tool.
The 2 parts of the ring will fit into the inner diameter of the BB. Once inside, use the centre shaft to expand the split ring, such that it rests nicely behind the BB cup as shown.
Another view showing the two flanges of the split ring resting on the BB cup. These flanges will push out the BB cup from the rear.
Add this long threaded rod with large handles, it will be rotated to push out the BB.
The long threaded rod passes through the shaft and sticks out the other side, this keeps everything well aligned.
Then, attach an adapter (various step sizes available) and the tool cup, which has a female threaded hole in the middle.
When assembled, the threaded rod will thread into the tool cup. Rotate the large handles on the other side to push out the BB from the inside.
When the handles are turned, the centre shaft inside will push the split ring, which in turn pushes out the BB cup. Easy!
This tool works very well, as there are ball bearings at the handle side to ensure smooth rotation. Instead of hammering the BB out, the tool steadily pushes the BB cup out evenly and smoothly. I am very impressed with how well it works! This tool can be easily used by just one person, with no loud hammering needed and almost no risk of frame damage.
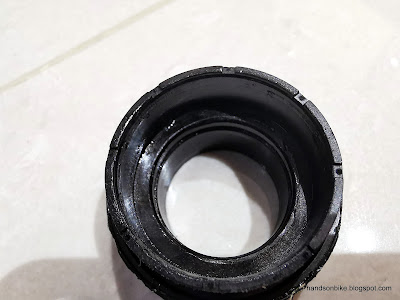
When the BB cup is removed, there is no visible damage, unlike when the hammering tool is used. This allows the press fit BB to be reused if you wish to.
Installing the BB is somewhat similar to existing tools, using appropriately sized adapters to fit the press fit BB. Rotate the handles to press in the BB smoothly.
During installation, the tool cup guides the threaded rod on the other side when pressing in the BB.
This press fit BB tool is highly recommended, there is no reason to use the hammering type of BB tool when this better tool is available.


cool
ReplyDelete