Friday, July 10, 2020

Bike Friday HaD: Rear Handlebar Installation

Carrying on from the first part of this modification, which was to remove the wraparound bars from the Bike Friday Haul-A-Day cargo bike, now I need to add a rear handlebar to the bike.

Since there is no more wraparound bar, a rear handlebar needs to be added so that the rear passenger has something to hold on to while riding. Usually this is done by attaching a long stem to the seat post, then attaching a handlebar to that stem. Shown below is a stock picture from the Bike Friday website.

A stem is attached to the seatpost, so that a rear handlebar can be installed.

For this purpose, the Haul-A-Day uses a special seatpost size, which is 28.6 mm in diameter. This is exactly the clamp diameter of the steerer tube, that allows a normal stem to be fixed to the seat post. It is the reason why I had to get a special 28.6 mm diameter seat post from Thomson.

However, based on the distance between the seat post and the rear rack, I would need a really long stem, so that the rear handlebar is not too close to the seat post. If not, the rear rider would be right up against the butt of the front rider.

If you need to adjust the seat post height for different front riders, then the rear handlebar will also be moved up and down together. This is not ideal for the rear rider.

After I removed the wraparound bars, I found that the remaining clamp seems to be able to accept a handlebar. What is the diameter of this clamp?

Clamp at the front of the rear rack, with the wraparound bars removed.

After some measurements and testing with a handlebar, I found that the clamp diameter is suitable for a 25.4 mm handlebar! This is a standard diameter that is perfect for installing a rear handlebar. Besides, the position also seems to be ideal for the rear rider, since it is at the same position as the previous wraparound bars.

One downside is that it is less rigid than a stem that is mounted to the seat post. There is some flex with this mounting point, but I think it is acceptable, as it is only for holding on and there is no steering or braking forces on this rear handlebar.

It would not be ideal to install a standard width handlebar that is around 600 mm wide, as it is too wide for the rear rider, and also makes the bike quite wide. Although the front handlebar is 600 mm wide, it is controlled by the front rider and so it is OK. A rear width of 600 mm might make it tricky to get past through narrow spaces.

If you have a spare handlebar, it is easy to cut off the ends to make the handlebars narrower. However, I did not have a spare 25.4 mm handlebar lying around. Therefore, I had to buy a new handlebar.

I found that Toseek makes narrower handlebars for kids bikes, which is only 480 mm in width. This seems to be ideal for this purpose, and also saves me the trouble of cutting a full size handlebar. Although it is a carbon handlebar, it is not expensive, and Toseek is a brand that I have used before a few times, such as on this Haul-A-Day itself, and also on the Fnhon DB11 folding bike.

Toseek carbon handlebar, 480 mm in width.

It has a 5 degree backsweep, and a 25.4 mm centre clamp diameter.

As it is narrower than normal handlebars, it weighs just 76 grams, which is amazingly lightweight.

After getting the handlebar, I need to get new grips as well. It is better to get thinner grips as the grip diameter is smaller, which is more suitable for kids' hands. There are many many handlebar grips available on the market, so it is just a matter of choosing the colour and design that you like.

I came across this brand called Fifty-Fifty, which seems to make really nice grips as seen from the pictures. I decided to give it a try as the quality seems really good.

Look at the amazing colours!

Fifty-fifty lock-on handlebar grips, in grey colour.

Close up look at the grip material. Looks to be pretty nice and well molded.

The pair of grips weigh 111 grams, noted here for future reference.

Installation was super easy, it is just a matter of assembling the handlebar in the clamps, and sliding on the grips.

Handlebar and grips installed!

Handlebar width including the grips is slightly more than 480 mm.

The two-piece clamp has a diameter that matches the diameter of the 25.4 mm handlebar. Secures well with 2 bolts. You can basically install any handlebar you like, as long as it has a 25.4 mm centre clamp diameter.

The rear handlebar is at the same position as the previous wraparound bars. If I had used a stem that attaches to the seat post, a really long stem would be necessary to achieve the same position.

Together with the rear support, installed previously, the rear setup is complete!

Transformed the rear seat into a space that is more suitable for older kids. The colour of the rear grips matches the front Ergon GS3 grips!

This new setup probably weighs more than the previous setup with the wraparound bars, as the additional footrests weigh more than the wraparound bars that was removed. Not that I am still tabulating the weight of this bike, as it is already heavy at 20 kg. Another few hundred grams is not going to make a difference.

I was also able to attach a 14" kids bike onto the cargo bike, since there is now a footrest to help support the bike. Here is how it is done.

The kids bike is tied to the side of the rear rack, and secured further with bungee cords.

By this method, the width is not increased by too much, while the length is still manageable.

The cargo bike now functions as a range extender, as I can bring my kid out to cycle at places that are further away, without tiring him out by having to cycle all the way there and back.

Sunday, July 5, 2020

Bike Friday HaD: Footrest and Rear Support Installation

Ever since I set up the Bike Friday Haul-A-Day cargo bike, it has been in the "Young Riders" mode, with the wraparound bar to hold the kids behind. 

At that time, the footrests were not installed, as my kid could not reach it anyway. Also, I was not carrying anything that needed to be supported by the footrests. Therefore the footrests were left out to save some weight.

Recently, I found that my kid has grown tall enough, such that his feet can now reach the footrests. Therefore, it was time to put on the footrests! There will be no need to tuck the legs into the side pockets of the side bags any more.

Metal footrests installed onto the bike!

No tools needed, as there is a spring loaded ball that fits into a hole on the frame.

After fitting one side in, the other end also needs to be slotted into the frame. This is a bit difficult as the shape of the footrest and frame don't fit together exactly. A bit of knocking and bending is required to join them up.

Each side of the footrest weighs about 700 grams, so putting on the pair adds 1.4 kg to the bike. It is a lot, but not as much as you think when the whole bike already weighs 20 kg.

Once the footrests are installed, my kid can actually climb on and off the bike by himself, using the footrests to step up. However, the wraparound bars are in the way. Therefore I decided to remove the wraparound bars.

Previous setup, with the wraparound bars for the kid or kids to hold.

Wraparound bar removed from the bike. There is a shim at the front clamp area that changes the diameter from 22.2 mm to 25.4 mm (approximated values).

No more wraparound bars!

It is necessary to give the kid something to hold on to while they are riding behind. At the front of the rear seat, a handlebar can be installed (separate post to be written), while a backrest should be added behind for some support and safety.

There is a rear crossbar that links the two diagonal struts at the back. I plan to reinstall this crossbar to act as the backrest.

Crossbar linking the left and right end of the wraparound bar together.

I noticed that the diagonal struts are not very rigid, as it is not fixed to a solid part of the frame. As shown below, the diagonal struts are fixed to the metal plate of the seat, which means that it can flex a lot upwards and downwards.

When the wraparound bars are present, it is not an issue as the wraparound bar stiffens up the whole structure. Now, with the wraparound bars removed, I need to find another way to stiffen up the rear diagonal struts.

As shown, the diagonal struts are bolted to the metal plate only, while the metal plate is itself bolted to the frame.

Diagonal struts are fixed to the thin metal plate only. Pulling up or down on the diagonal struts causes the metal plate to flex up and downwards alarmingly.

Bottom view. Diagonal strut fixed to the metal plate with a normal nut and bolt (right side), while the metal plate is fixed to the frame via a bolt that threads into the boss on the frame (middle of picture)

I considered using an additional metal part to stiffen up the end of the metal plate, but it didn't seem that it would be effective.

Then, I had a better idea, which was to move the diagonal struts forward, such that it bolts directly into the frame, together with the metal plate. Slightly longer bolts are required to ensure full thread engagement.

Moved the diagonal struts forward from the end of the metal plate, so that the bolts are secured directly to the threaded boss on the frame.

By doing so, the rigidity of the diagonal struts are greatly improved, since it is not affected by the metal plate's bending any more. 

Next question, how do I install the horizontal crossbar to the diagonal struts, since the wraparound bar is no longer present?

I found that the clamp diameters of the diagonal struts and horizontal crossbar are about 22.2 mm in diameter, which is the same as the diameter at the end of flat handlebars. It is a standard diameter for grips, brake levers and shifters. What I need is just two short tubes of diameter 22.2 mm.

You could just cut the ends off an unused flat handlebar, but I didn't have an unused one lying around. Then, I found that I could just get a cheap diameter 22.2 mm tube from Taobao and cut it to my preferred length.

Here is a 400 mm long, 22.2 mm diameter straight tube! It is actually a seatpost for a kids bike, but strange that it is so long for a kids bike.

Using the tube, I cut two lengths of 100 mm each, as I measured it to be roughly what I need.

Here is how it is fixed! The short tubes act as a link between the diagonal struts and the horizontal crossbar. The clamp diameters fit perfectly. Credit to Bike Friday for using standard clamp and tube diameters.

View from the top. You can set the position of the crossbar to be more forward or rearward as you wish. I used cable tie to fix some foam around the crossbar for more comfort as it is quite slim.

When the bike is placed vertically, the bike rests on the upgraded roller wheels and the cushioned end of the frame as seen here. It used to rest on the ends of the wraparound bars but they have been removed.

I set the length of the short tubes so that they don't touch the ground, as the diagonal struts are not strong enough to support the bike's weight. However, they do act as a stabilizer, as they prevent the bike from tilting too far over.

As a final step, I found some cheap plastic handlebar plugs from Decathlon, which can be trimmed to plug the ends of the short tubes. I have some fancy wedge type bar end plugs, but they are too big to fit into the ends of the short tubes.

With both ends of the short tubes plugged, mostly for aesthetic purposes.

This modification is not completed! The handlebar for the kid has not been installed yet. That will be shown in the next blog post.

Friday, June 26, 2020

Cervelo Aspero: Issues with Aspero Front Fork

The Cervelo Aspero gravel bike has been fully assembled, but I had some problems initially, as assembly was not so straightforward. More specifically, I had an issue with the front fork Trail Mixer, which is a reversible adapter that is used to adjust the amount of trail.

I found that the concentricity of the adapter hole and the cutout shape of the fork was not good. The cutout on the fork was not deep enough to accept the hub axle properly, causing the insertion of the thru axle to be very difficult. The adapter position had to be manually adjusted to ensure that the thru axle can pass through the adapter and hub axle smoothly.

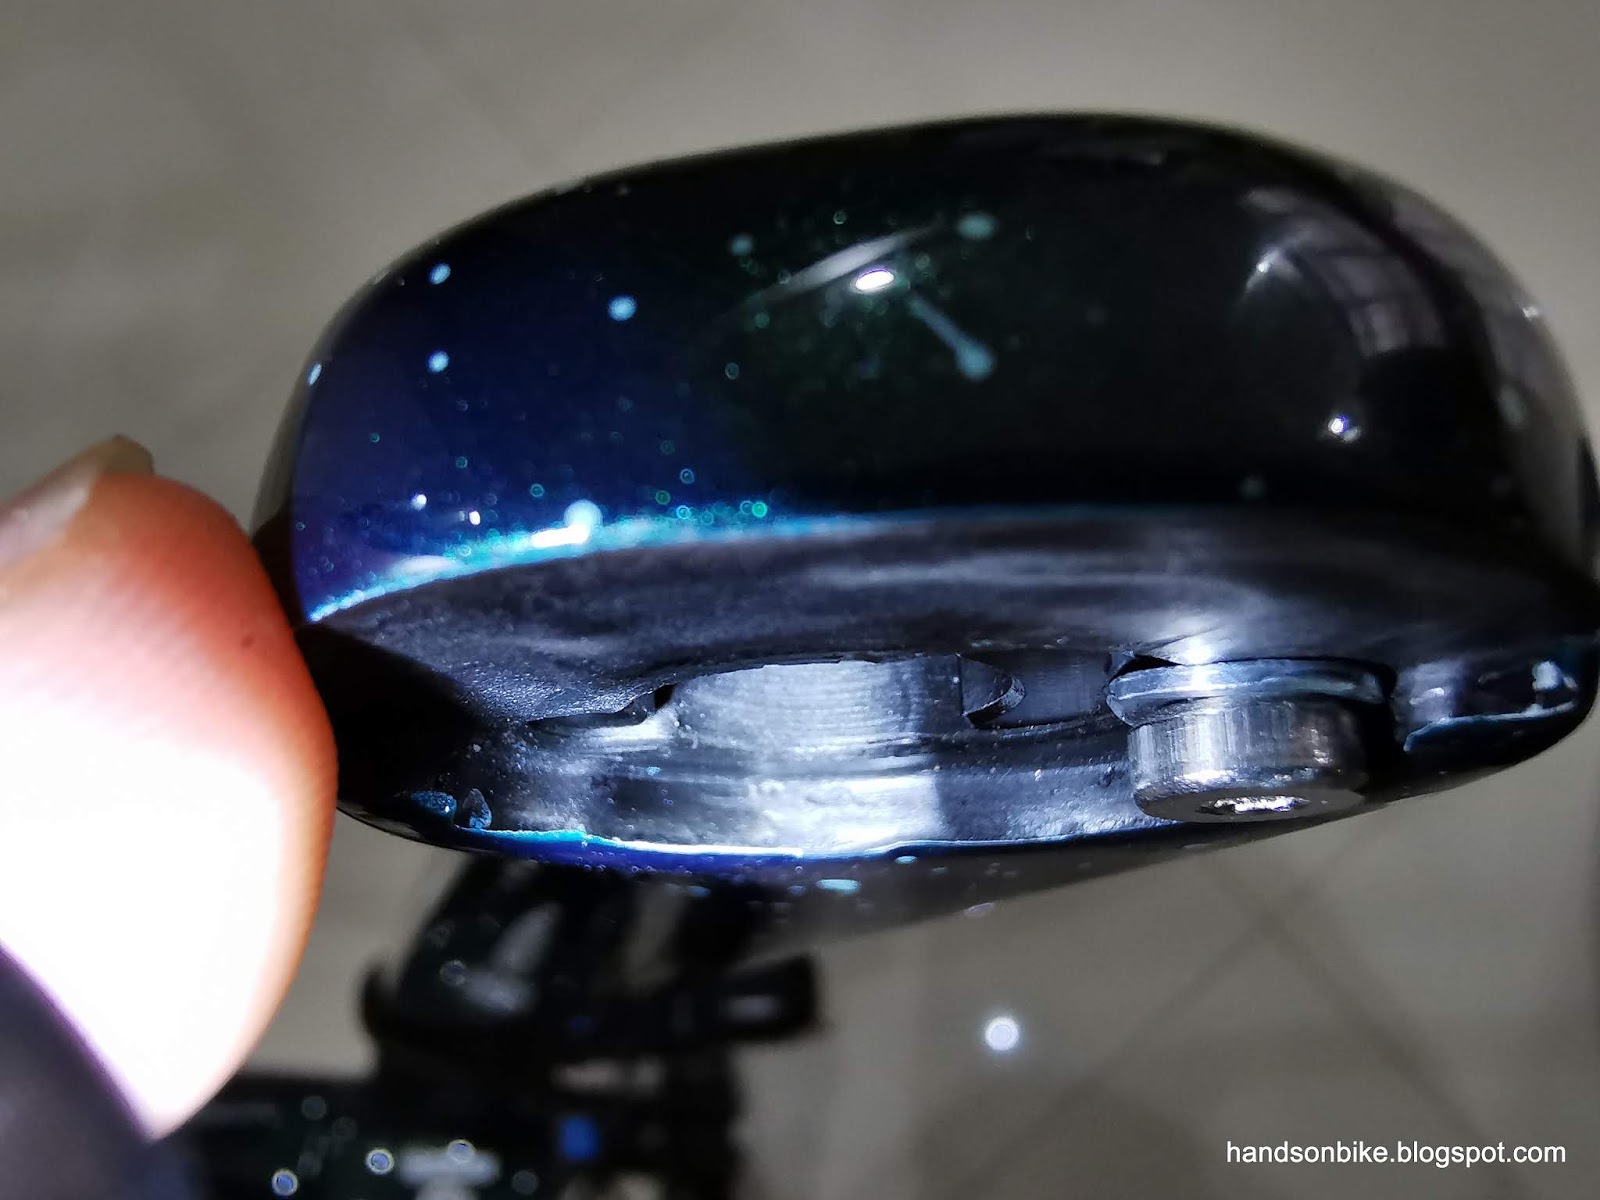
While trying to solve this issue, I discovered something odd. There is a small bolt that fixes the Trail Mixer to the fork. Under the bolt head, there is also a small washer. As you can see from the pictures below, the washer will get deformed after the hub axle is installed. This condition applies to both sides of the Trail Mixer adapter.

Small washer under the bolt head gets deformed after wheel installation.

The edge of the washer is pressed down by the hub axle, which is odd since it seems to be a design mistake.

As you can see, the hub axle will press down on the edge of the washer once the thru axle is tightened.

Another view of this phenomenon.

The hub axle diameter is measured to be nominal, which is usually about 19 mm.

I have not encountered this problem before on my other thru axle bikes, like the Canyon Endurace or the Fabike C3. Of course those other bikes don't have the Trail Mixer adapter and thus no bolt or washer there.

This condition is unusual since I have not seen any design whereby the washer is designed to be deformed partially after installation. To me, it feels like there was not enough design clearance between the hub axle and the washer.

I first checked with the local bike dealer where I got the bike frame from, but they were unable to answer my question, although they did observe the same deformed washer phenomenon on their Aspero bikes. To them, it was not an issue, and suggested that I contact Cervelo directly if I have any doubts.

Which is exactly what I did, by sending in pictures of the deformed washers as you have seen above. The first reply that I got from Cervelo was that the official drawings of the bike does not have the washers included, although the product manual does have the washer.

Information from the Aspero product manual. The washer can be seen, but it is smaller than what I have on the actual bike.

What I found is that the product manual does show that it has washers, but they are smaller in diameter than what I have on the actual bike. The washer shown in the manual is the same size as the bolt head which would prevent it from being deformed by the hub axle.

Cervelo asked me to try installing the Trail Mixer bolts without the washer, to see if it fits better.

If the washers are included, the bolt length is perfectly flush with the outside of the Trail Mixer.

I removed the washers and tried to tighten the bolt, to fix the Trail Mixer to the fork.

However, due to the missing washer, the bolt will be too long and protrude from the outside of the Trail Mixer.

Also, if the washer is not used, tightening the bolt will cause the carbon surface on the fork to be damaged by the bolt head, as you can see from the depression formed.

Seems that a washer is necessary, in order to prevent damage to the fork during bolt tightening.

After some to and fro, and some discussion within Cervelo, the conclusion is that the washer is designed to be deformed, as per design intention. This is odd, but I accept their explanation even though I am not convinced. Anyway, it does not pose any safety issue and so I will not pursue further.

If you do notice it on your own Aspero, the official explanation from Cervelo is that the washer is meant to be deformed as per design intention.

Unfortunately that was not the only issue that I faced. The other issue was that during the fixing bolt tightening of the front brake adapter (shown below), the washer is too big (or adapter clearance too small). The effect is that when the bolt is being tightened, the washer will interfere with the adapter. The tightening action will also cause the adapter to move sideways, making it very difficult to set the brake caliper position accurately.

It took a lot of trial and error in order to fix the brake caliper position, so as to prevent rubbing with the disc brake rotor. This is another washer issue that I faced on this Aspero.

This problem came about because the brake adapter is a special one from Cervelo, which is designed for the Aspero. The brake adapter is needed when you use the rearward position of the Trail Mixer, which means that the brake caliper needs to be shifted more rearward to match the rearward position of the hub axle and disc rotor. If you use the forward position of the Trail Mixer, you will not encounter this issue.

I was told by Cervelo that the washer of the SRAM fixing bolt is smaller, and thus does not interfere with the brake adapter. I'm using the stock fixing bolt of the Dura-Ace R9170 brake caliper, which is what you see in the picture below. Apparently the washer of the Shimano fixing bolt is larger, which was not taken into account when Cervelo was designing the adapter.

Interference between the washer and the Aspero front brake adapter.

The reply from Cervelo was that they overlooked this, and they will ensure that the adapter works properly with standard fixing bolt and washers from major brake manufacturers, such as Shimano, SRAM, Campagnolo, etc. Good to know that they will make improvements to this.

In summary, I faced two washer problems with the Aspero, but luckily none of it was critical to safety or installation. I was glad that Cervelo was able to give me an answer, and that they are now aware of these issues, and will make improvements.

Friday, June 19, 2020

Fnhon DB11: Elosix 29 cm 2 Bolt Handlepost

My latest folding bike project is the Fnhon DB11, which is a 1x11 speed folding bike with 451 wheels, premium XTR brakes and some other goodies.

Among the new components that I used was the latest Fnhon handlepost, which has a smooth joint like Tern Physis handleposts. This gives it a better appearance and also looks more high-end. However, after using it, I found that it seems to be slanted to one side.

What I mean by slanted is that the handlepost is not perfectly vertical, when the front wheel is perfectly vertical. There is a sideways tilt of the handlepost, which causes the handlebar to be tilted as well. The end result is that one side of the handlebar will be higher than the other, when riding straight. This effect is not much, but it is enough that I can feel the difference.

When the front wheel is vertical, the top of the handlepost can be seen offset to the right side, due to the tilt of the handlepost. This offset also causes the handlebar to be higher on the left side than the right side.

Although riding and folding the bike is normal, this tilting of the handlebar gives me a weird sensation that I cannot get used to. I am probably more sensitive to these kind of non-symmetrical effects, as I always set up my components to be as perfectly symmetrical as possible.

Examples: height and angle of road shifter hoods needs to be the same on left and right side, handlebar needs to be perfectly perpendicular to front wheel, saddle needs to be pointed perfectly straight, etc.

Other than the handlepost tilt, I also found that the handlebar height is a little higher than what I prefer. It is VERY difficult to find a handlepost height that is shorter than the common 31.5 cm Fnhon handlepost, as most other handleposts are taller. I used to have a shorter 27 cm handlepost, but I can't find it on Taobao any more.

After much searching, I finally managed to find a seller who has a shorter handlepost available. It also needs to be the 2 bolt or 4 bolt kind (not QR or T-shaped type), and also inward folding. Apparently the brand is Elosix, but it could be anything actually.

New shorter Elosix handlepost on the left, versus the common 31.5 cm Fnhon handlepost on the right. Both of these are the traditional Dahon/Fnhon design, not the new smooth type from Tern/Fnhon.

New handlepost has a rhino logo printed on the top clamp, and uses a bolt with a different head.

Base of the handlepost looks almost the same, but with a different clamp bolt.

Looks almost the same from the bottom.

The lever looks the same, but the plastic safety catch is different.

As mentioned, the lever looks to be from the same mold. Even the circular debossed feature is there.

Internal clamp design is different. Shown on the left is the new Elosix handlepost.

Elosix design is simpler, with no frame to hold the sliding bolt. This allows the internal space of the handlepost to be seen.

Fnhon 31.5 cm handlepost has an actual height of about 33.8 cm. The difference is due to how the height is defined (from clamp joint) vs how it is measured (from base). Strange but true.

New Elosix handlepost (claimed height 29 cm) has an actual height of 31 cm. About 2.8 cm shorter than the Fnhon handlepost.

Traditional Fnhon 31.5 cm handlepost weighs 565 grams

New Elosix 29 cm handlepost weighs 518 grams, a difference of about 47 grams.

However, note that this comparison above is between the traditional construction of the Fnhon handlebar and the Elosix handlepost, which look almost similar. The handlepost that I installed on the Fnhon DB11 is the new type of Fnhon handlepost, which requires a longer compression bolt.

Therefore, a more complete weight comparison is as shown:

Weight comparison of handlepost + compression bolt:
Traditional Elosix 2 bolt type (29 cm) + compression bolt = 518 + 45 = 563 grams
Traditional Fnhon 2 bolt type (31.5 cm) + compression bolt = 565 + 45 = 610 grams
New Fnhon 4 bolt type (31.5 cm) + longer compression bolt = 552 + 68 = 620 grams.

In this case, changing from the new Fnhon 4 bolt type to the shorter Elosix 2 bolt type gives a weight saving of about 57 grams, which is only about 0.6% of the whole bike's weight.

New Fnhon 4 bolt type handlepost. Wider clamp but also more weight.

From left to right: Elosix 29 cm 2 bolt, New Fnhon 31.5 cm 4 bolt, Traditional Fnhon 31.5 cm 2 bolt.

The height of the new Fnhon 4 bolt type and traditional Fnhon 2 bolt type is almost the same, since both are labeled as 31.5 cm height.

After installing the new Elosix handlepost, I found that the tilting is still present.

Front wheel is perfectly vertical, but there is some tilting of the handlepost towards the right.

Strangely, there is still some tilting of the handlepost and handlebar after swapping to the new Elosix handlepost. In this case, it is likely that the handlepost may not be the issue after all. Maybe the fork legs are bent, or the frame head tube is tilted, which can also cause the same effect. It is difficult to conclude definitively since the tilting is small, and I cannot measure the parts accurately.

Regardless, the handlebar height is now reduced, which I much prefer over the previous one. Maybe it is because I am used to riding drop bar bikes with a low handlebar, therefore I am not used to riding flat handlebar bikes with a higher handlebar.

With the handlebar transplanted onto the new Elosix handlepost.

As the handlepost is shorter, the handlebar is located differently when folded down. I will need a new protective sticker on the fork leg to prevent the handlebar from hitting the fork leg.

New protective sticker pasted on the fork, to prevent scratches between the handlebar and the fork leg during folding.

Picture with the shorter handlepost! Although it is only about 2.8 cm lower, it does make a difference both ergonomically and visually.

Updated bike component specifications, with shorter and lighter Elosix handlepost. Bike weight without pedals and kickstand is now 8.8 kg.

I am happy with this change of handlepost, as the lower handlebar enables a more sporty riding position which I prefer. Although the handlepost tilting issue is not 100% solved, it is less obvious and no longer annoys me so much. Not sure if my previous folding bikes had this problem, but I have not noticed it before.