In order to study the Birdy frameset, all the stock components need to be disassembled. Most of them are not a problem, except for the square taper crankset and bottom bracket. I have a slight phobia of square taper cranksets, due to having stripped the crank arm threads when extracting one a long time ago. Same for the bottom bracket with multiple small splines that are hard to engage properly.
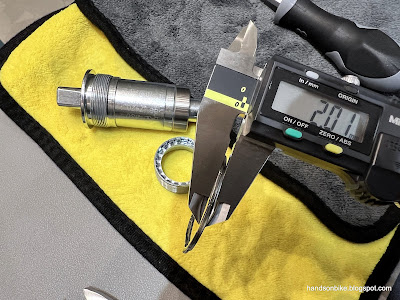
For removing the square taper crankset, I make sure that the square taper extractor tool is well greased on the threads, so as to maximise the thread engagement to avoid damage. As for removing the square taper bottom bracket, I made a simple tool modification to make sure the bottom bracket tool does not slip off during usage.
As shown below, I used an actual crank arm bolt plus a few large washers to keep the tool on the bottom bracket spindle, when applying torque on the tool. This virtually eliminates tool slippage and spline damage. Just take note that as you loosen the bottom bracket cups, you will need to release the crank arm fixing bolt slightly to enable the bottom bracket to back out.
Using a spare crank arm fixing bolt and a few washers to keep the tool in place. The crank arm fixing bolt is screwed into the thread of the bottom bracket spindle.
A 2 mm spacer was used under the drive side of the bottom bracket to push out the chain line slightly. Something to consider when installing the new bottom bracket and crankset.
Nearly all components removed from the Birdy bike! If you are planning to upgrade all the components on the Birdy, you only need to go this far.
New Birdy Chain Tensioner, weighs 85 grams and works well.
However, since I am curious to study more on the frameset and suspension fork, I will be disassembling the frameset further, as much as it is feasible.
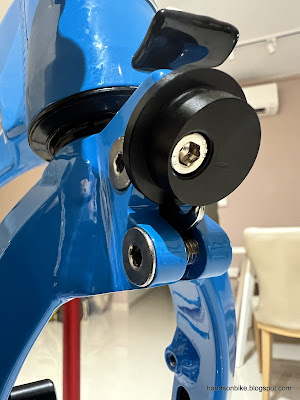
Another area which I wanted to check are the holes on the frame for internal cable routing. On the Dahon MuSP, which is a folding bike with internal cable routing, the cables will slide in and out of the frame holes during folding and unfolding. Unfortunately, due to sharp burrs on the frame holes, the outer casing gets scratched and cut easily. Eventually I changed the cable routing to be external instead, to solve the outer casing damage issue.
On the Birdy, I will make sure that the frame holes are smooth and free of burrs, so that the hydraulic brake hose will not be damaged.
Using a deburring tool to scrape the inside edge of the frame holes, to remove any burrs or sharp edges.
A needle file is also used to round off any remaining edges.
Same deburring and filing treatment done on other frame holes as well.
Moving on, the front suspension fork will be disassembled from the main frame for detailed study. Before that, I better take note of how every part is assembled, so that it can be put back correctly later. It is not as straightforward as a Dahon/Fnhon front fork as there are suspension and linkage parts involved, while the stem design is inverted.
Front suspension coil spring slots onto this stepped round block. Offset bolt design is interesting...
With the round block removed, I can see why the screw hole is offset to one side. Latch design is simple, just need to take note of where to hook the spring.
The fork was clamped very tightly around the steerer tube from the handlepost, and I could not remove it even after removing the top cap and clamp bolts. Therefore, I had to use an old trick to widen the gap so as to enable the fork to be removed. Using a flat metal disc such as a coin, and a screw to push the disc, the gap can be widened as shown below.
Using a coin and a screw to push, the gap can be widened such that the fork can be removed from the steerer tube.
Once the fork is removed, the headset bearings can be disassembled as well. Shown here are the stack of spacers, compression ring and seals.
Weight of headset (without bearing cups) is 33 grams. It is common for stock headsets to use loose ball bearings in a ball retainer, instead of sealed bearings.
Comparing a Litepro headset cup for Dahon (left) with the stock Birdy headset cup (black). Looks somewhat similar but the inside is shaped differently.
Flange diameter is the same, not sure about the outer diameter that presses into the head tube.
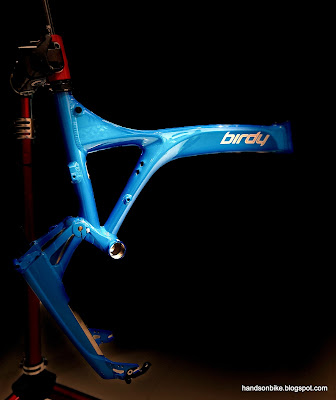
Artistic shot of the Birdy with the front fork and handlepost removed. Now it really looks like a bird!
Stock Birdy seat post removed for some measurements. Original length is 600 mm, with a diameter of 34.9 mm.
Stock Birdy seat post weighs 515 grams. A little heavy, but definitely sturdy.
Looking inside the seat tube. There is no seat post shim, the seat tube clamps directly to the seat post.
Step by step, the Birdy bike frame is being disassembled! In the next few posts the individual frame parts and weight will be studied.


Would you mind showing the order to install back the stock headset bearing?
ReplyDelete